Microsoft Dynamics 365 Business Central Processing Journal Entries
How to Process Journal Entries in Business Central
This tutorial will guide you through the steps to process journal entries in Microsoft Dynamics 365 Business Central. Journal entries are essential for recording financial transactions and ensuring accurate accounting records.
General Journal Entries
Most financial transactions are posted to the general ledger through dedicated business documents, such as purchase invoices and sales orders. You can also process business activities such as purchasing, paying, or refunding employee expenses by posting journal lines in the various journals in Business Central.
The information that you enter in a journal is temporary and can be changed while it is in the journal. When you post the journal, the information is transferred to entries on individual accounts, where it cannot be changed. You can, however, un-apply posted entries, and you can post reversing or correcting entries.
Post into General Journal
To post into the general journal, follow these steps:
- In the Business Central search bar, enter General Journals. You can also Choose the “search glass” icon, and enter General Journals. Then choose the related link.
- Open the relevant general journal batch.
- On a new journal line, fill in the fields as necessary. Hover over a field to read a short description.
Repeat step 3 for all the separate transactions that you want to post. Choose the Post action to record the transactions on the specified G/L accounts.
Bulk Upload Journal Entries
You can also bulk upload journal entries using an Excel file. To do this, follow these steps
Prepare configuration package
- Open Configuration package.
- Create a new configuration package.
- In the new configuration package card, include table ID 81 Gen. Journal Line.
- Export the table into Excel.
- Fill up the information into the excel file.
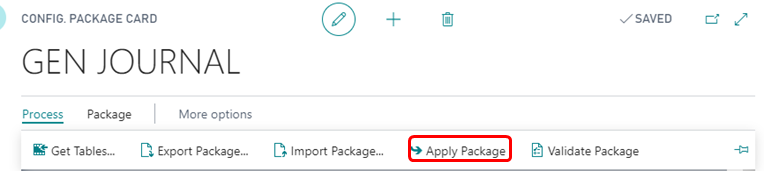
- Import the file into configuration package and apply the data.
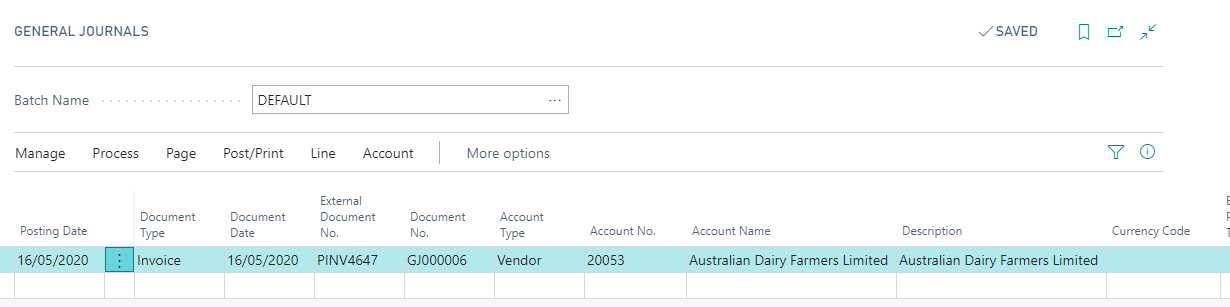
- Open general journal and post the entries.

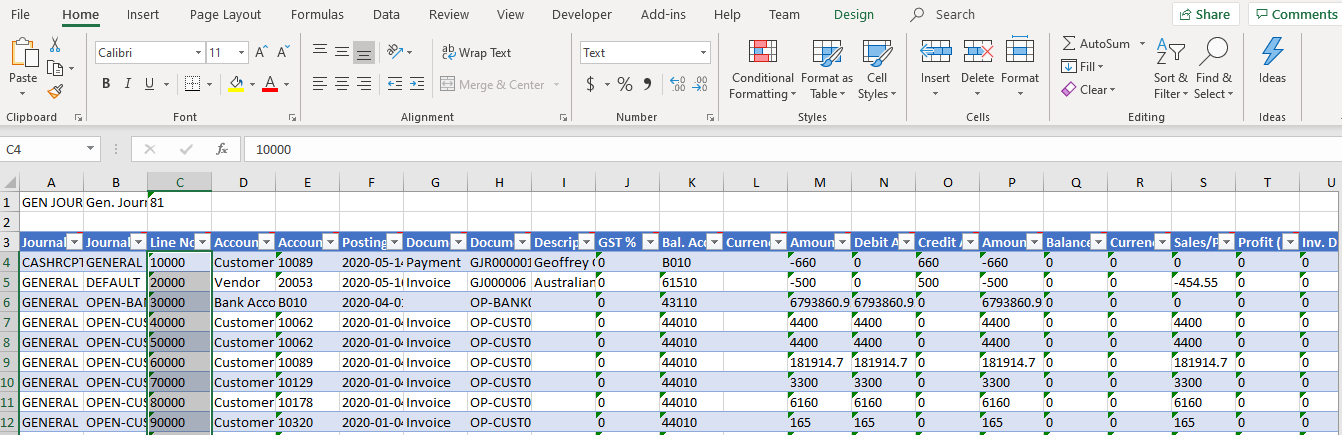
Fill up Excel file for Journal Entries
Once the template has been downloaded, it will contain several column headings. Fill in the Excel file with Journal Template Name, Batch Name, Account Type, Posting Date, etc. Once the data has been entered, import the file into Business Central and apply the data.
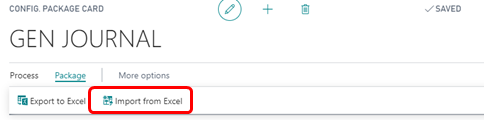
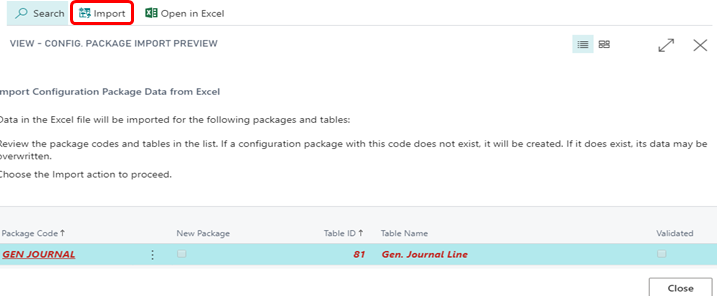
Import and Apply the data
Once the template has been filled, go back to config package card and choose Import from Excel function. Choose the Excel file and click the import button on the top of Config. Package Import Preview. Once it has been imported choose Apply package to apply the data to Business Central.