Microsoft Dynamics 365 Business Central User Inteface (UI)
Main Parts of the User Interface (UI)
We will take a look at the main parts of the user interface (UI) in Dynamics 365 Business Central.
About Pages
Pages are the main way to display and organise data. The user interface consists of following important types of pages:
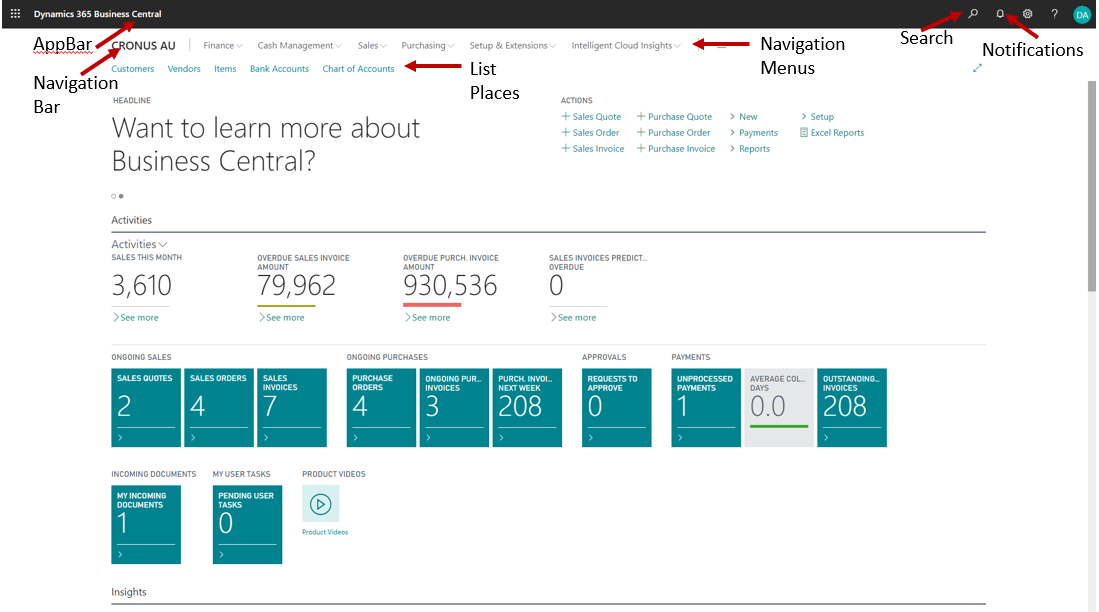
- Role Centre Page. Every user has a Role Centre page, customised to the individual needs and tasks that each user performs. It provides a quick overview of tasks and transactions related to your job role.
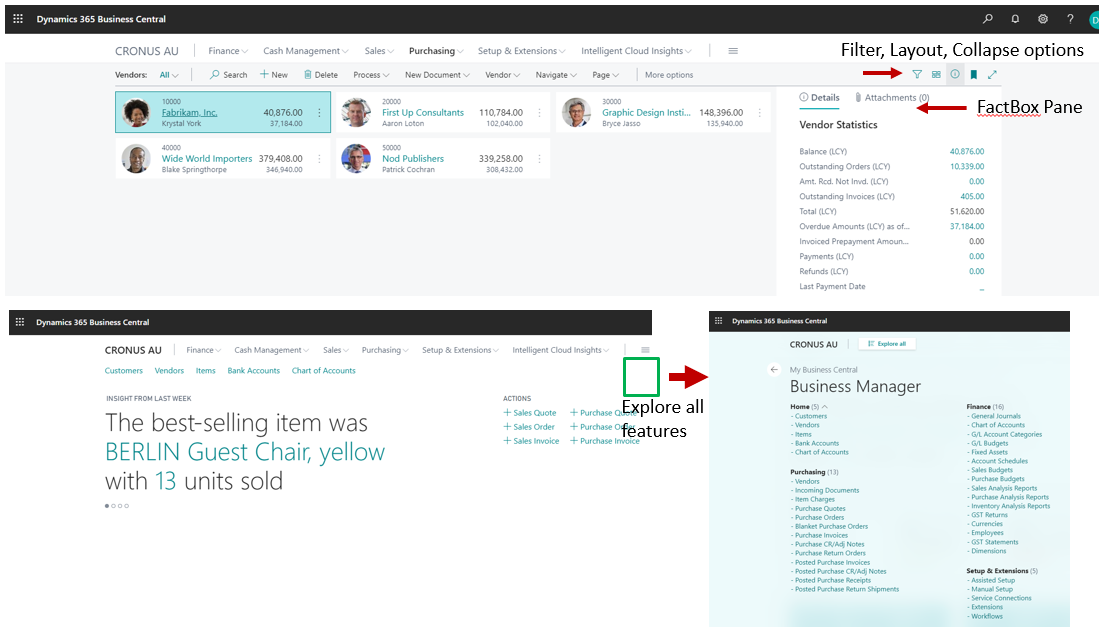
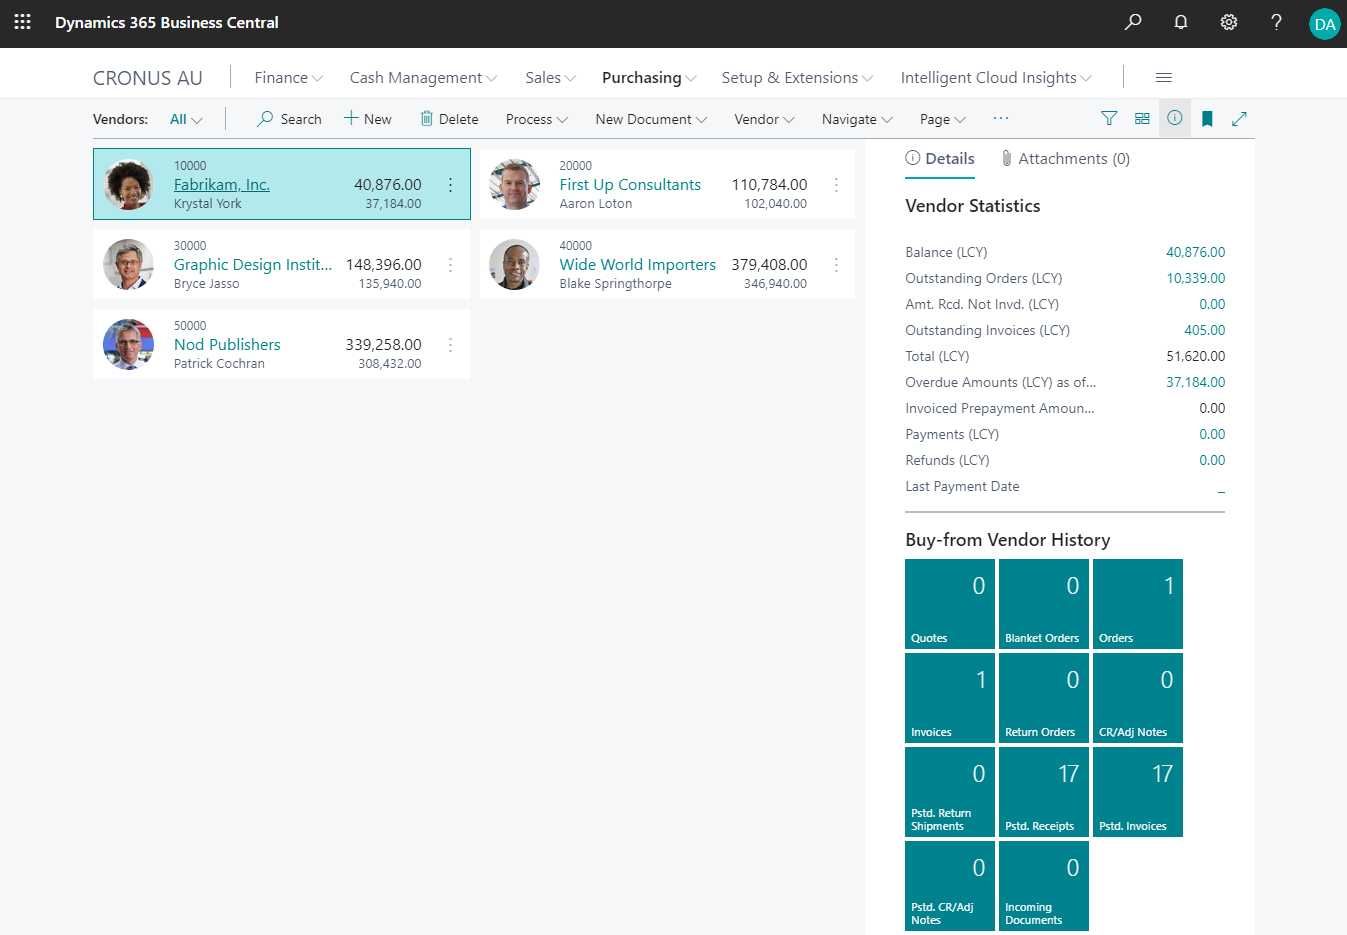
- List Page. List pages display lists of customers, vendors, contacts, sales orders, sales invoices and many more. As you find multiple records on one page, Pages are typically used to search and filter for information.
- Card Page. You use a card page to view and edit one record or entity from a table. The card page displays a wider selection of information than a list page. You can find more detailed information on the card page than on a list page. The card page only displays information of one record while a list page displays multiple records.
- Documents Page. Document pages focus on user tasks. Examples of document pages are Sales Order, Purchase Order, Sales Invoice, Purchase Invoice, Posted Sales Invoice, Posted Purchase Invoice and many more. Document Pages typically combine information from different sources.
Role Centre Page
The Role Centre page is the starting point in Business Central. Different roles will have different Role Centre pages. And they are optimised and tuned for that specific role. The Role Centre of a bookkeeper, for instance, and the business manager will be different. A bookkeeper needs to have quick access to different information than a business manager. And they have different security rights resulting in different access to specific actions. The Role Centre reflects these differences.
Tip about Search
At the top of each list page, there is a Search list action that provides a quick and easy way to reduce the records in a list and display only those records that contain the data that you are interested in seeing. To search, simply choose the Search action, and then in the box, type the text that you are looking for. You can enter letters, numbers, and other symbols.
Fine-tuning the Search
In general, search will attempt to match text across all fields. However, you can make a more exact search by using special characters – single quotes ” (for example, ‘man’), asterisk * before and after and place @ before the search text (for example @man*).