Assign and Manage a Security Role
How to Assign a Security Role
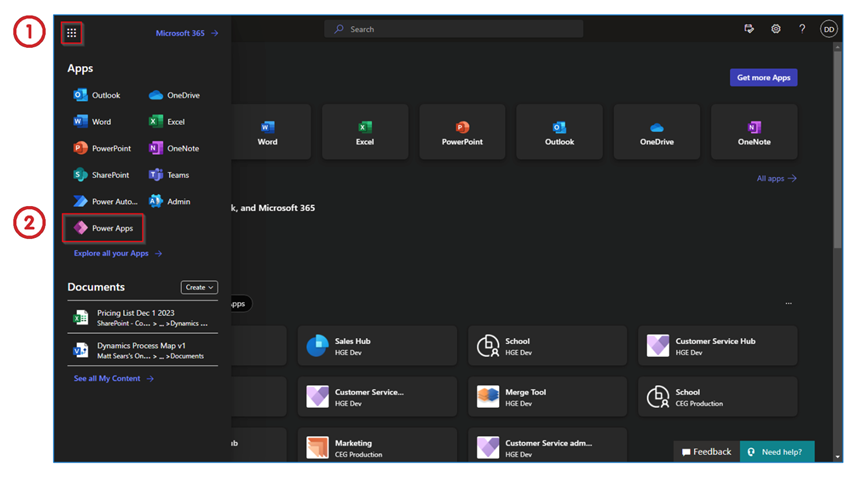
Security Roles are permissions assigned to users. To assign a Security Role, sign in to office.com using your credentials and perform the following:
Assign a Role
- Click on the “9 dots” from the top left corner.
- Open the Power Apps.
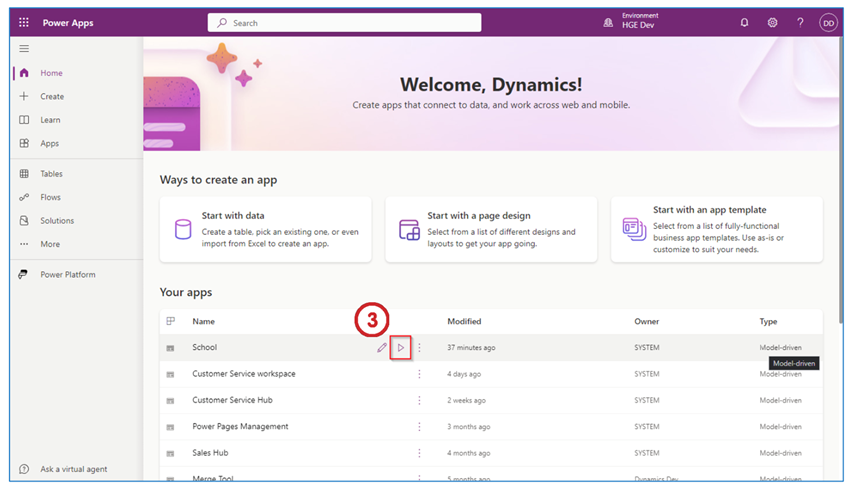
- Click “Play button” in the School option under Your apps. The “Play button” appears on the right. If you do not see the School app, click on All apps to find it.
Note: Make sure you are in the correct environment. Check the upper right-hand side of the screen and check the environment name.
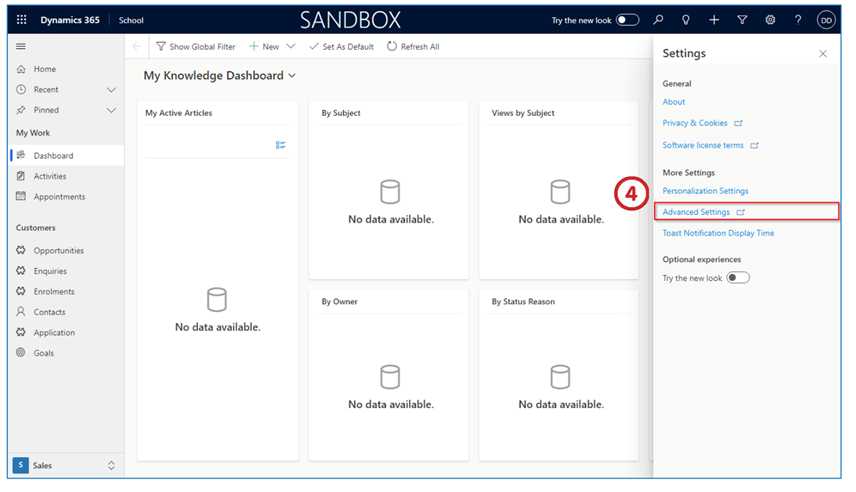
- Select Settings and click Advanced Settings.
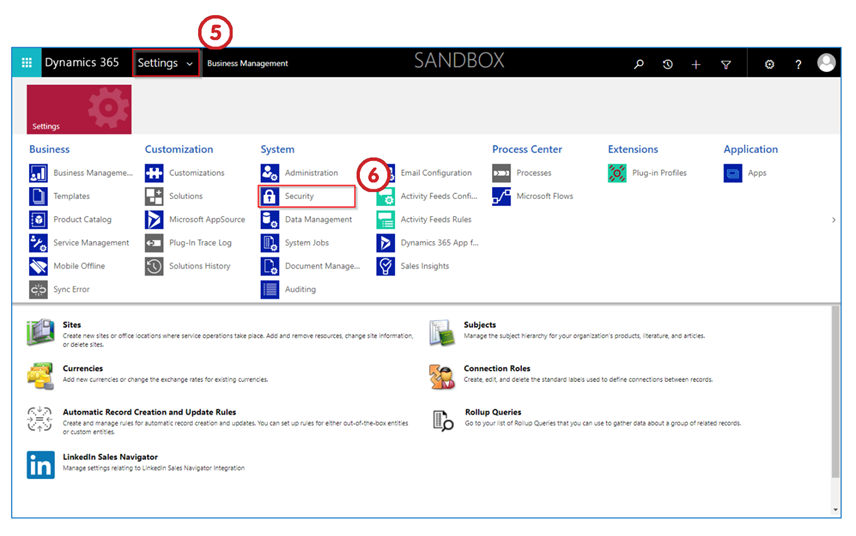
- Click the arrow with the Settings option on the top “ribbon”.
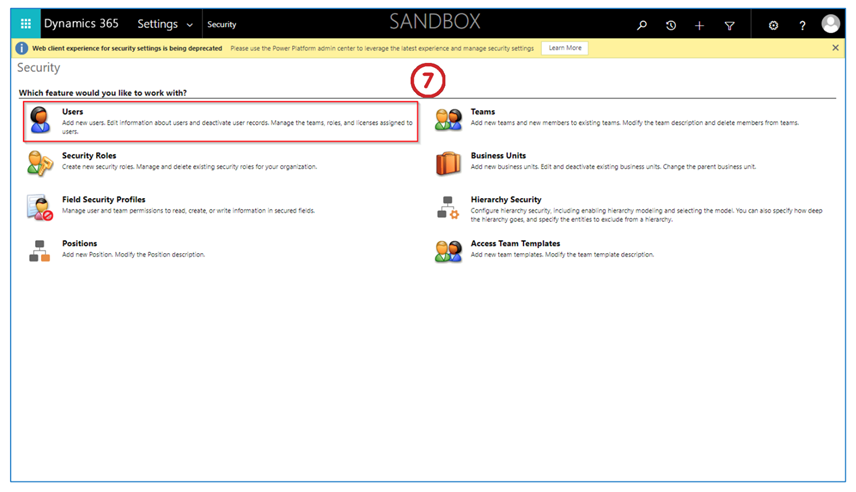
- Choose Security.
- From Which feature would you like to work with? select Users. This allows you to add new users as well as perform other functions. That includes getting user information; deactivating users; managing teams, roles, and licenses.
- Select the required User from this list.
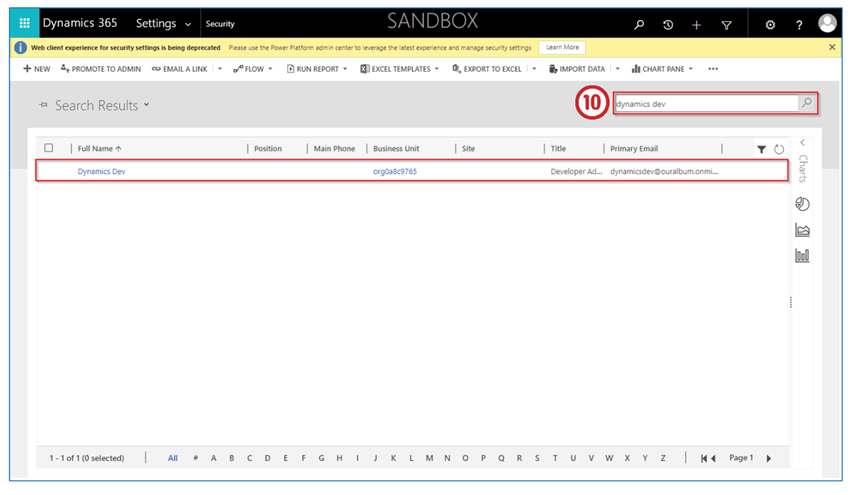
OR - You can also search for the user that you want to assign a security role to in the search bar and then hit the enter button or click on the search icon.
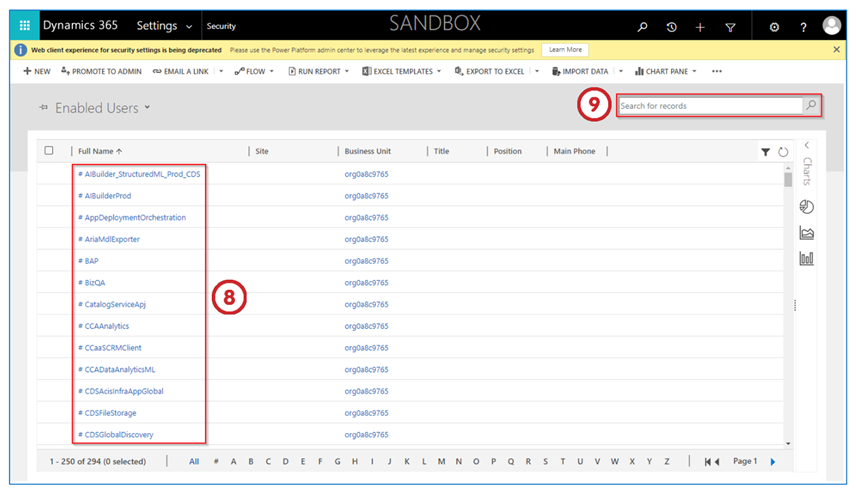
- The users will filter based on your search. Select the user by double clicking on the row to open the summary.
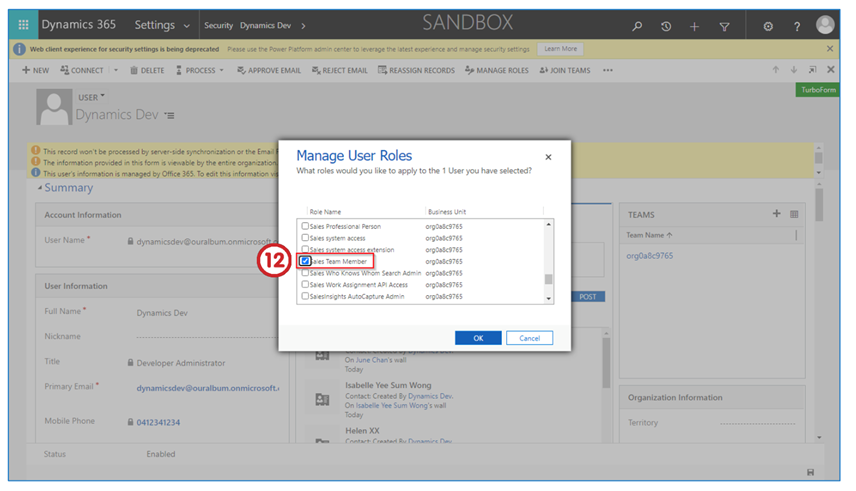
Manage a Role
- Select the Manage Roles option.
This will allow managing a user’s role.
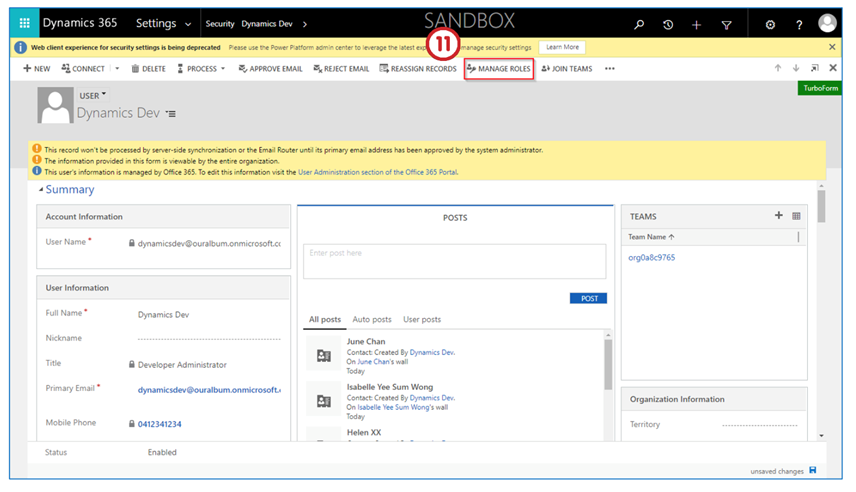
You will see a new window pop-up called Manage User Roles.
- The Sales Team Member role must be assigned to all users.
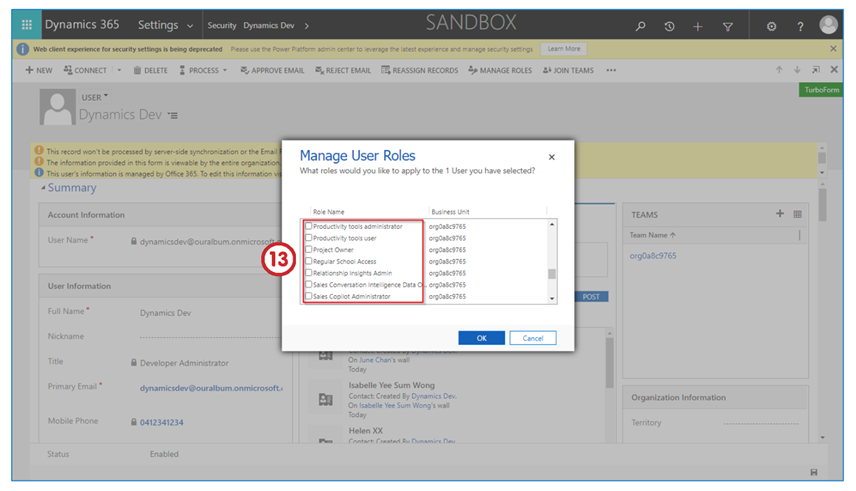
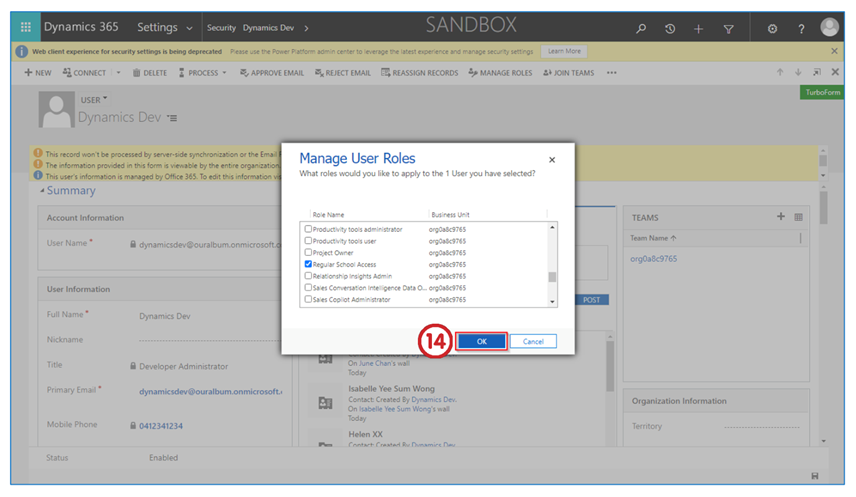
- Select the other security roles in Role Name, depending upon the job role of the user.
- Click on the OK button to confirm your selected user roles.
Last updated on