Admin For Dynamics 365 Education Customization
Customization
This section is for customizing forms and fields.
Forms & Fields
To customize forms and fields sign in to office.com using your credentials and:
-
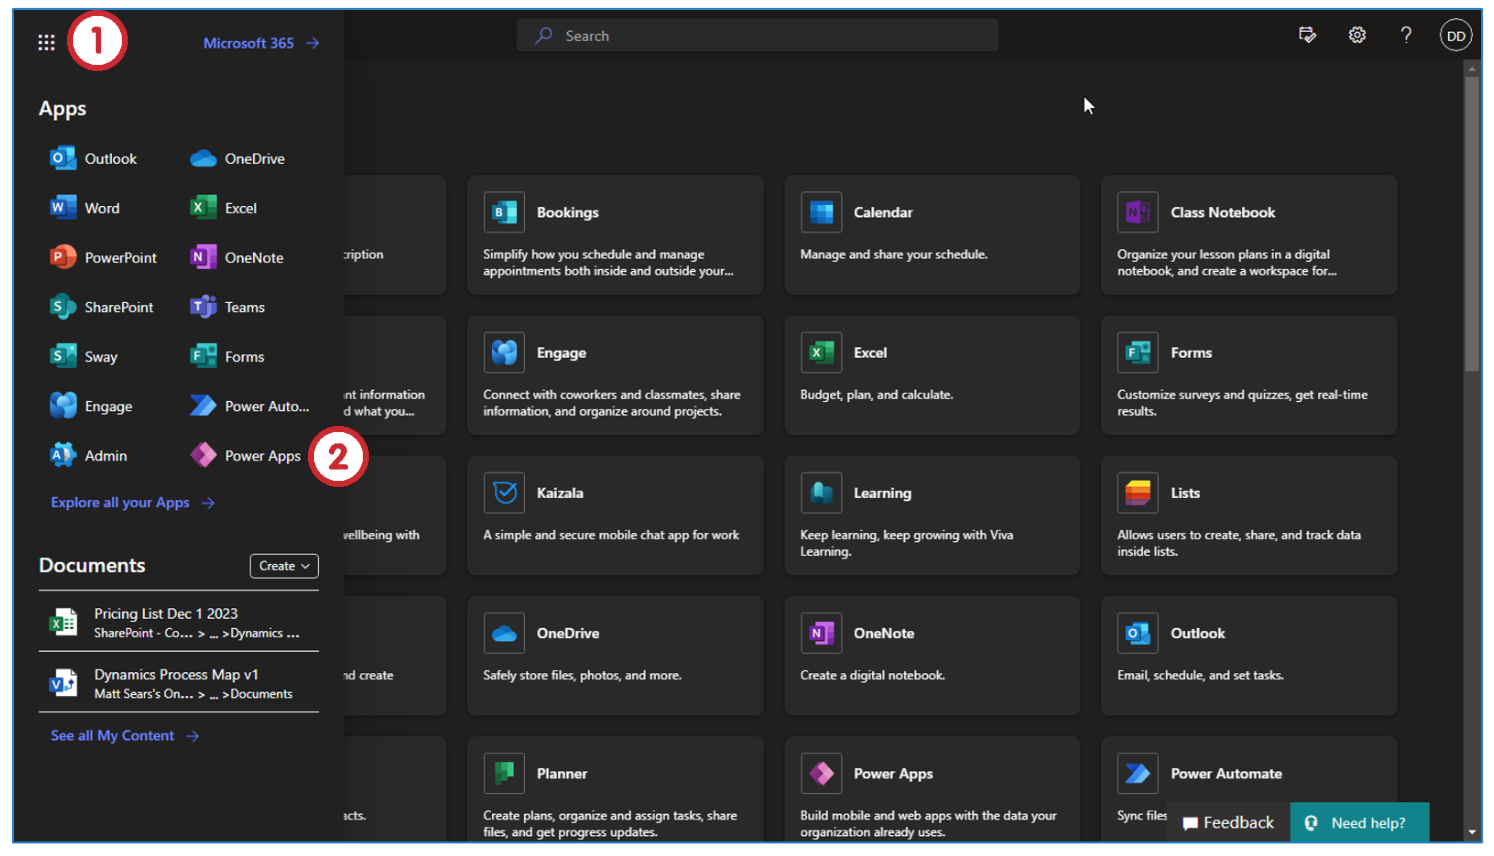
Click on the “9 dots” in the upper left-hand corner. This gives access to Microsoft 365 Apps.
-
Open the Power Apps (if none found, can be browsed through make.powerapps.com).
The forms contain the fields where you input data to be stored.
-
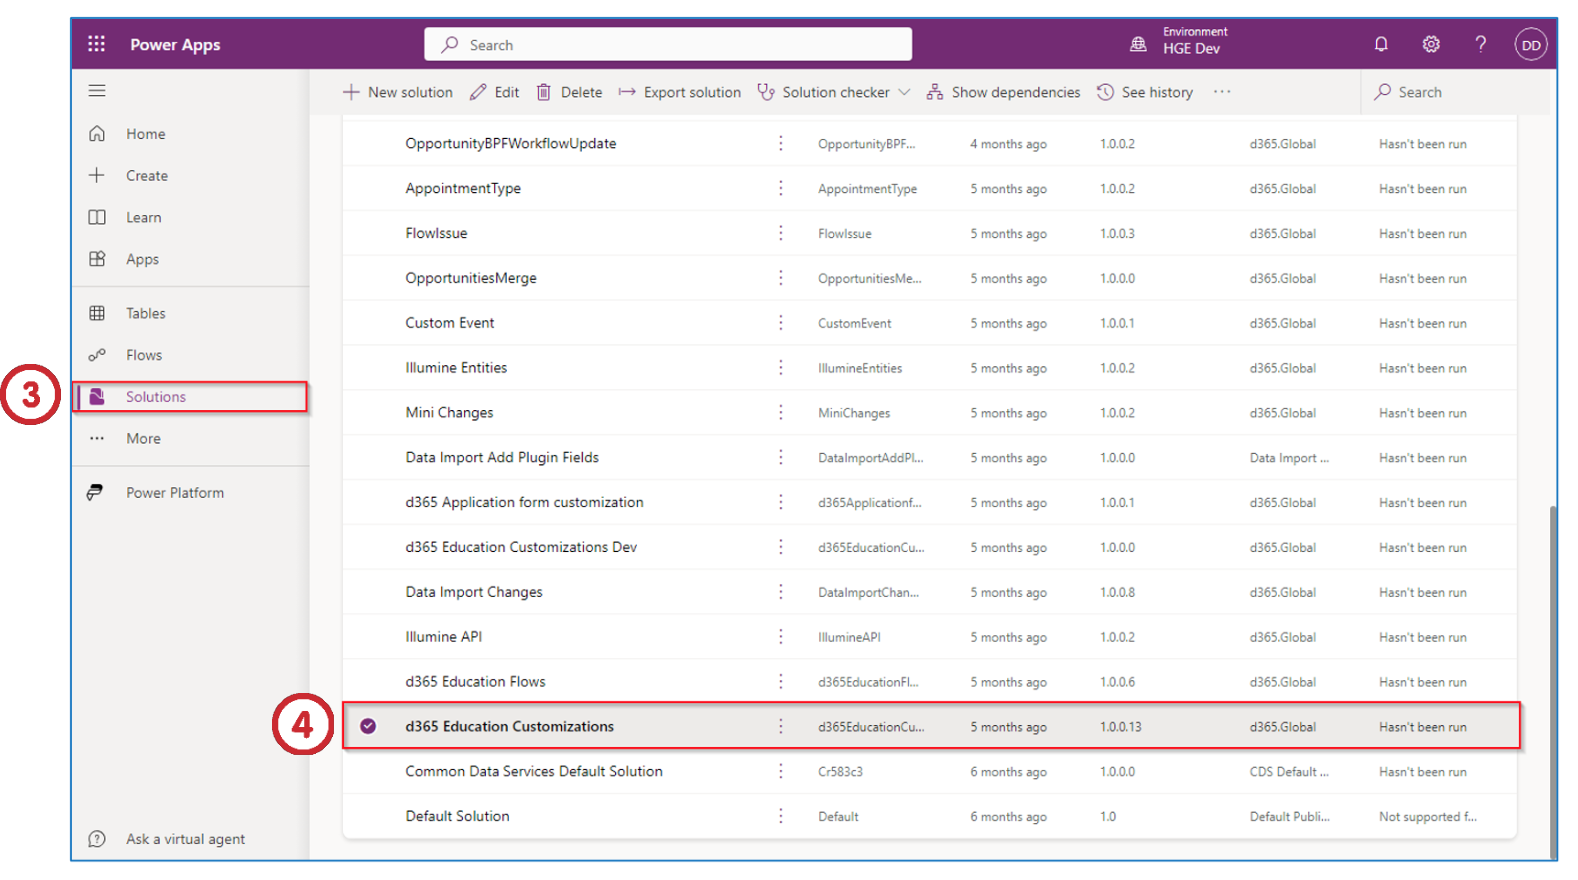
Click on Solutions in the main menu on the left-hand side of the application.
-
After that click on d365 Education Customizations.
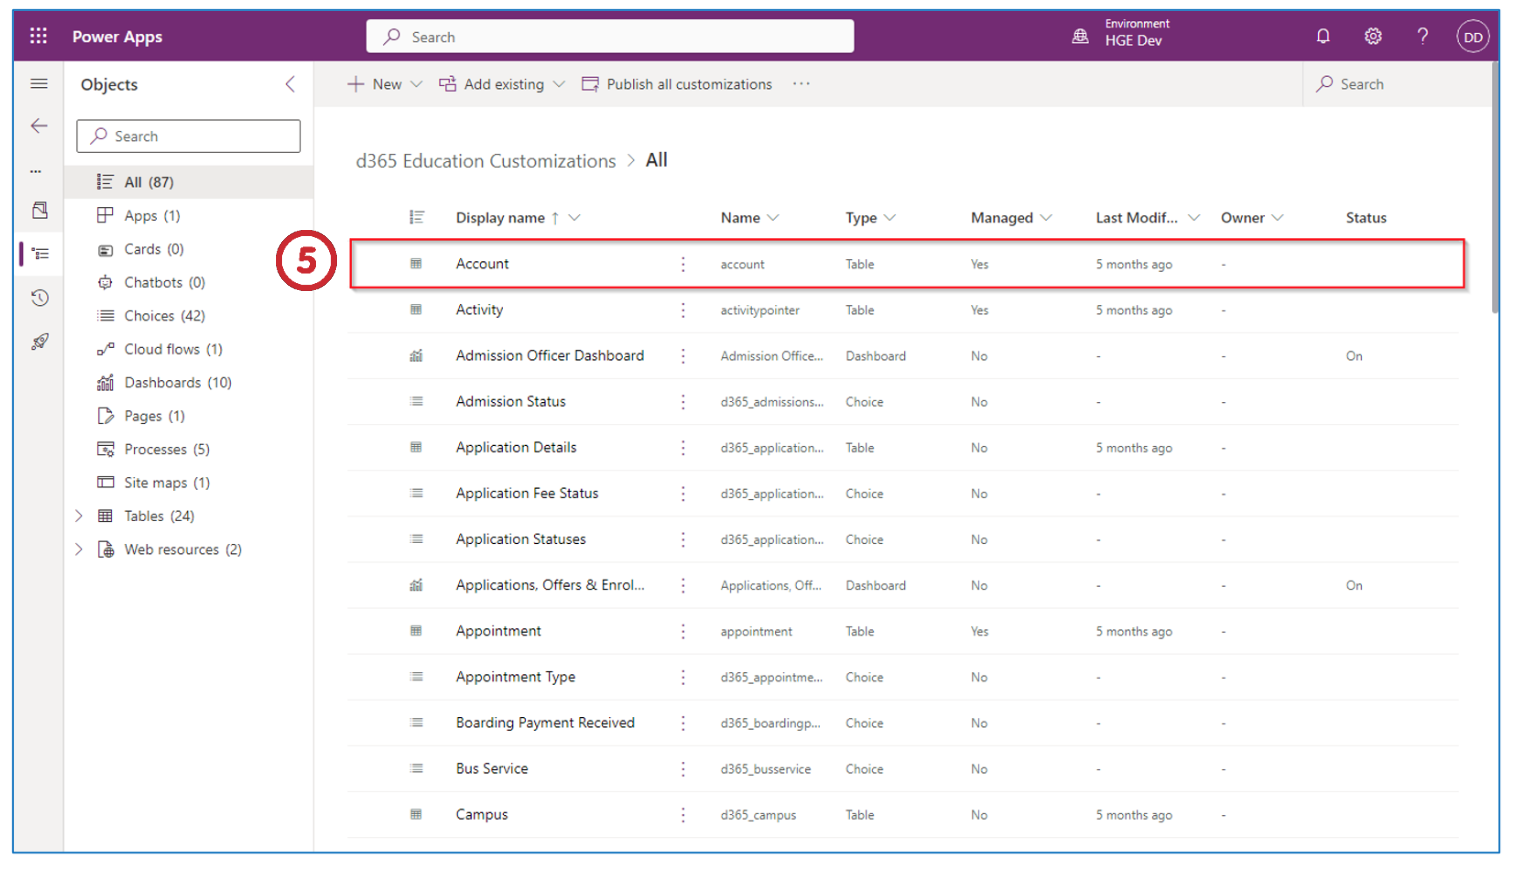
- Click on Account entity under Display name under d365 Education Customizations > All.
You can select the entity that you want to customize from the list.
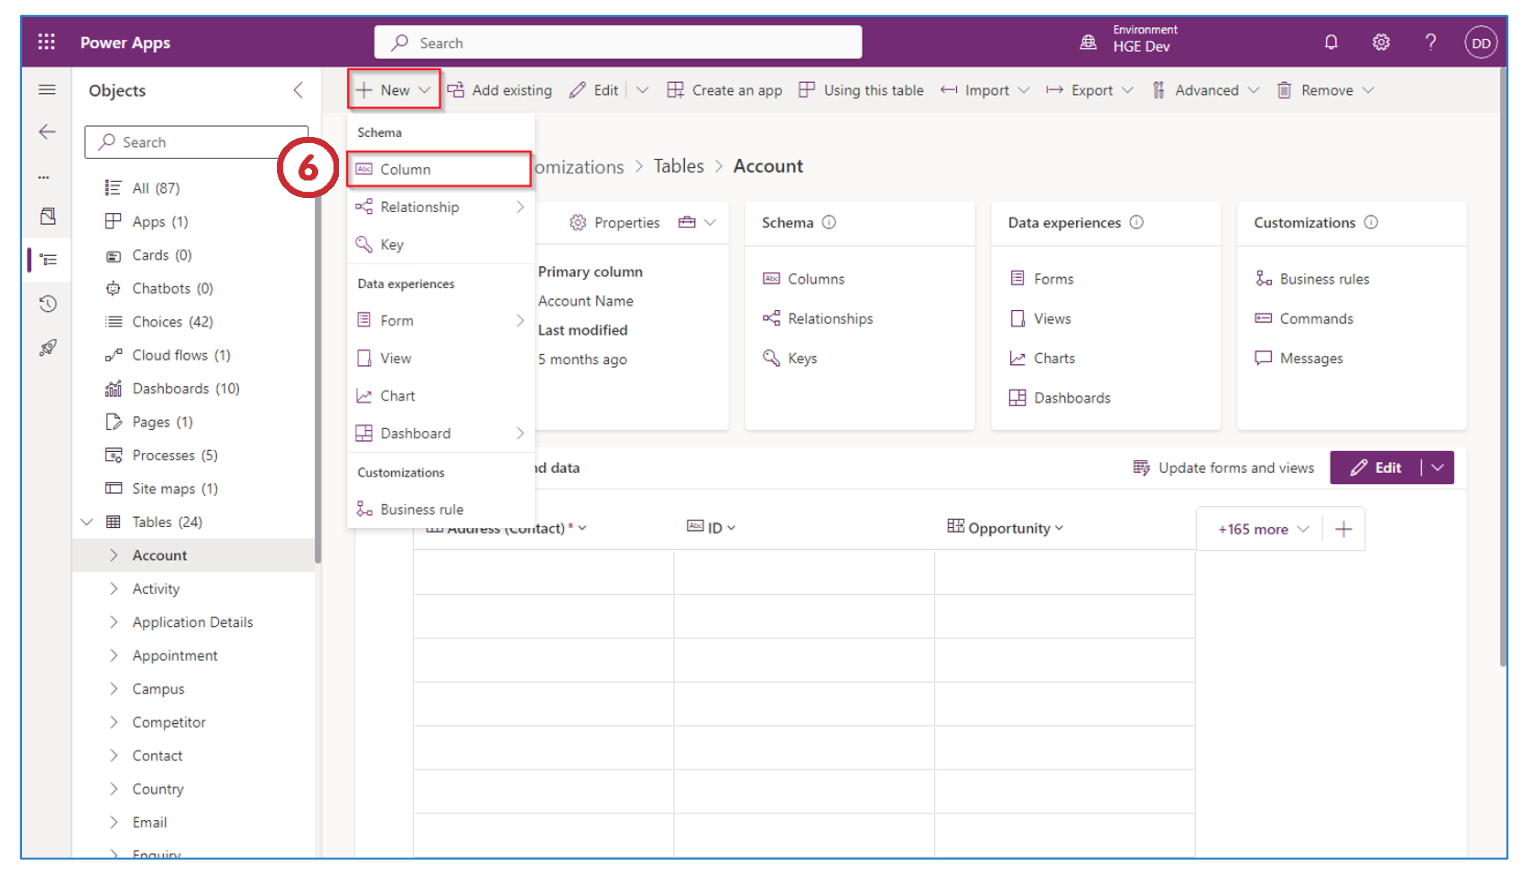
- From the “Nav Bar”, click New, then click on the Column button under the Schema.
This will add a field which you can add to the form. You repeat this process to create multiple fields.
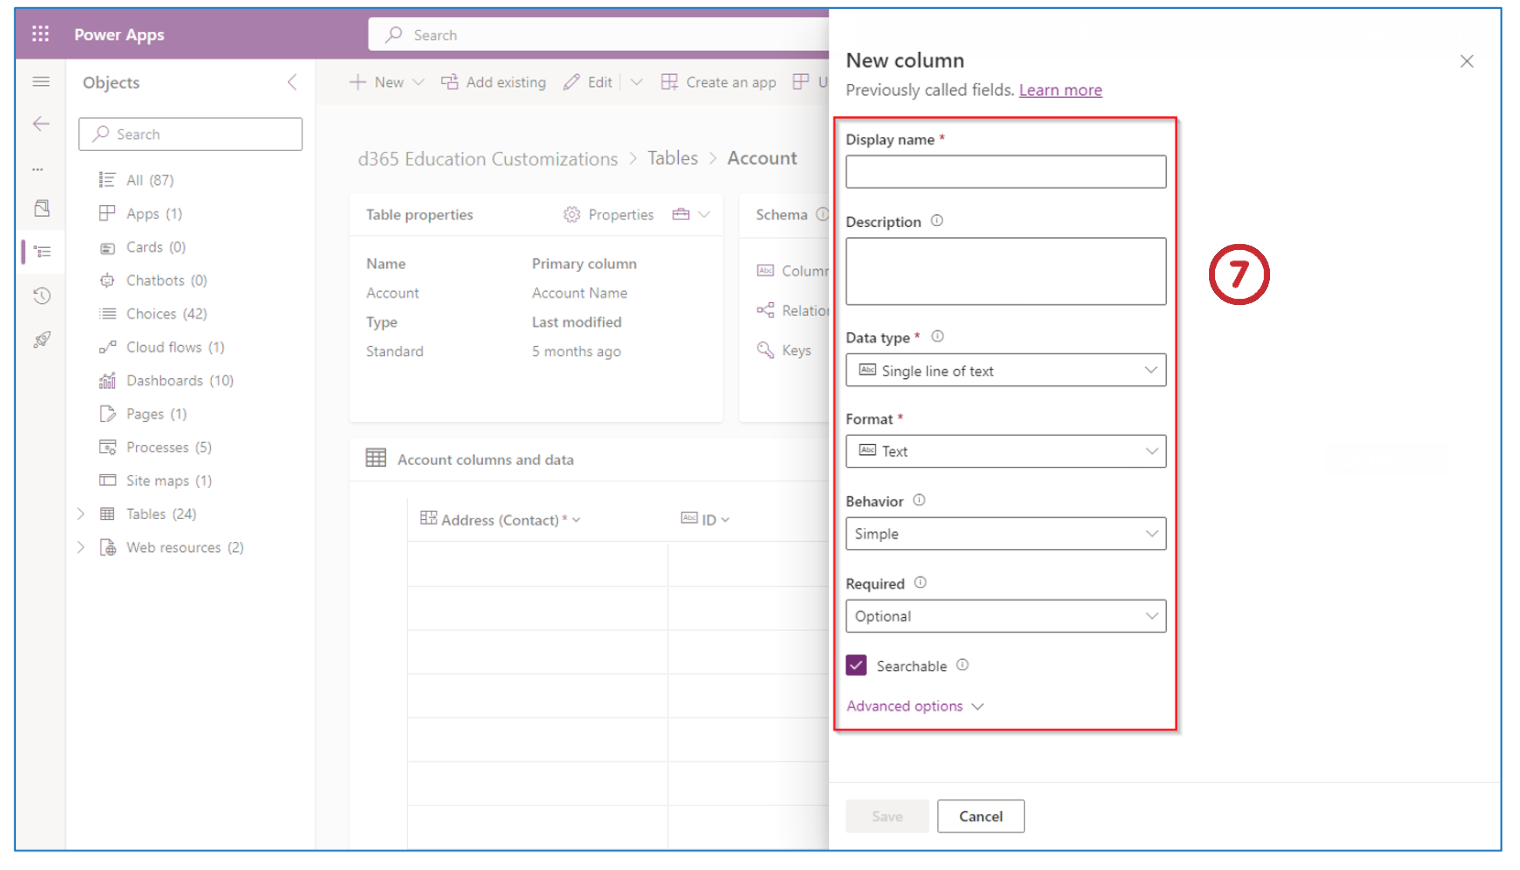
- Fill the column properties under New column.
Display name: This is the name that will show up in the form.
Name: This should be unique as this is used as primary key by CRM in database.
Data Type: Select required Data type.
Required: Select Optional if it is an optional field, required only if it needs to be filled out in the form.
Click Save after you have finished. You can click Cancel if you do not want to save any data.
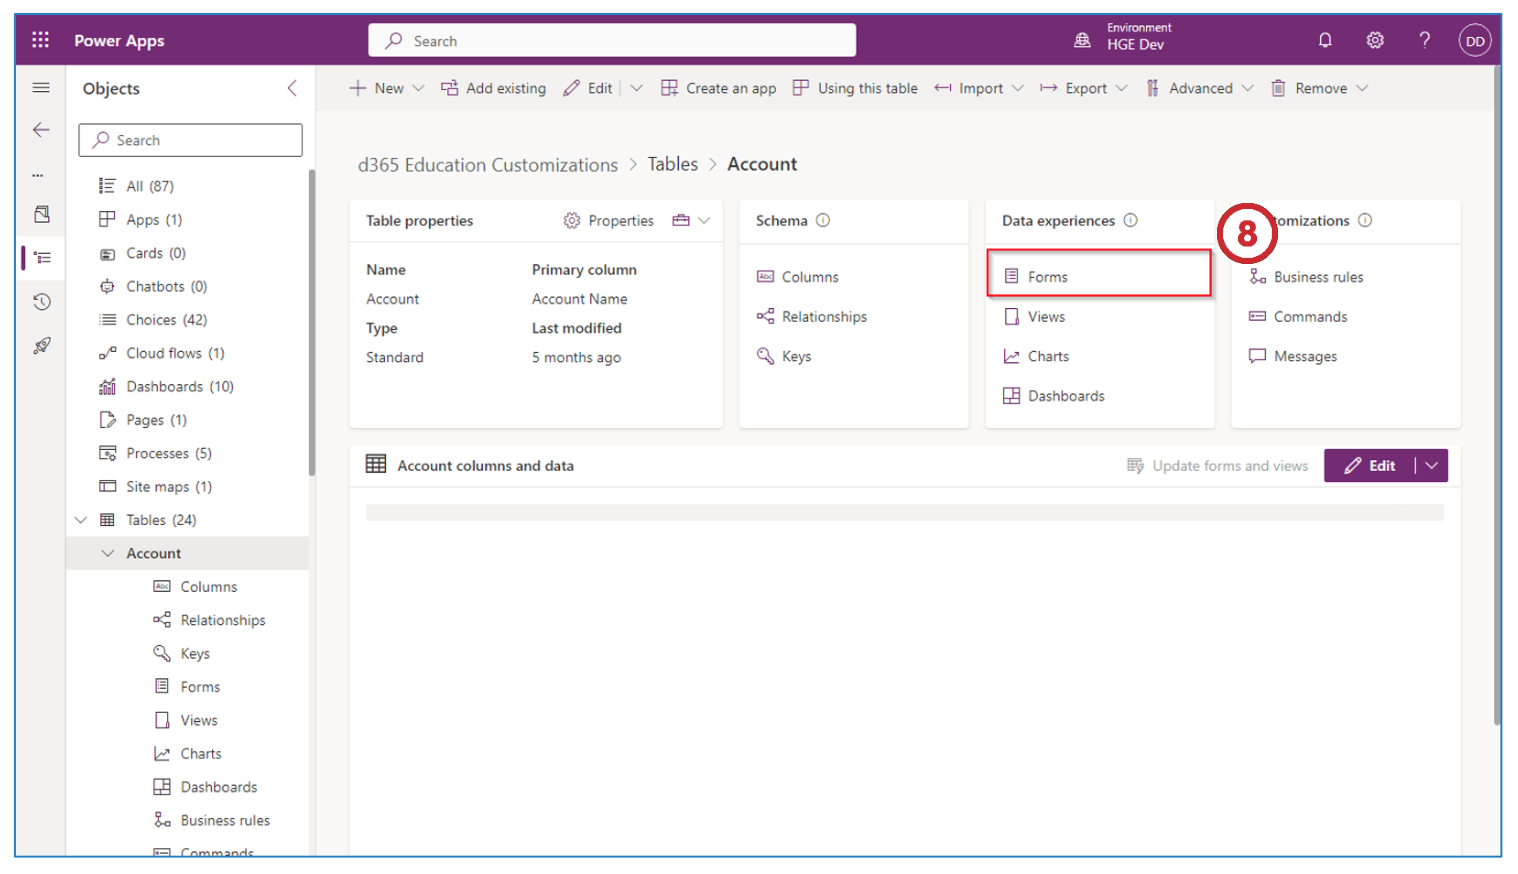
- Click on Forms under the Data experiences section in d365 Education Customizations > Tables > Account.
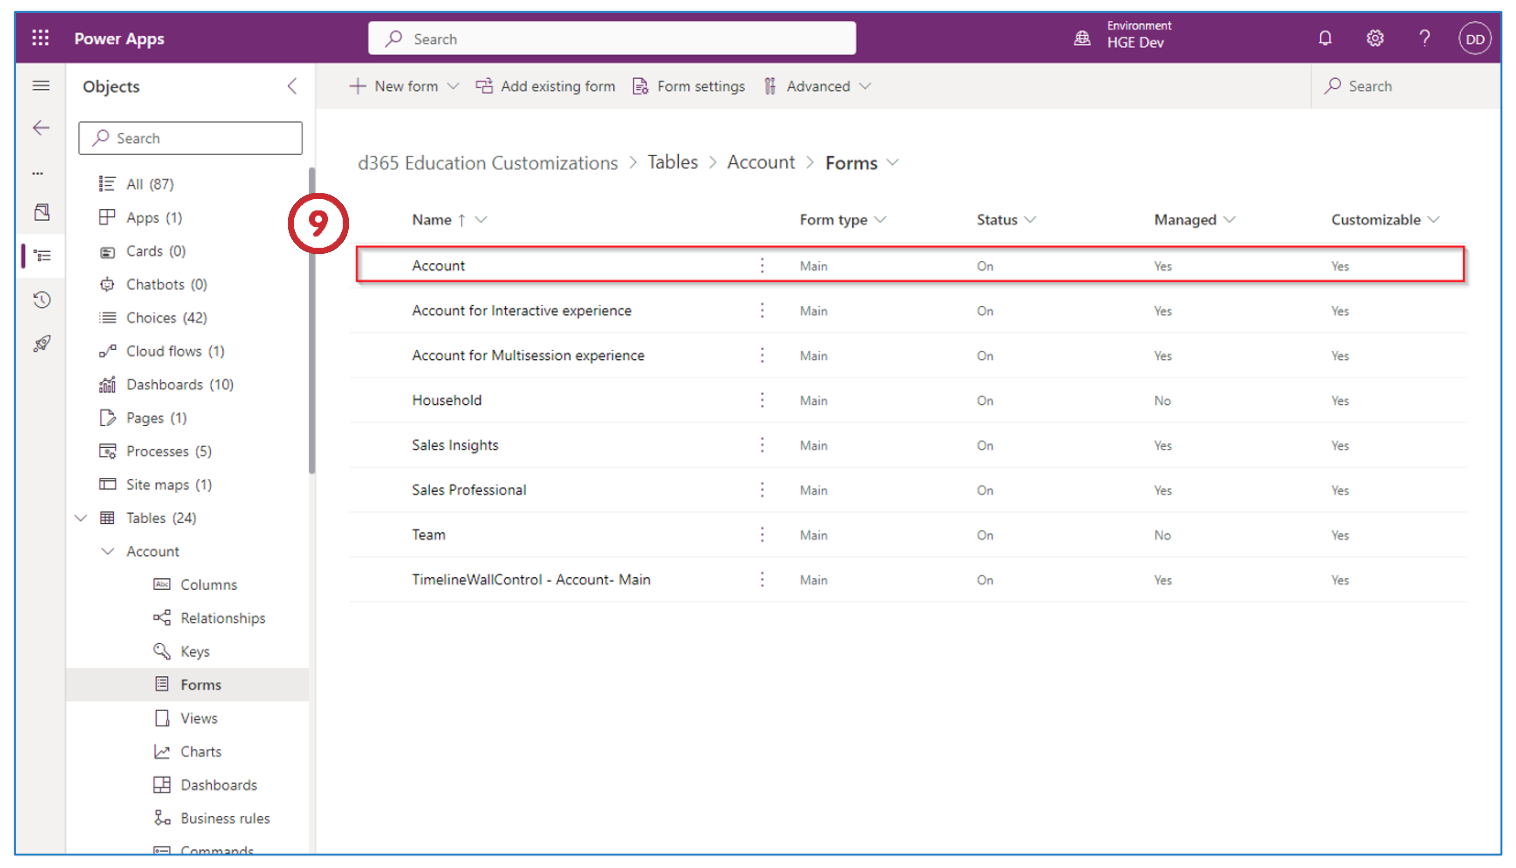
- Click on Account from Tables > Account > Forms under d365 Education Customizations.
In this step you select which forms you want to customize
-
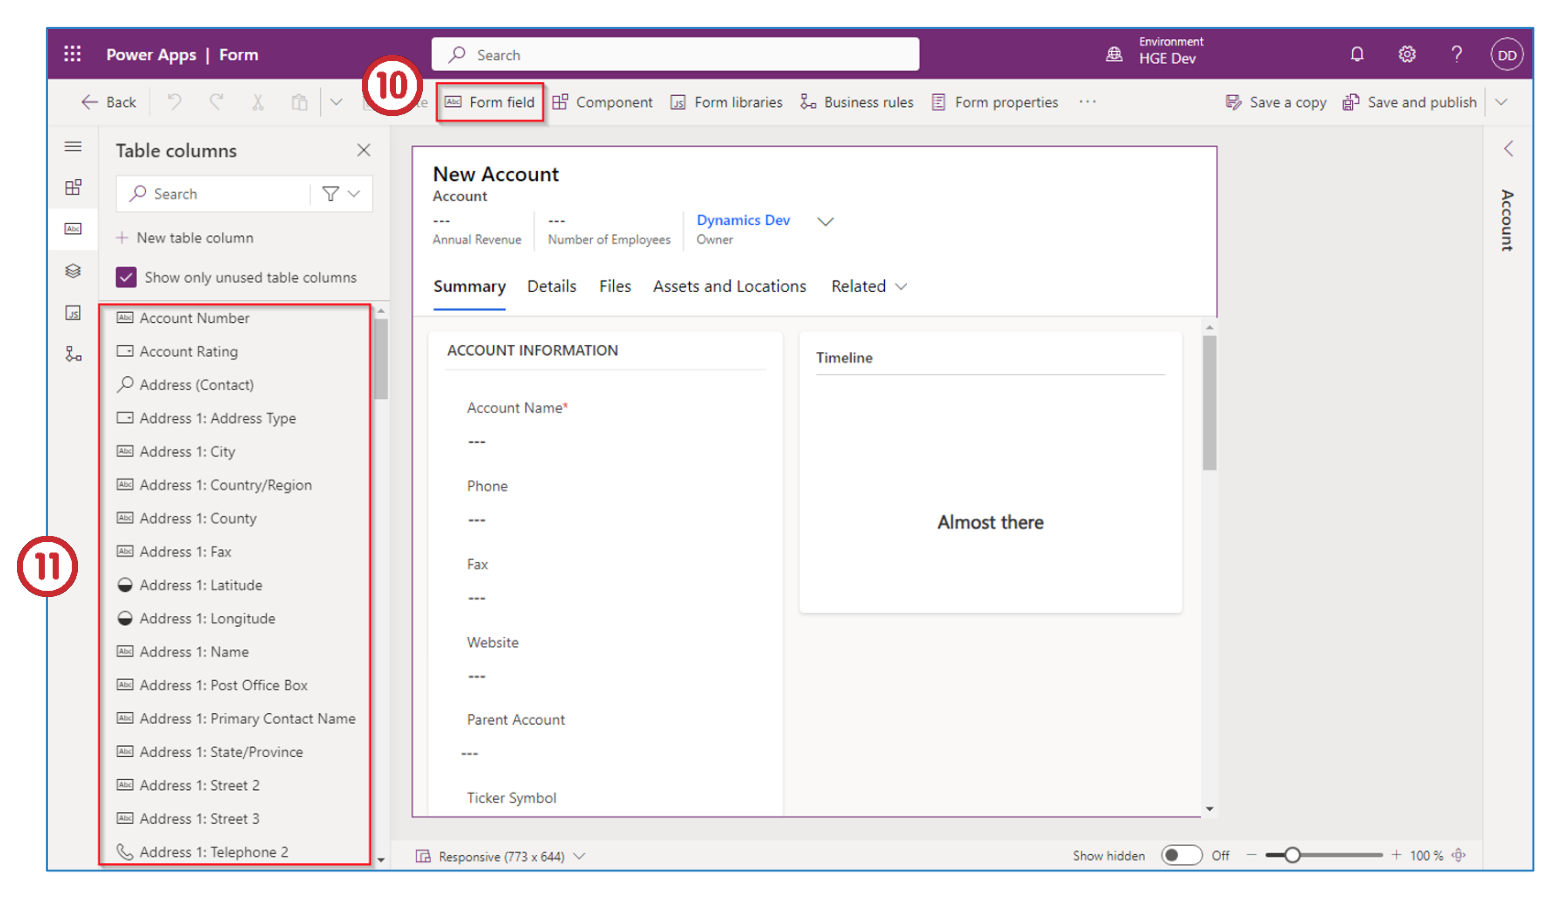
Click on the Form field button in the “Nav Bar”.
-
Using your mouse, track pad or pointing device, drag and drop the field you want to add to the form. You select the field from the list of options on the left-hand side of the screen under Table columns.
This will populate your form with the fields you selected.
-
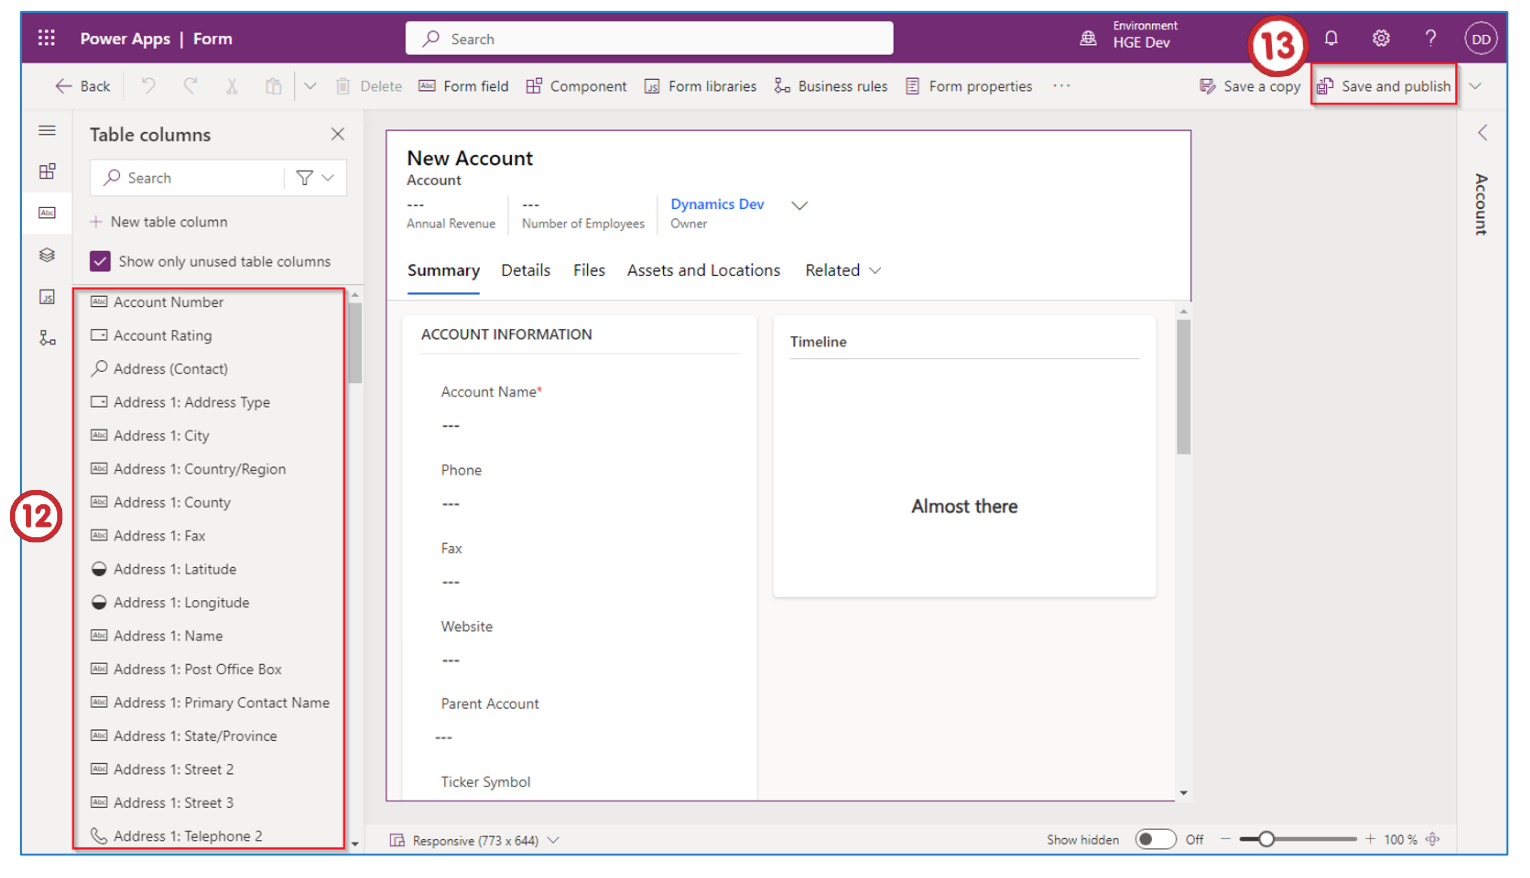
Drag and drop the column into the view. This is the same as the field.
-
After making changes click Save and publish.
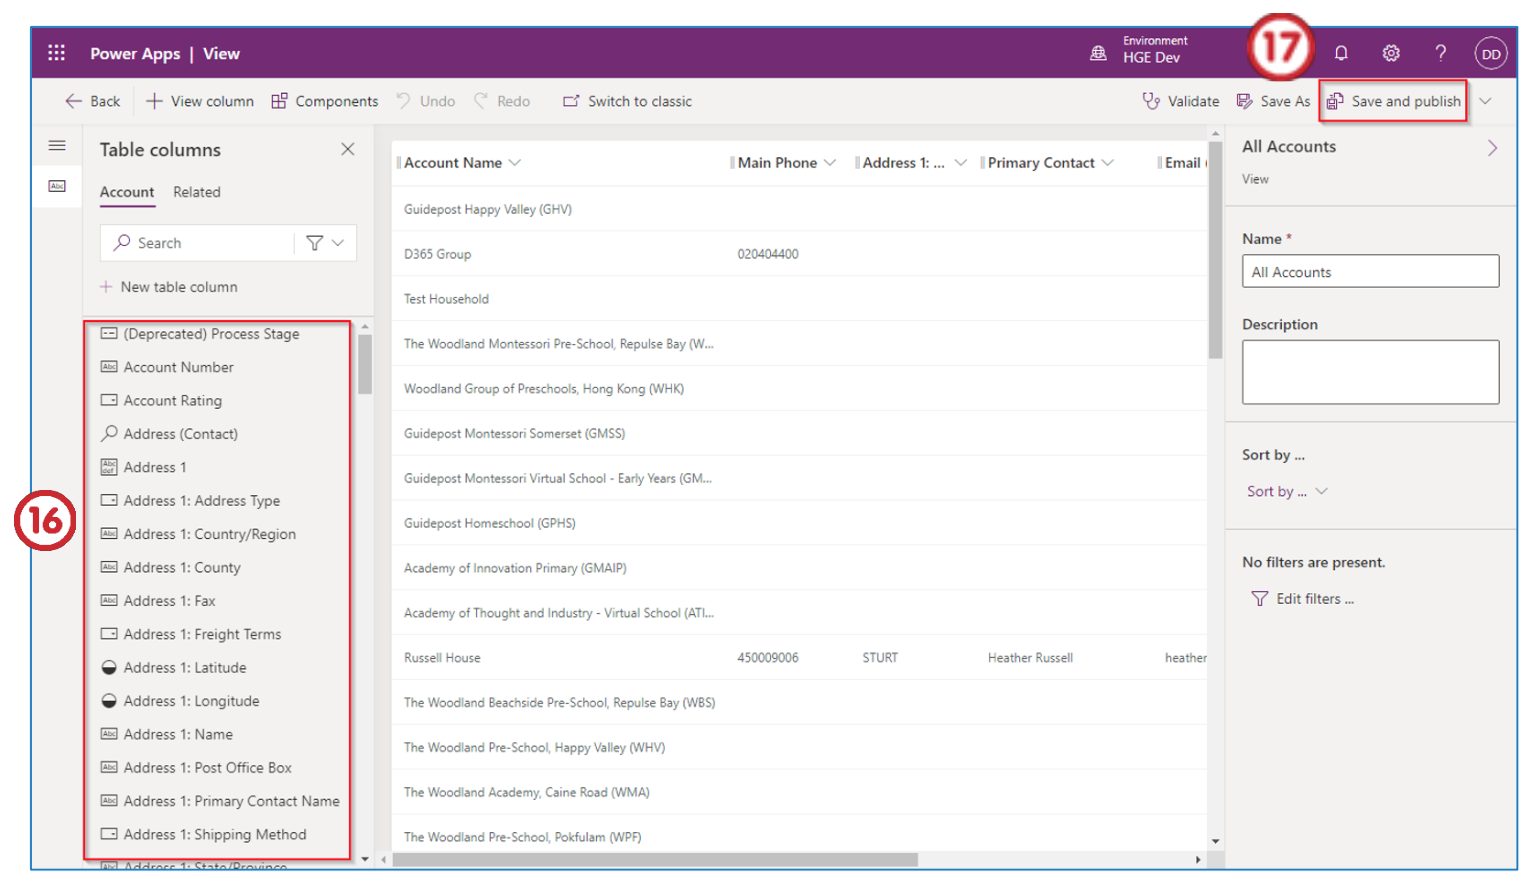
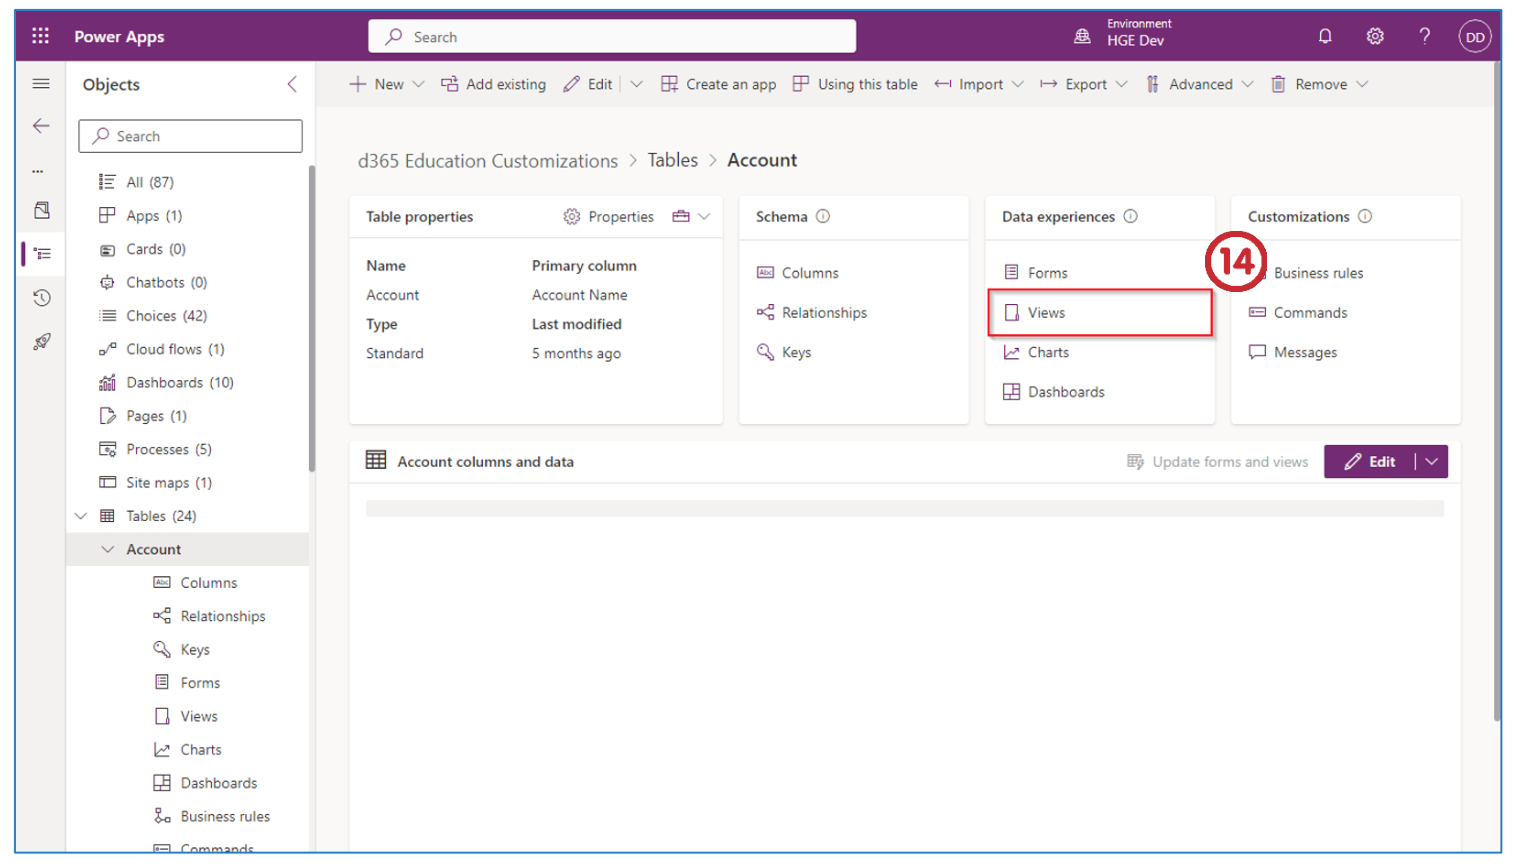
- Click on Views under Data experiences section which is under d365 Education Customizations > Tables > Account.
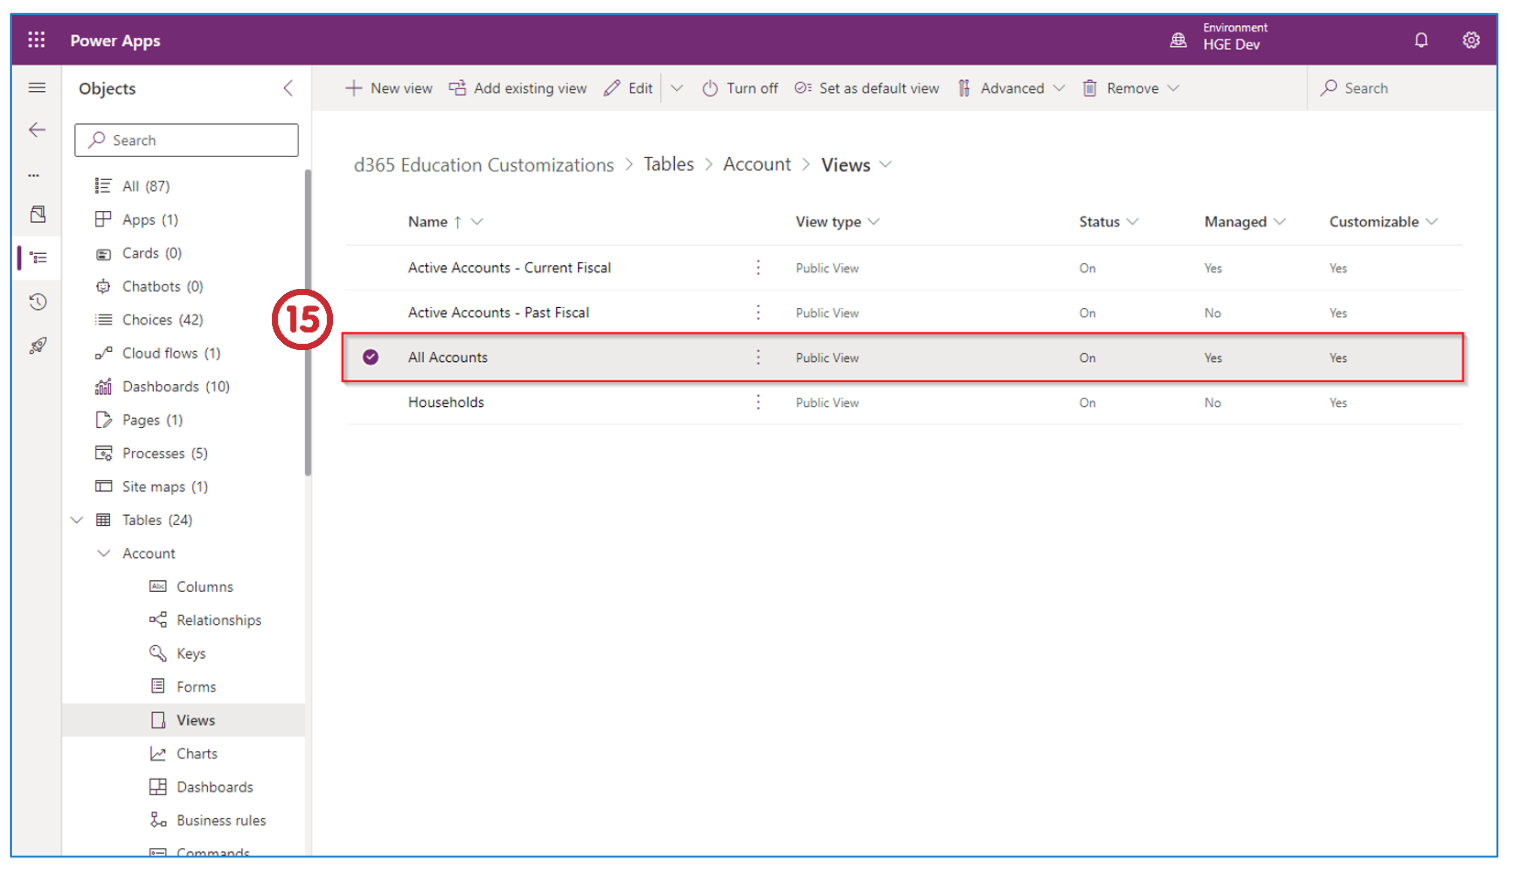
- Click on All Accounts or click the view you want to change.
-
From the left-hand side under the Table columns in the Account tab, drag and drop the column into the view.
-
When you are finished, click Save and Publish.