Microsoft Dynamics 365 NDIS Schedule Board
Schedule Board Overview
Schedule Board is the place where the rostering team will be managing the Bookings Fortnightly or on an ad hoc basis. Whether it’s about Setting / Confirming the Roster for the upcoming Fortnight or updating / rescheduling an individual Booking or managing cancellations.
Multiple Boards is what we have agreed to do. So, one board to be set up per Participant to manage the booking easily. On an individual board level, users can be added or removed.
Components
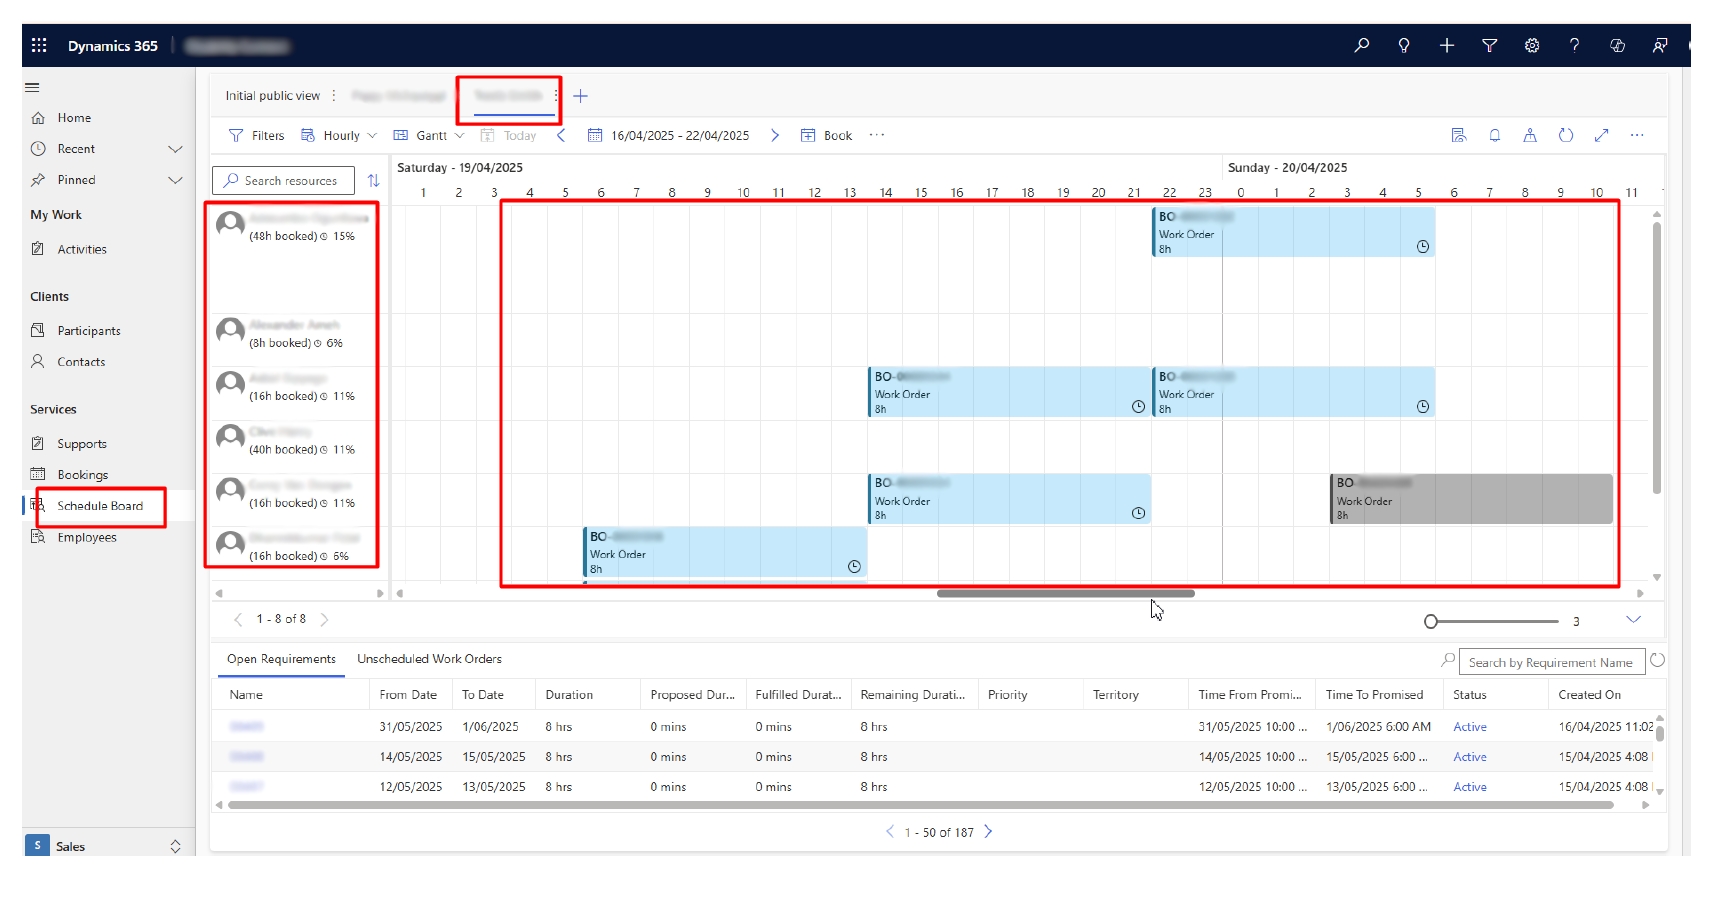
The Schedule Board consists of the following components:
-
Middle sections display all the Bookings.
-
The left pane lists all the resources added to the Board. This resource list can be managed using Filters or by manually adding them up.
-
From the right section, you will find the Board settings panel.
-
On the top section, we have a variety of Display options to facilitate our working style.
-
Upon hovering over the Booking tile, we can see the Booking details. If we click on it, it opens the Booking form.
Manage Bookings
The Schedule Board offers multiple options that we can use to manage the Bookings. Some of the prominent and easy to use ones are listed below:
-
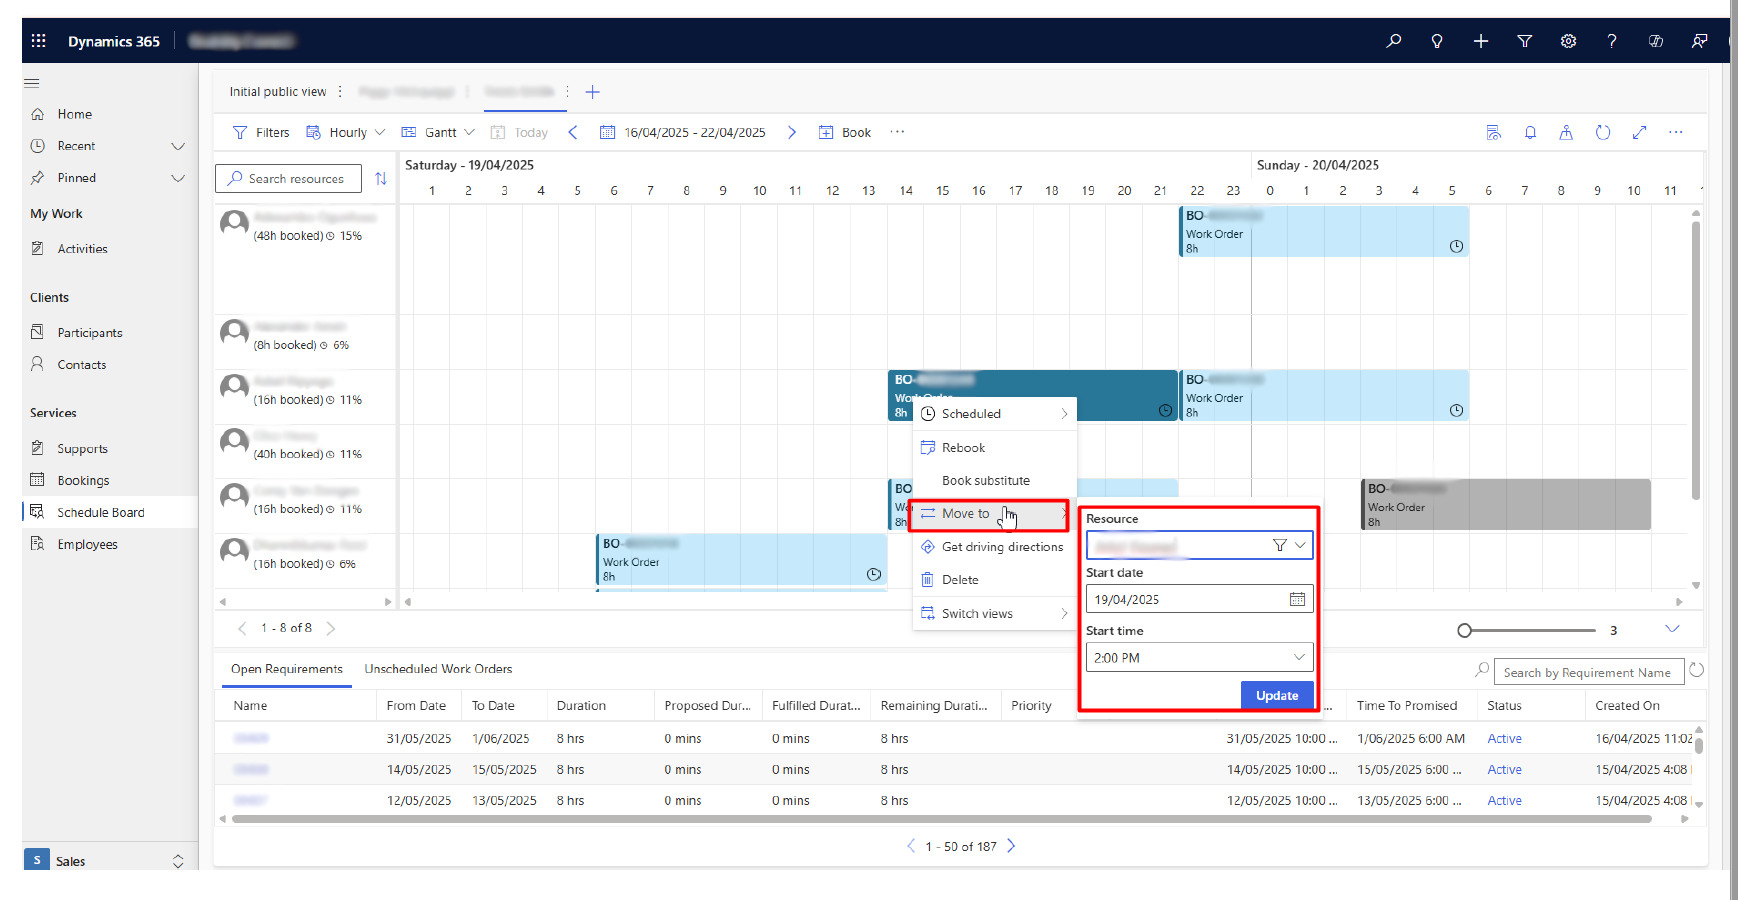
Drag & Drop — In case user needs to update either or combination of these — Resource, Start Time or End Time. All we simply need to do is to drag the Booking Tile and drop it at the newly designated Resource / Time. Once done, the system will automatically update the Required data.
-
Move To Option — This can also be used as a replacement to drag & drop. All you need is to right click on the Booking Tile. Select the MOVE TO option and add the new data as required.
-
Update Booking Status — In case the user needs to update the Booking status, the user needs to Right Click on the Booking Tile, navigate to the Scheduled option on top and then select the necessary status as per the use case.
This will update the Booking Record as intended.
Layout Features
Schedule Board also offers a lot of features to customize which would facilitate the working of users. For instance:
-
Layout / Color Scheme of bookings as per Booking Status.
-
Resource utilization
-
Resource Availability / non-Availability
-
Different view options of Bookings — Weekly, Daily, monthly etc.
These would be managed by the System Admin.

Creating New Board per Participant
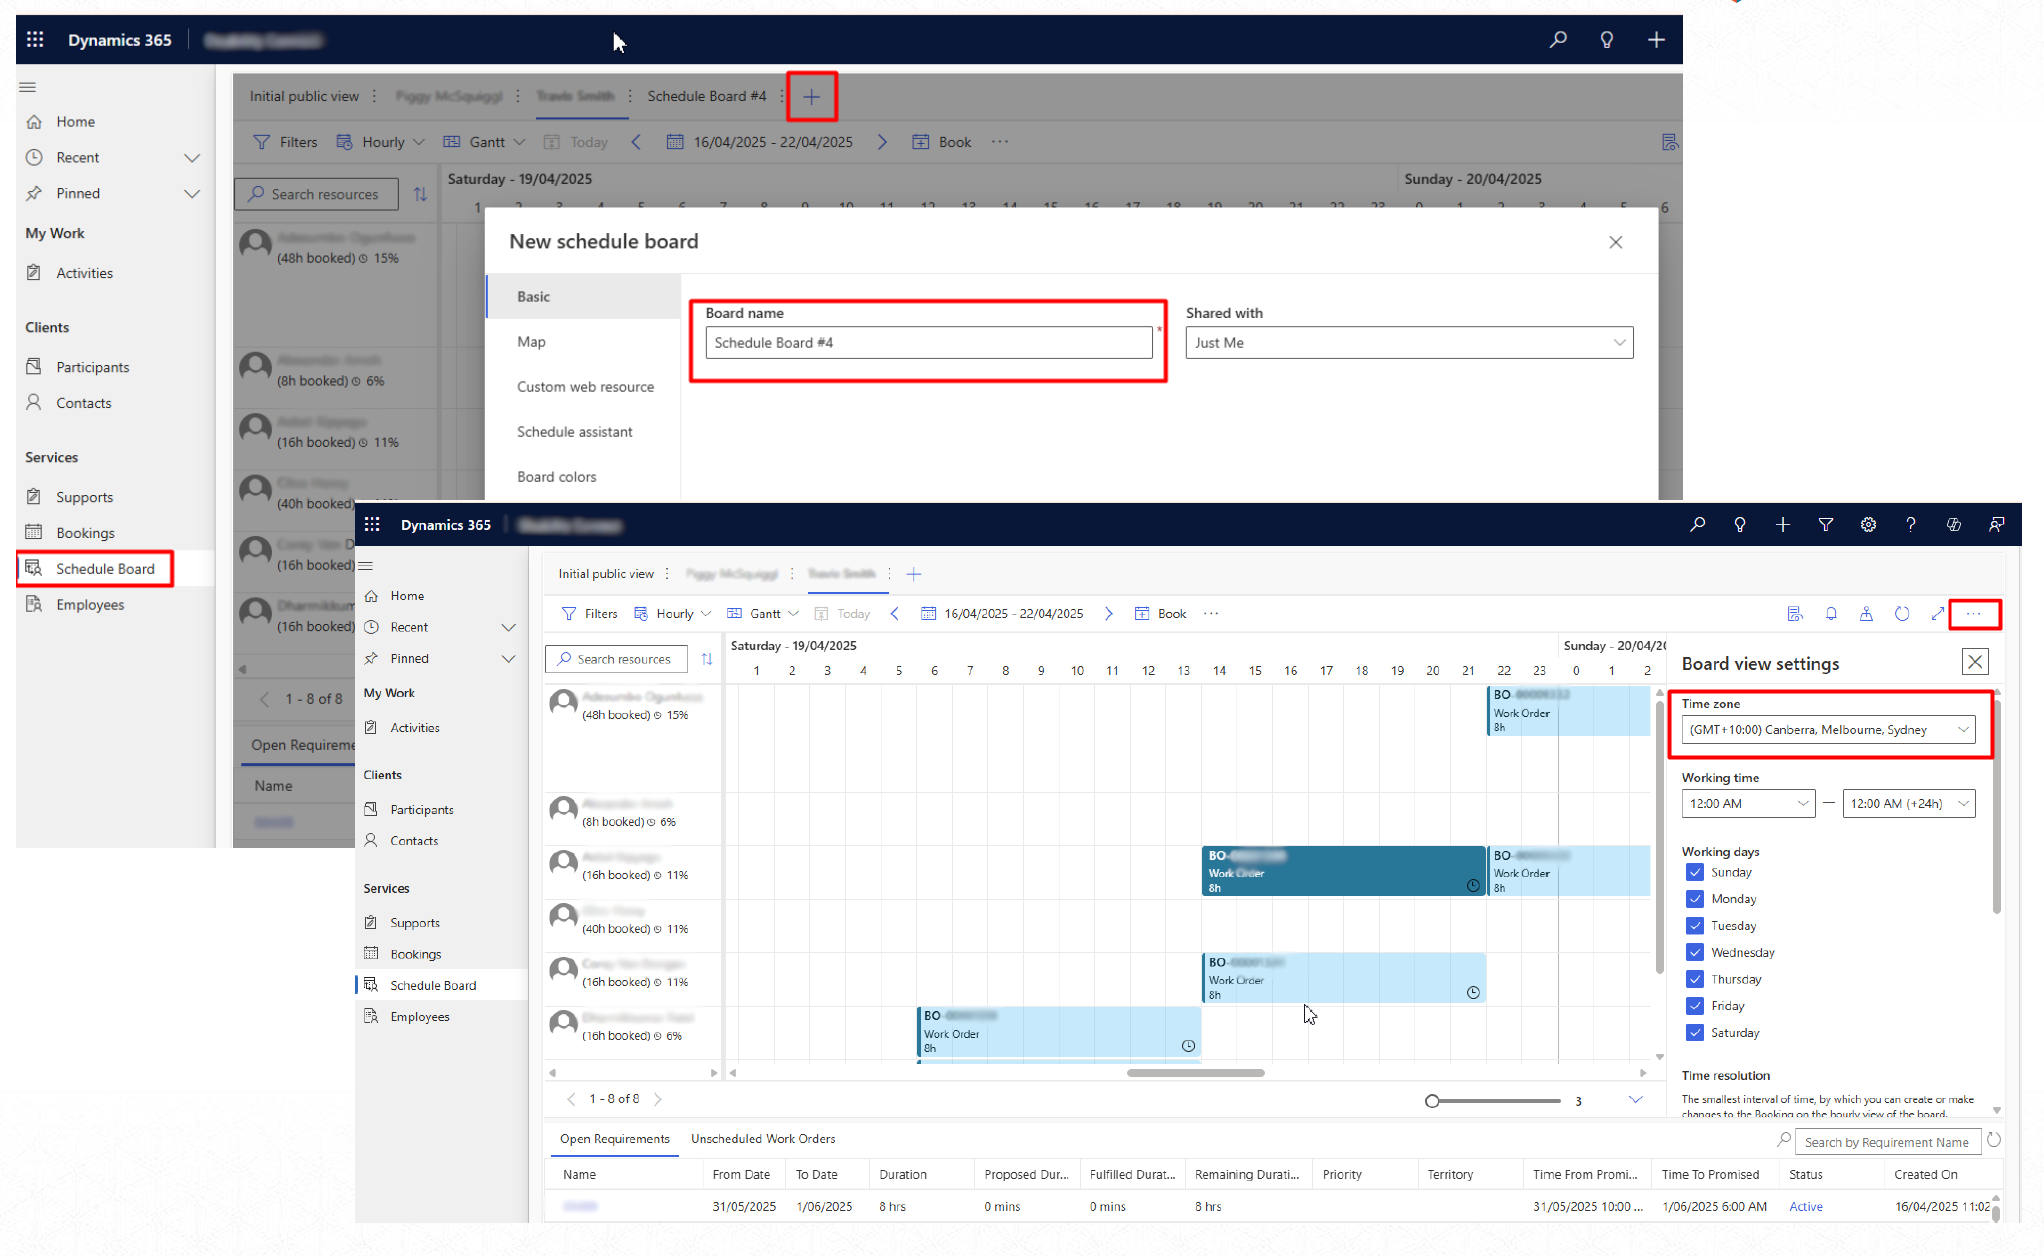
To create a New Board per Participant, we perform the actions below:
-
Navigate to the Schedule Board.
-
Click on ”+” icon and name the board appropriately.
-
Click on ADD. This will create the board.
-
Update the Time Zone of the board to the correct time zone.
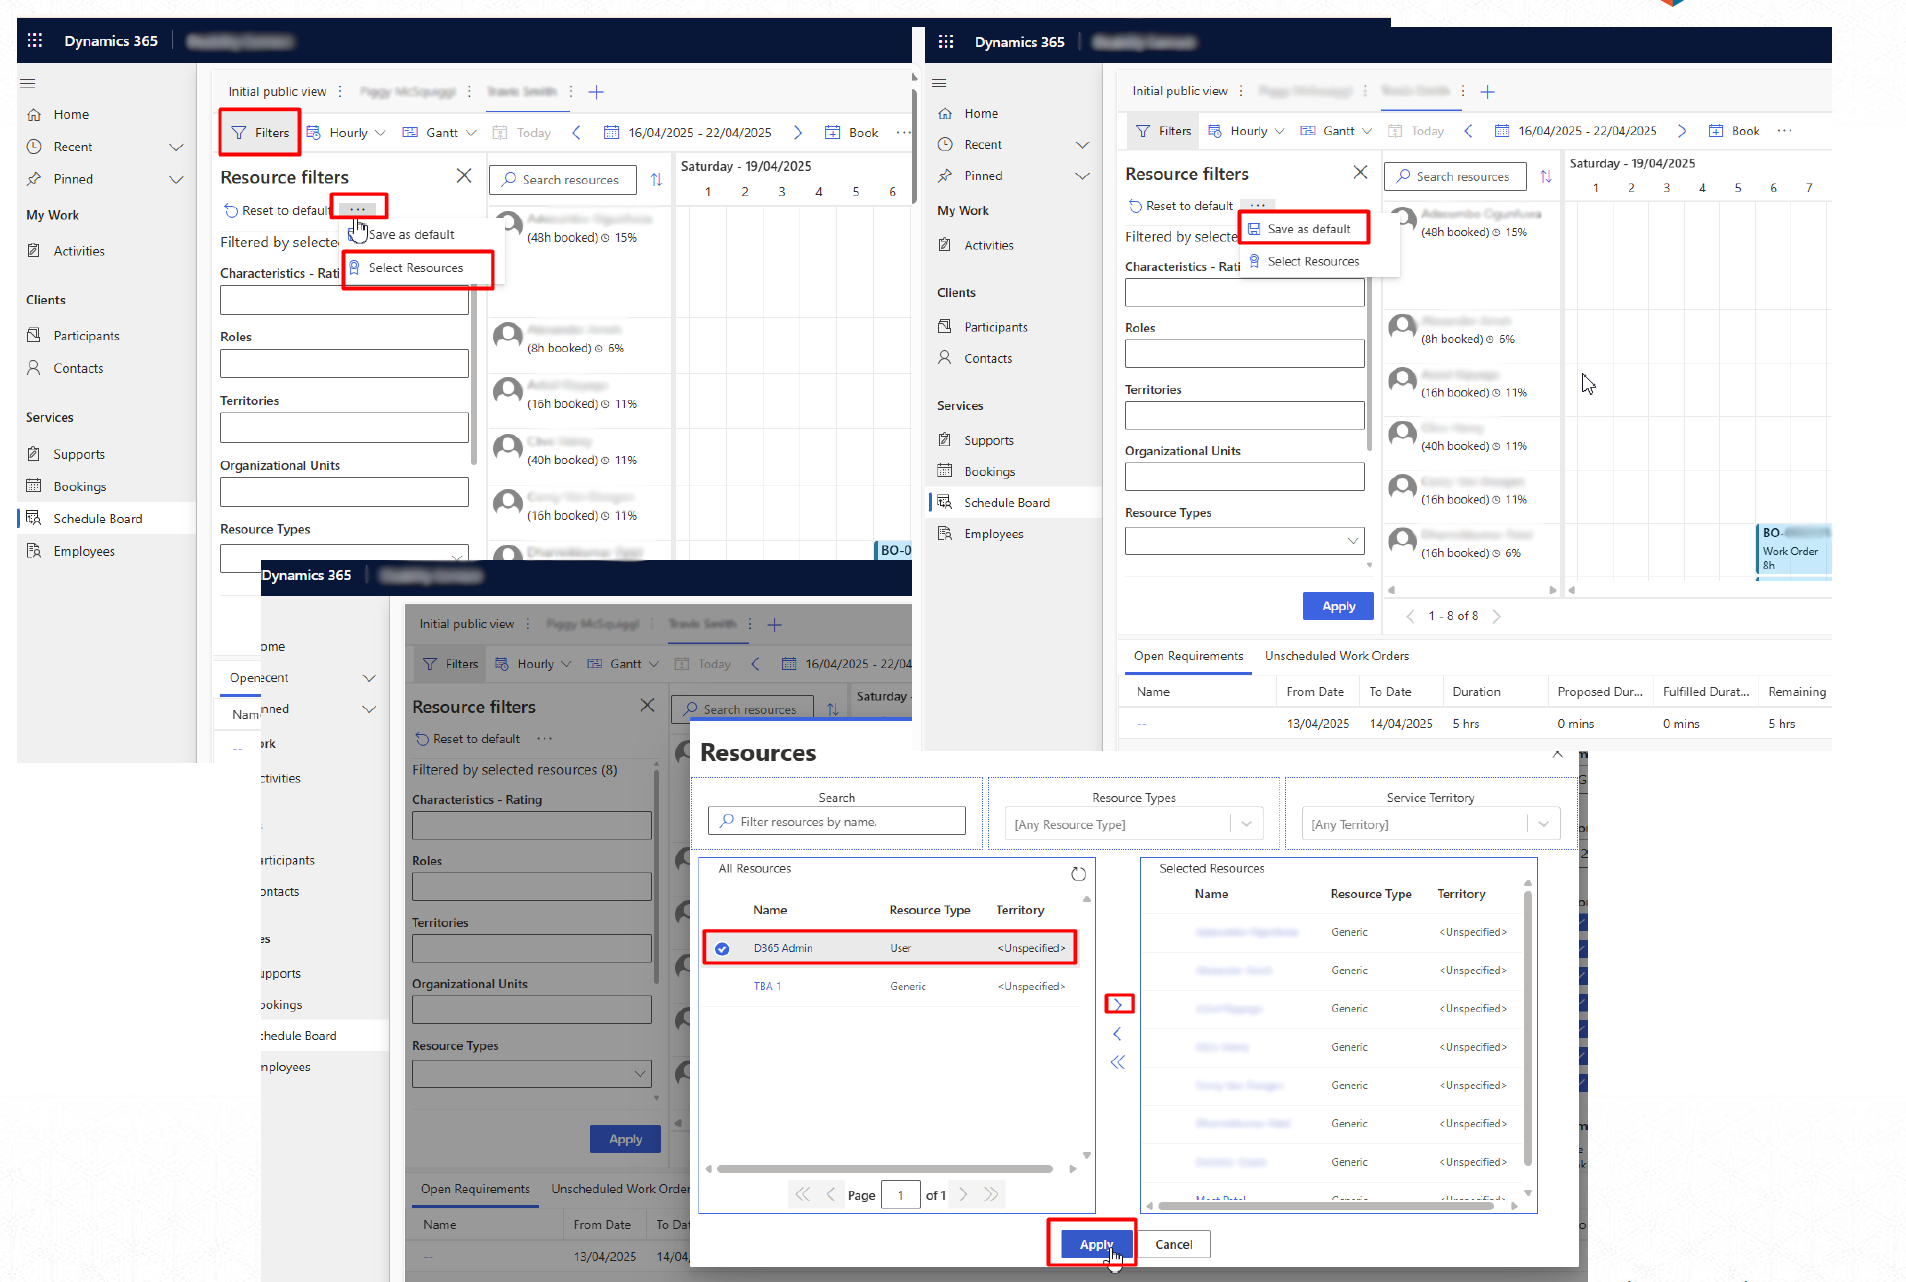
We will now be adding the required resources to this board. This will be done in the following steps:
-
Navigate to the Filters first.
-
Click on 3 dots and then SELECT RESOURCES.
-
Then select the required resources, take them to the right section, and then click Apply.
-
Once done, click Save As Default.