Legal User Guide for Microsoft Dynamics 365
Legal Case Management Section
Billing Events
The Billing Events tab is used to record and manage billable amounts linked to a Matter. Billing Events may represent time-based work, fixed fee instalments, contingent fee amounts, retainers, or other billable items depending on the Matter’s billing setup.
Billing Events are an important part of the billing and invoicing process. Once reviewed and approved, eligible Billing Events can be included in invoice processing.
Billing Events may be created in different ways:
-
Manually from the Matter using the Billing Event button
-
Through the Billing Event Entry screen
-
From time entries recorded by legal staff
-
From Fixed Fee Schedule instalments
-
Automatically when a Contingent Fee matter reaches settlement
-
From other configured billing processes such as retainers
The source of the Billing Event depends on the Matter’s Billing Type and system configuration. Fixed Fee and Contingent Fee billing are explained in more detail later in this guide.
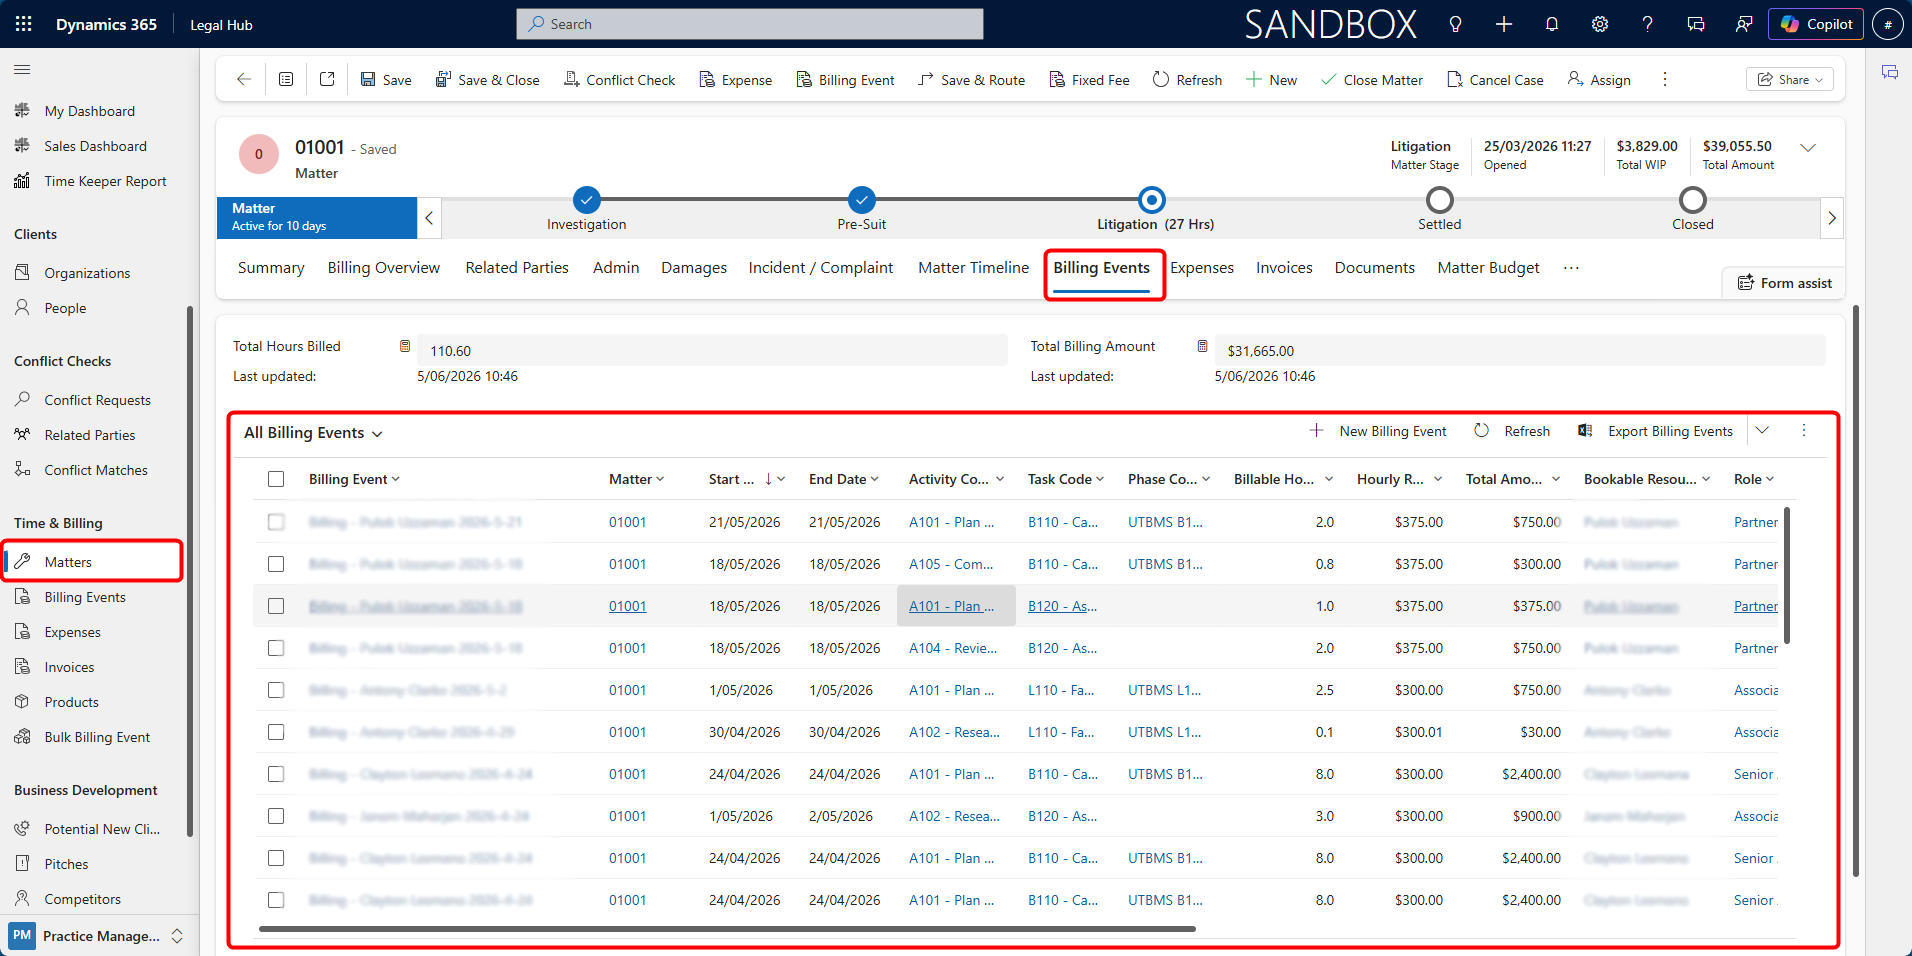
Accessing Billing Events
Billing Events can be accessed from the Matter record or from the main Time & Billing area.
To access Billing Events from a Matter:
-
Open the relevant Matter.
-
Select the Billing Events tab.
-
Review the Billing Events linked to the Matter.
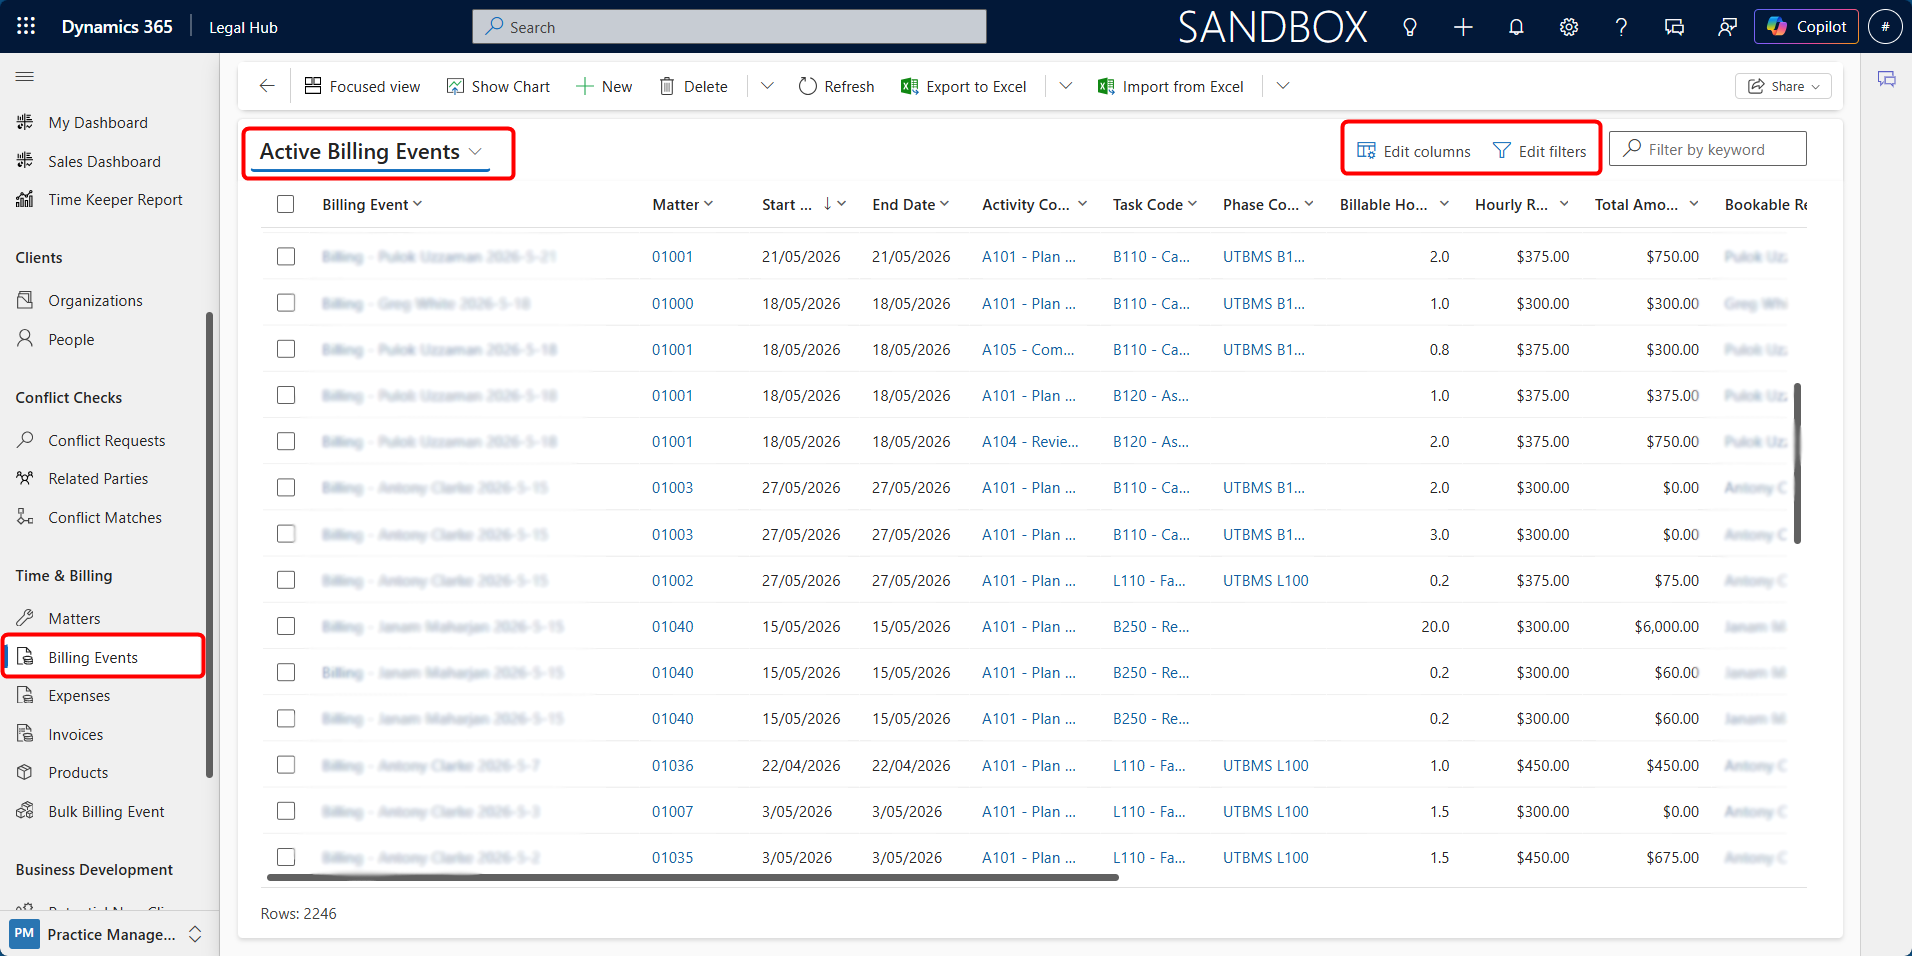
To access Billing Events from the main navigation:
-
Go to Time & Billing.
-
Select Billing Events.
-
Use views and filters to locate the required records.
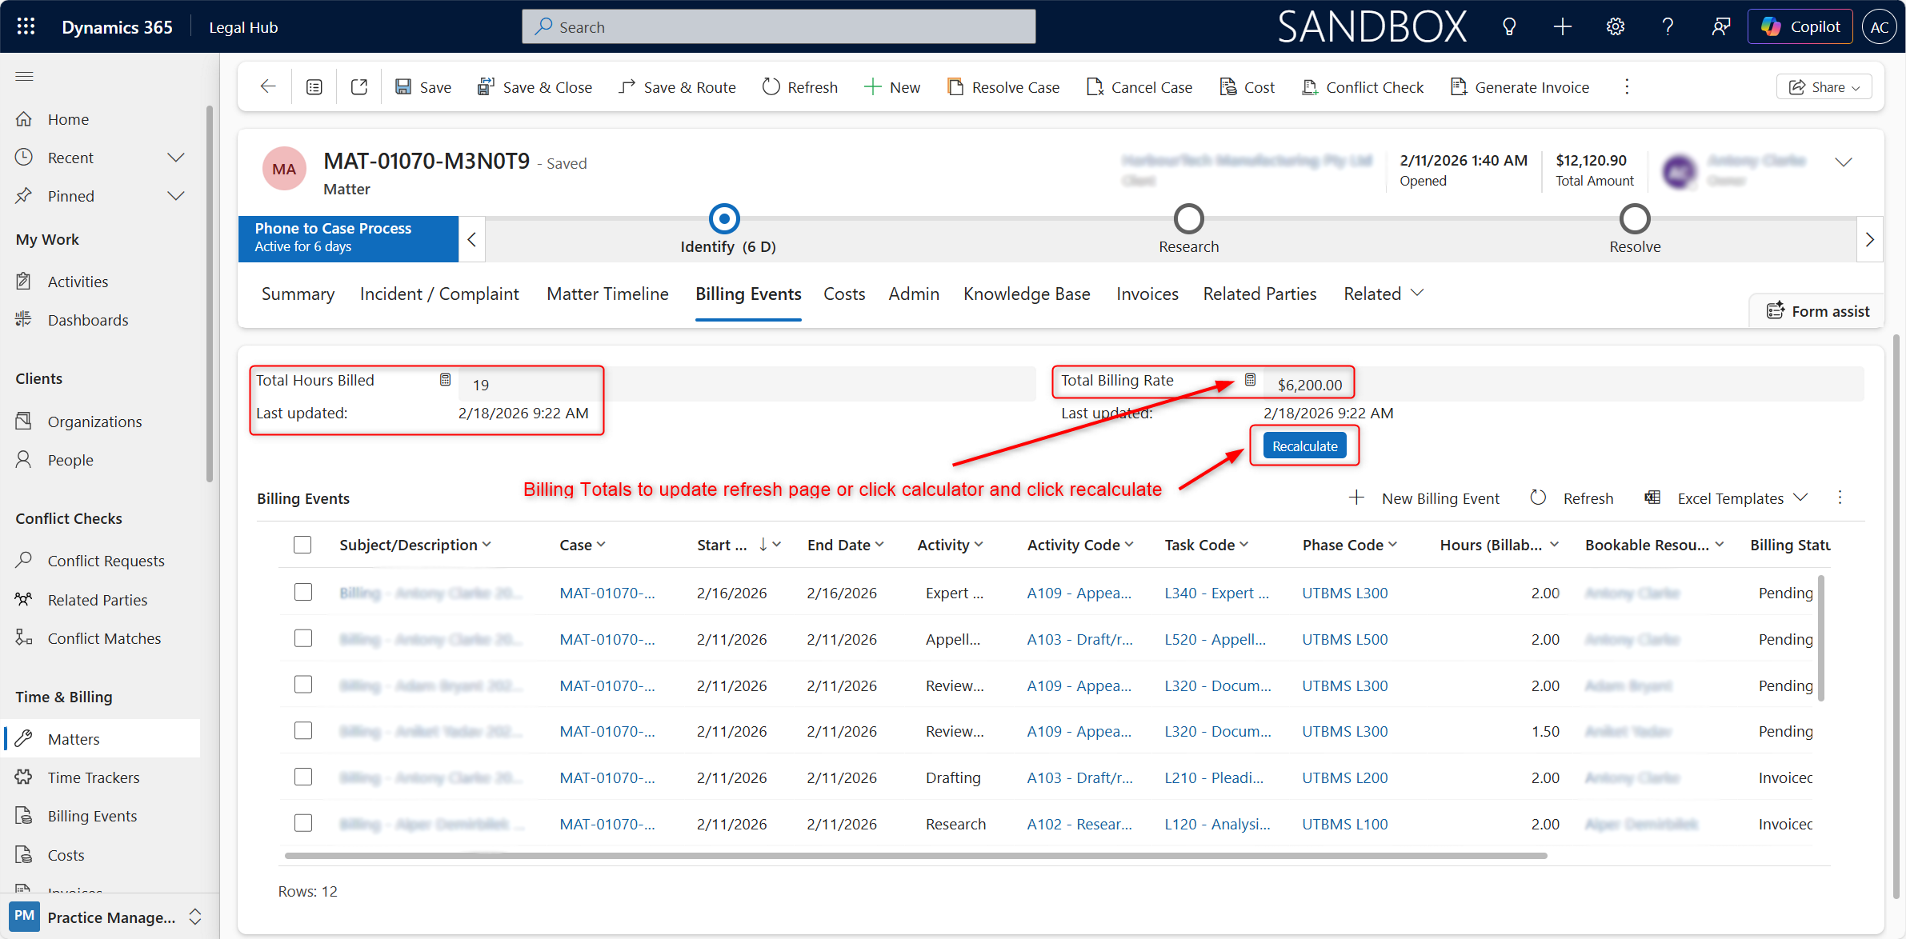
Total Billing Summary
At the top of the Billing Events tab, you will see Total Hours Billed, Total Billing Rate and Last Updated Date.
If totals do not appear up to date:
-
Click the Calculator icon.
-
Select Recalculate.
-
Alternatively, refresh the page.
This ensures totals reflect the latest billing entries.
Billing Event Sources by Billing Type
Billing Events can be created from different sources depending on the Matter’s Billing Type.
| Billing Type | How Billing Events Are Created |
|---|---|
| Per Diem (Time & Charges) | Created from time entries or manually created Billing Events |
| Fixed Fee | Created from Fixed Fee Schedule instalments once they are raised |
| Contingent Fee | Created automatically when the Matter reaches settlement and the contingent fee is calculated |
| Retainer | Created from recurring or configured retainer billing events |
For Per Diem (Time & Charges) matters, Billing Events usually represent billable time recorded by legal staff.
For Fixed Fee matters, users first create fixed fee instalments in the Fixed Fee Schedule. The instalments must then be raised into Billing Events before they can be invoiced. This can happen automatically overnight or manually using the Fixed Fee button on the Matter command bar.
For Contingent Fee matters, the Billing Event is created when the Matter reaches settlement. The system calculates the fee based on the settlement amount and contingent fee percentage, then creates the Billing Event for invoicing.
Creating a New Billing Event
Billing Events can be created in multiple ways. For manual time-based billing, the recommended approach is to use the Billing Event Entry screen, which allows users to create and manage multiple billing entries efficiently.
Billing Events can also be created directly from the Matter using the Billing Event button in the command bar. This is useful when a user needs to quickly create a single billing item against the Matter.
Method 1: Billing Event Entry (Recommended)
This method allows users to create multiple billing events in one go, with options to clone, edit, and review before saving.
Steps
-
Open the required Matter.
-
From the top command bar, click Billing Event.
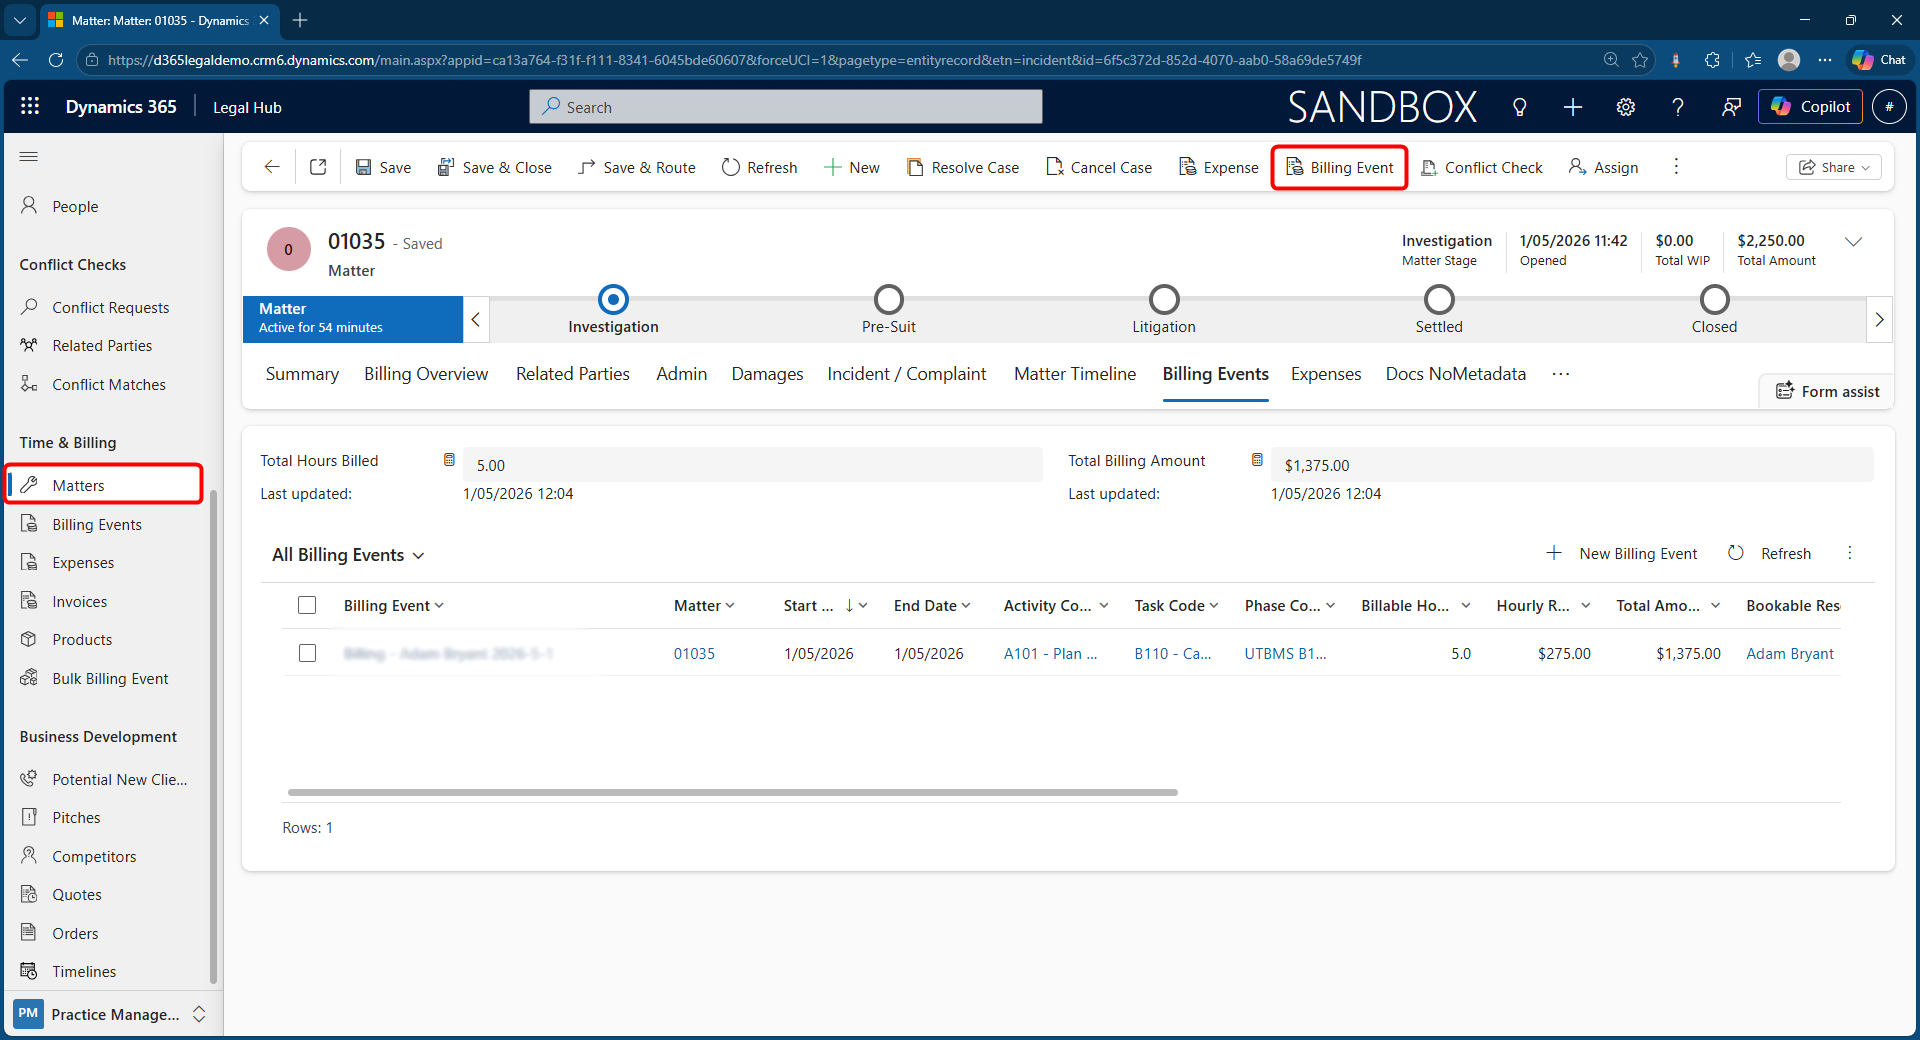
- The Billing Event Entry window will open.
Enter the required details:
-
Matter (auto filled), Resource
-
Start Date / End Date
-
Billable Hours
-
Activity Code, Task Code and Description
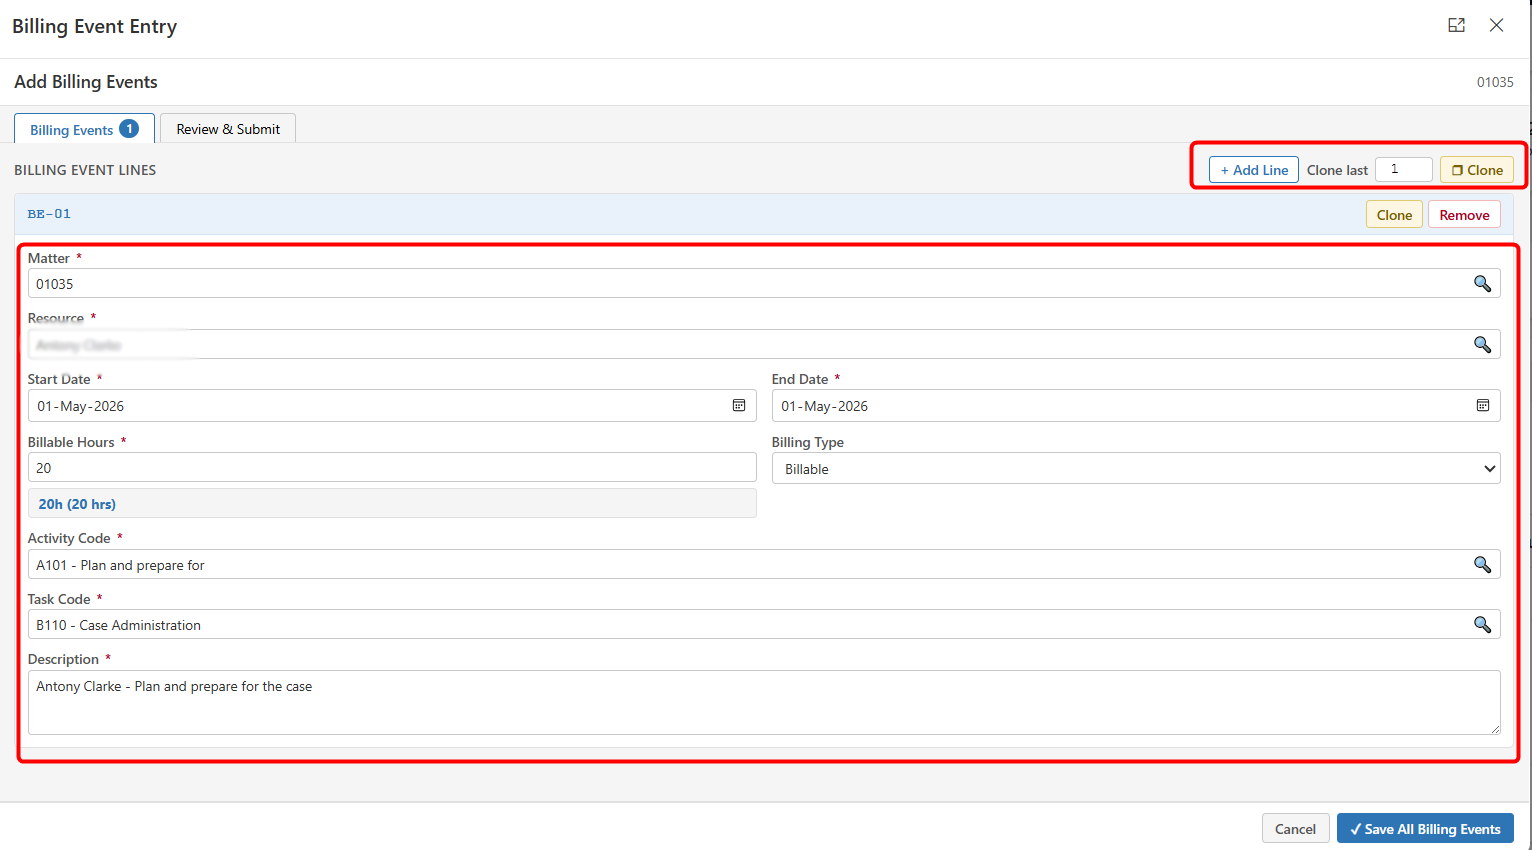
Working with Billing Event Lines
The Billing Event Entry screen allows you to manage multiple entries efficiently.
-
Add Line
a. Click + Add Line to create additional billing event entries
b. Useful for adding multiple time entries in one session
-
Clone
a. Use Clone to duplicate an existing line
b. Option to clone multiple times
c. Ideal when creating similar entries with minor changes
-
Remove
a. Click Remove to delete a draft line
b. This only removes the draft (not yet saved records)
-
Review & Submit
a. Once all billing event lines are added → Click Review & Submit
i. Review total number of entries, total hours, resource summary, etc.
ii. Click Save All Billing Events
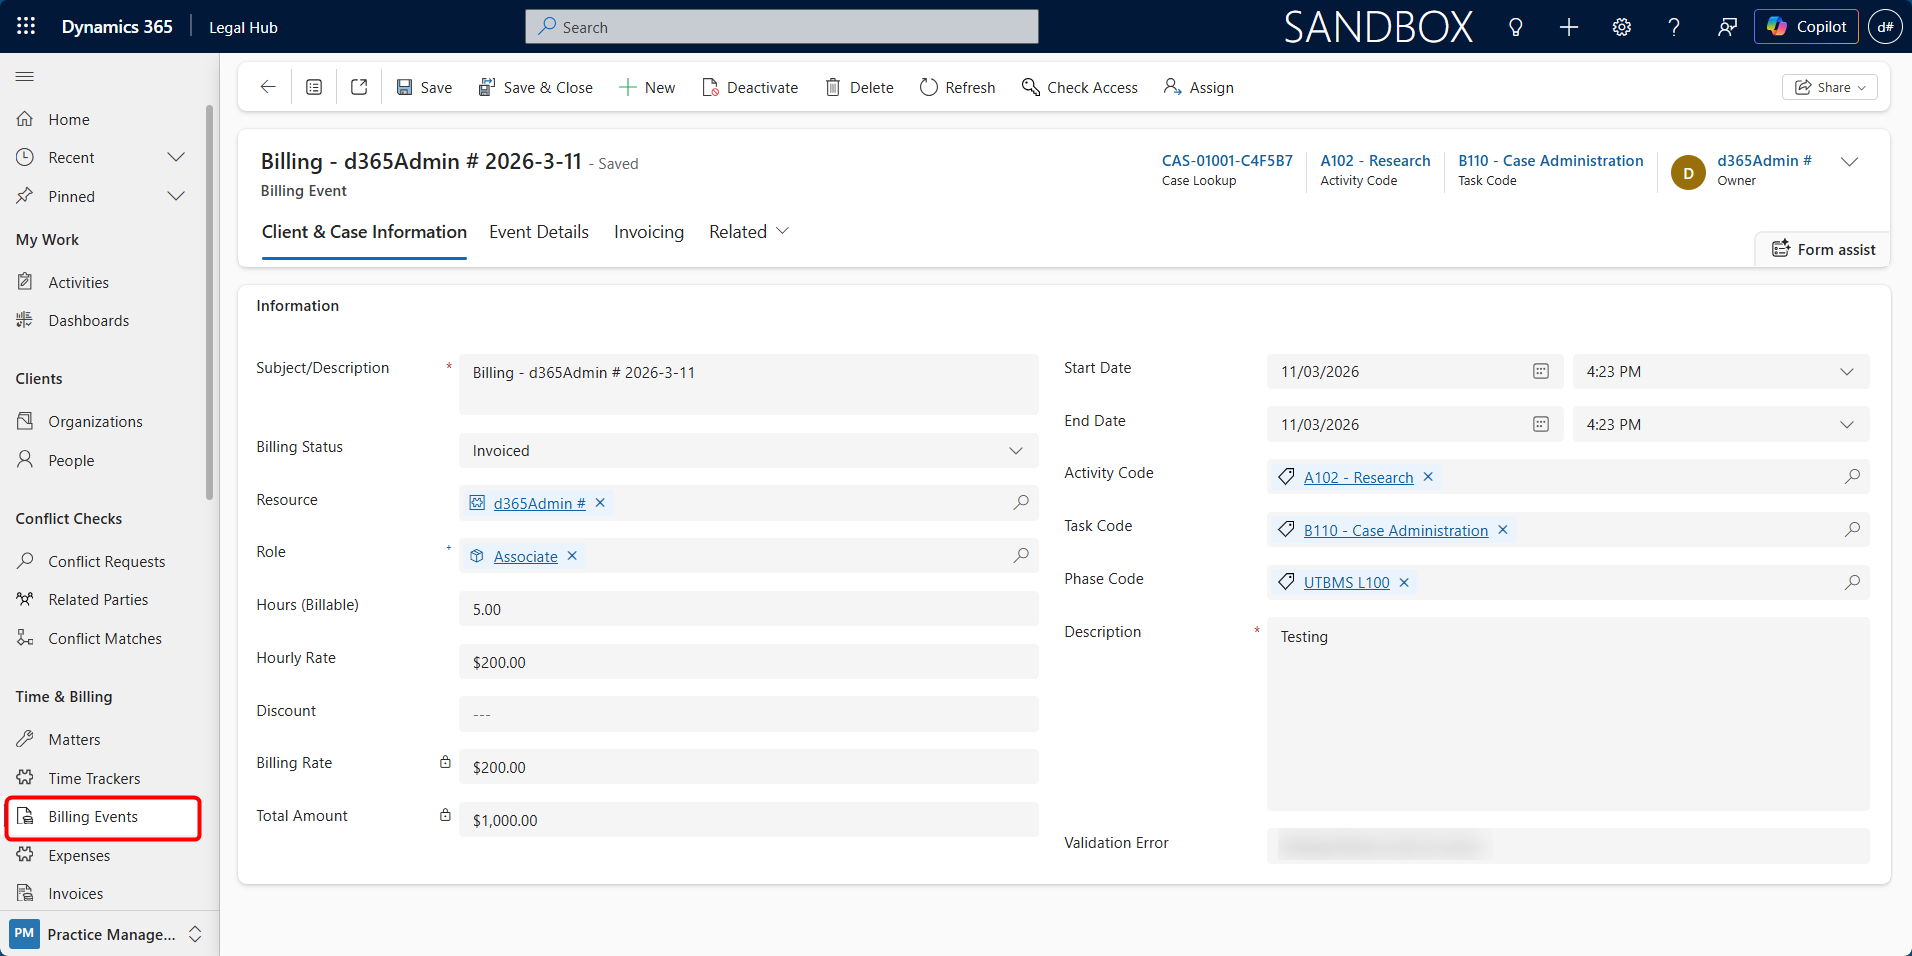
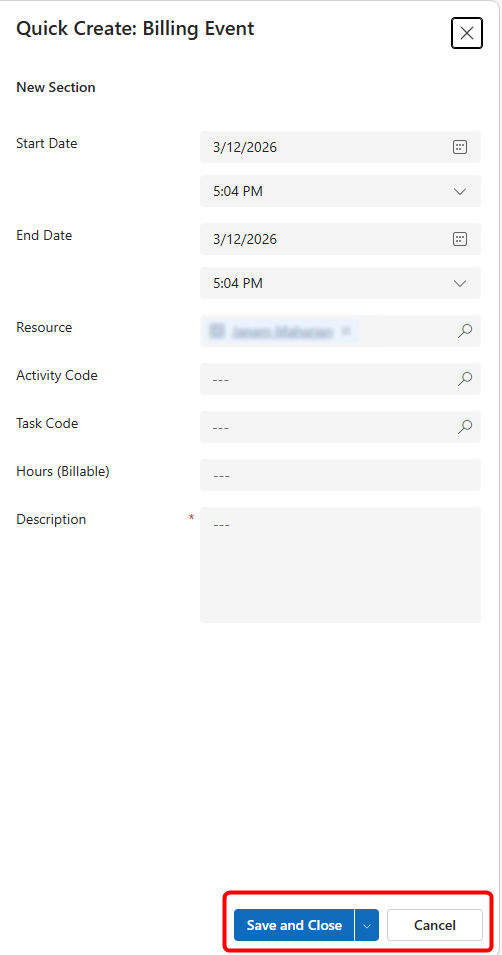
Method 2: Quick Create (Basic Method)
Billing Events can also be created individually from the Matter.
-
Go to the Billing Events tab on the Matter page.
-
Click + New Billing Event.
-
A Quick Create window will open.
-
Enter:
-
Start Date
-
End Date
-
Resource
-
Activity Code
-
Task Code
-
Hours (Billable)
-
Description
-
-
Click Save and Close.
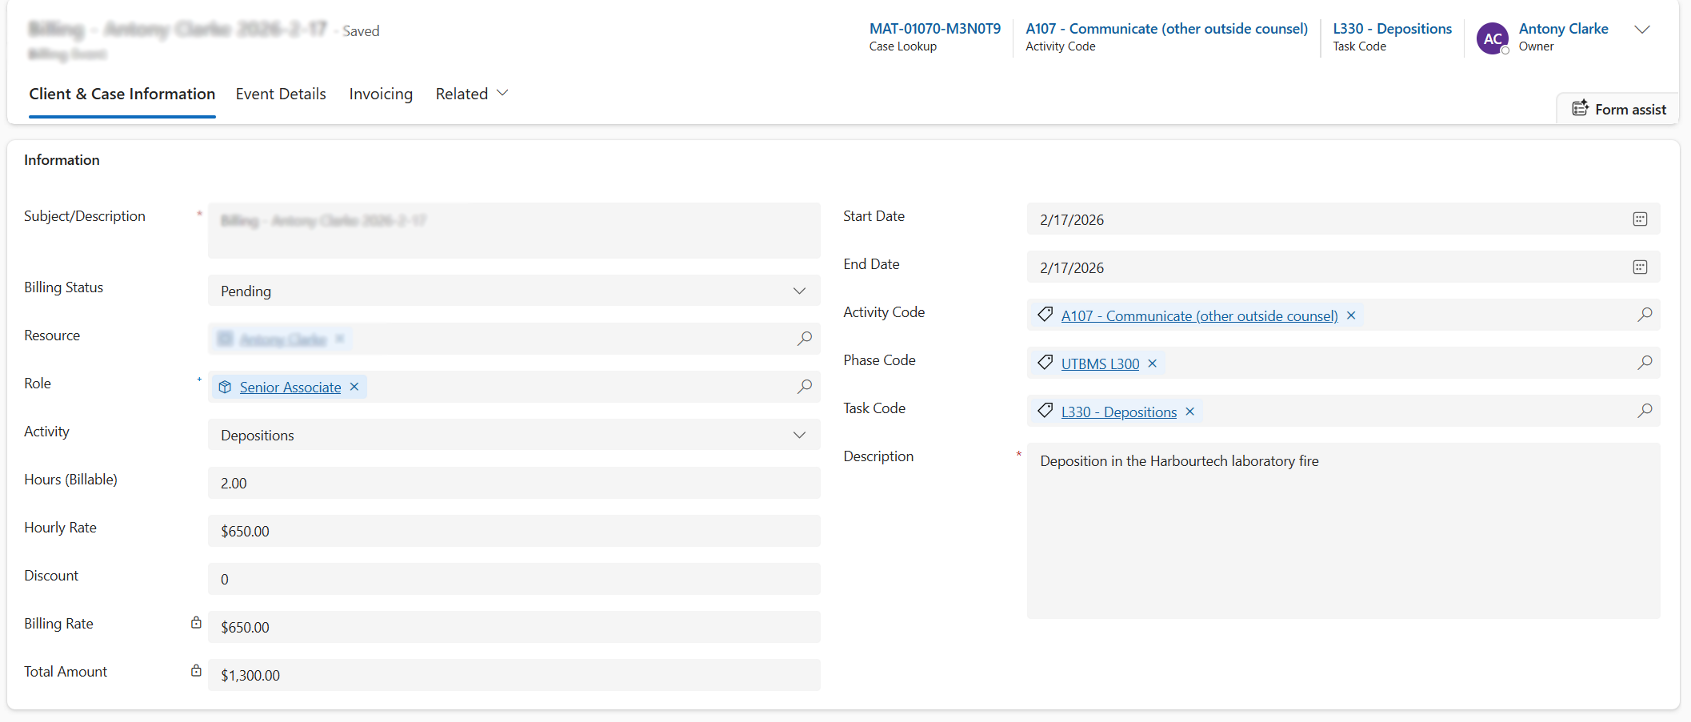
The system will automatically:
-
Apply the appropriate Role
-
Populate the Hourly Rate
-
Calculate Billing Rate
-
Calculate Total Amount (Hours x Billing Rate = Total Amount)

To view full details, double-click the Billing Event record.
Viewing & Filtering Billing Events
Billing Events can be viewed and filtered using different system views. This helps users track entries based on their status and readiness for invoicing.
Using Views to Filter Billing Events
-
Navigate to:
a. Matter → Billing Events tab, or
b. Time & Billing → Billing Events
-
Use the view selector dropdown to switch between views.
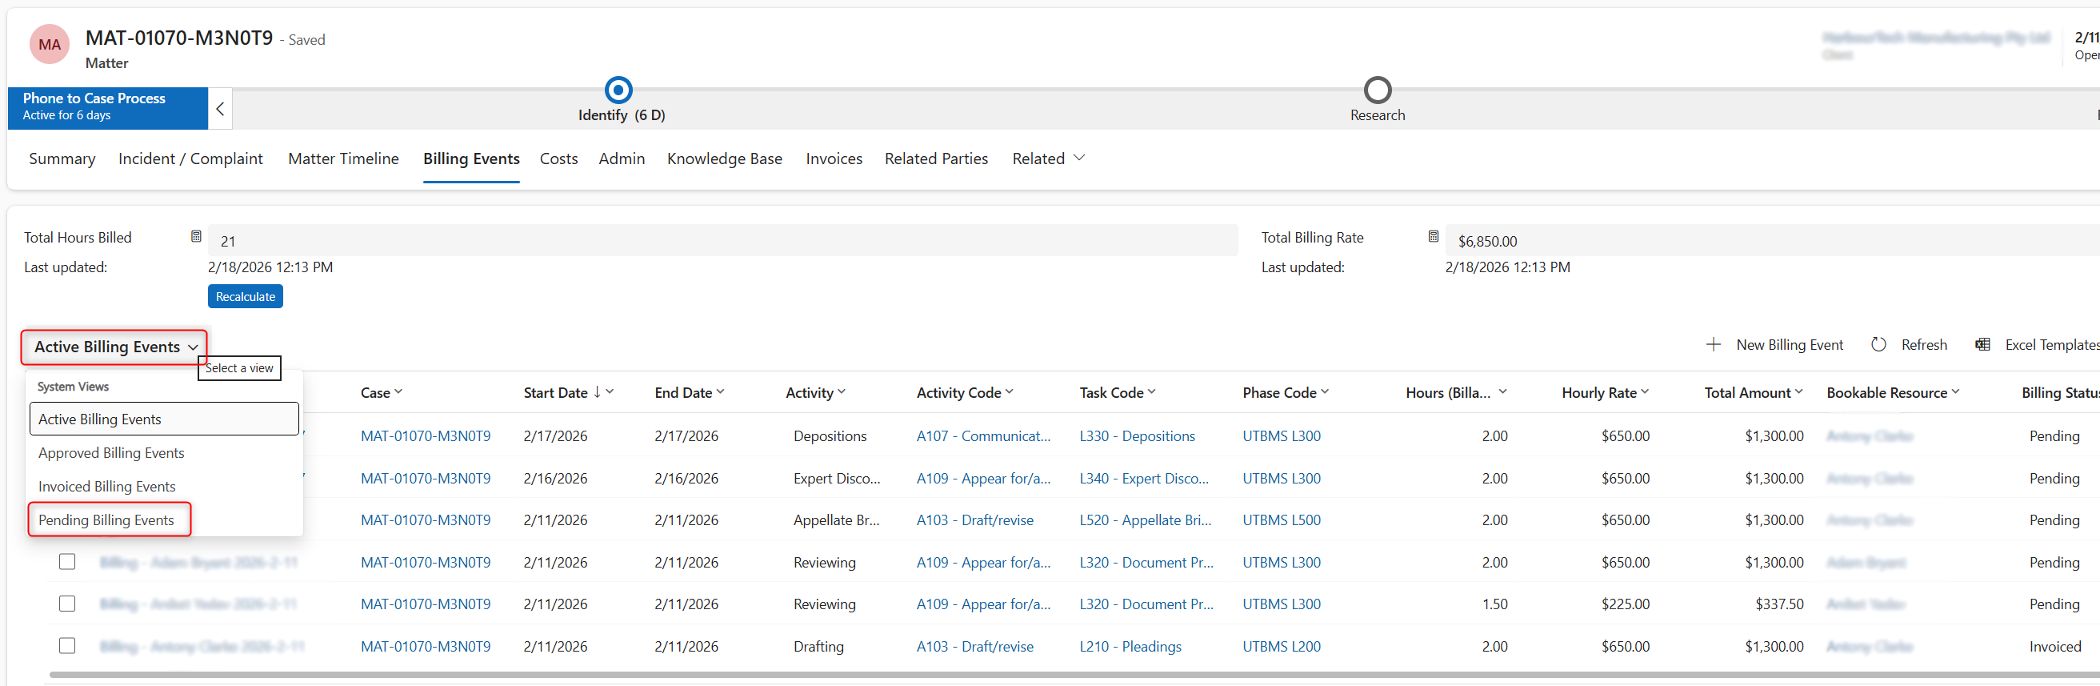
Available Views
Common views include:
-
Active Billing Events Shows all active entries
-
Pending Billing Events Shows entries that are yet to be approved
-
Approved Billing Events Shows entries ready for invoicing
-
Invoiced Billing Events Shows entries that have already been invoiced
Why Use Filters
Filtering helps users:
-
Identify entries that require approval
-
Track which records are ready for invoicing
-
Review previously invoiced entries
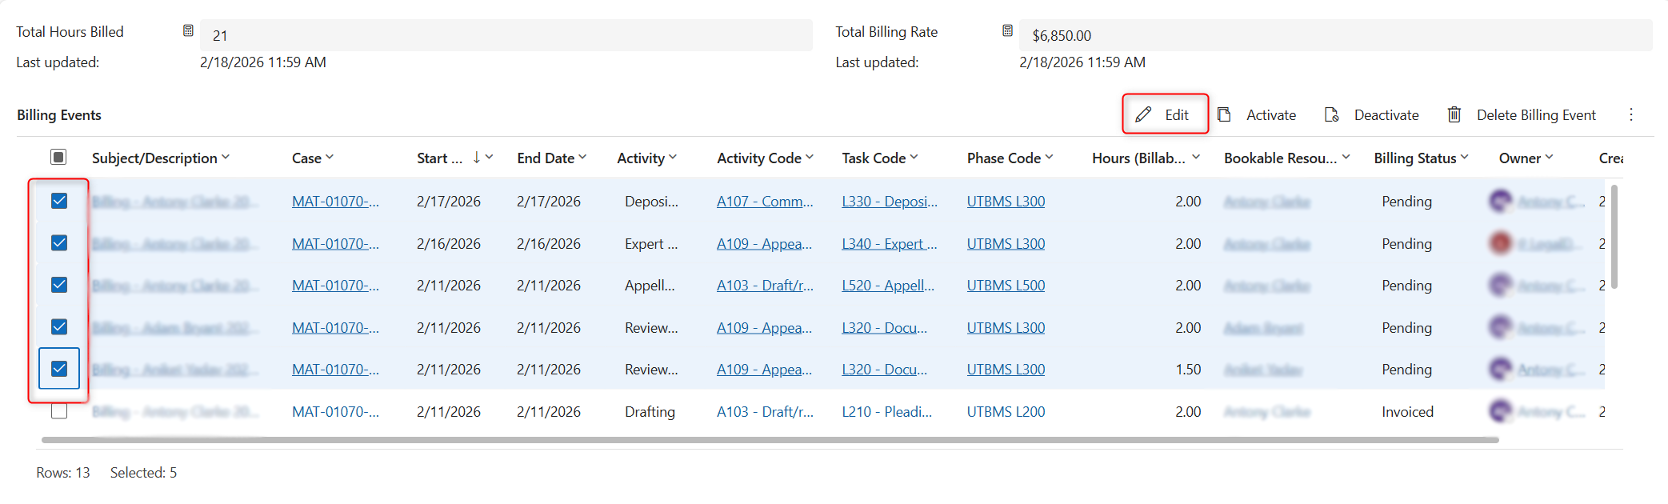
Approving Billing Events
Billing Events can be approved individually or in bulk.
To approve multiple Billing Events:
-
Navigate to:
a. Matter → Billing Events tab, or
b. Time & Billing → Billing Events
-
Select the relevant Billing Events using the checkboxes.
-
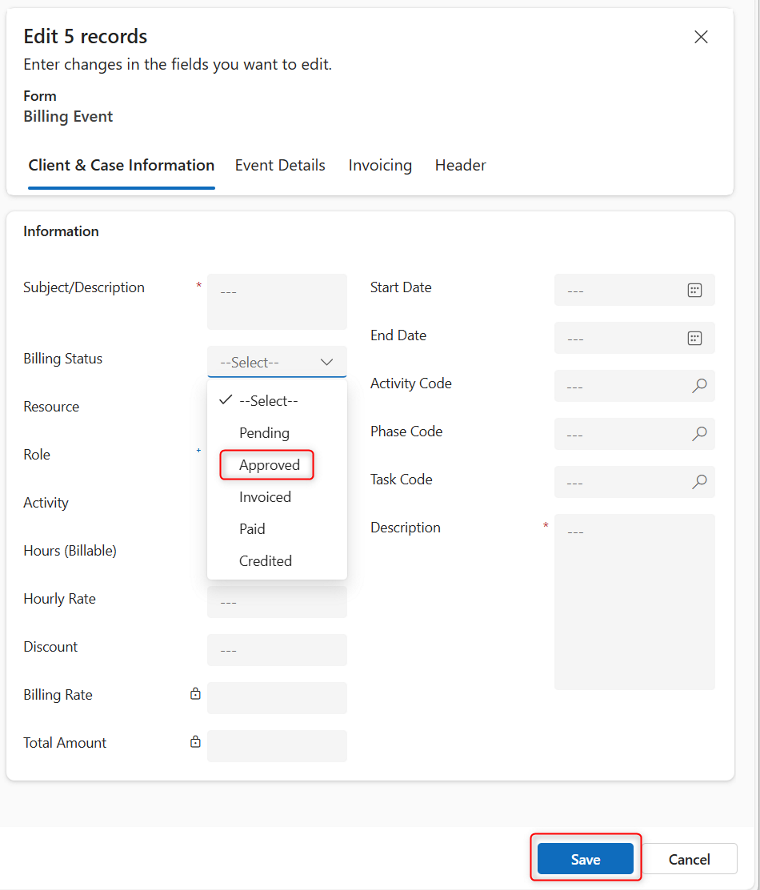
Click Edit from the command bar.
-
In the Billing Status field, select Approved.
-
Click Save.
All selected records will update to Approved.
This is how to approve a single Billing Event.
-
Open the Billing Event record.
-
Update the Billing Status field to Approved.
-
Click Save.
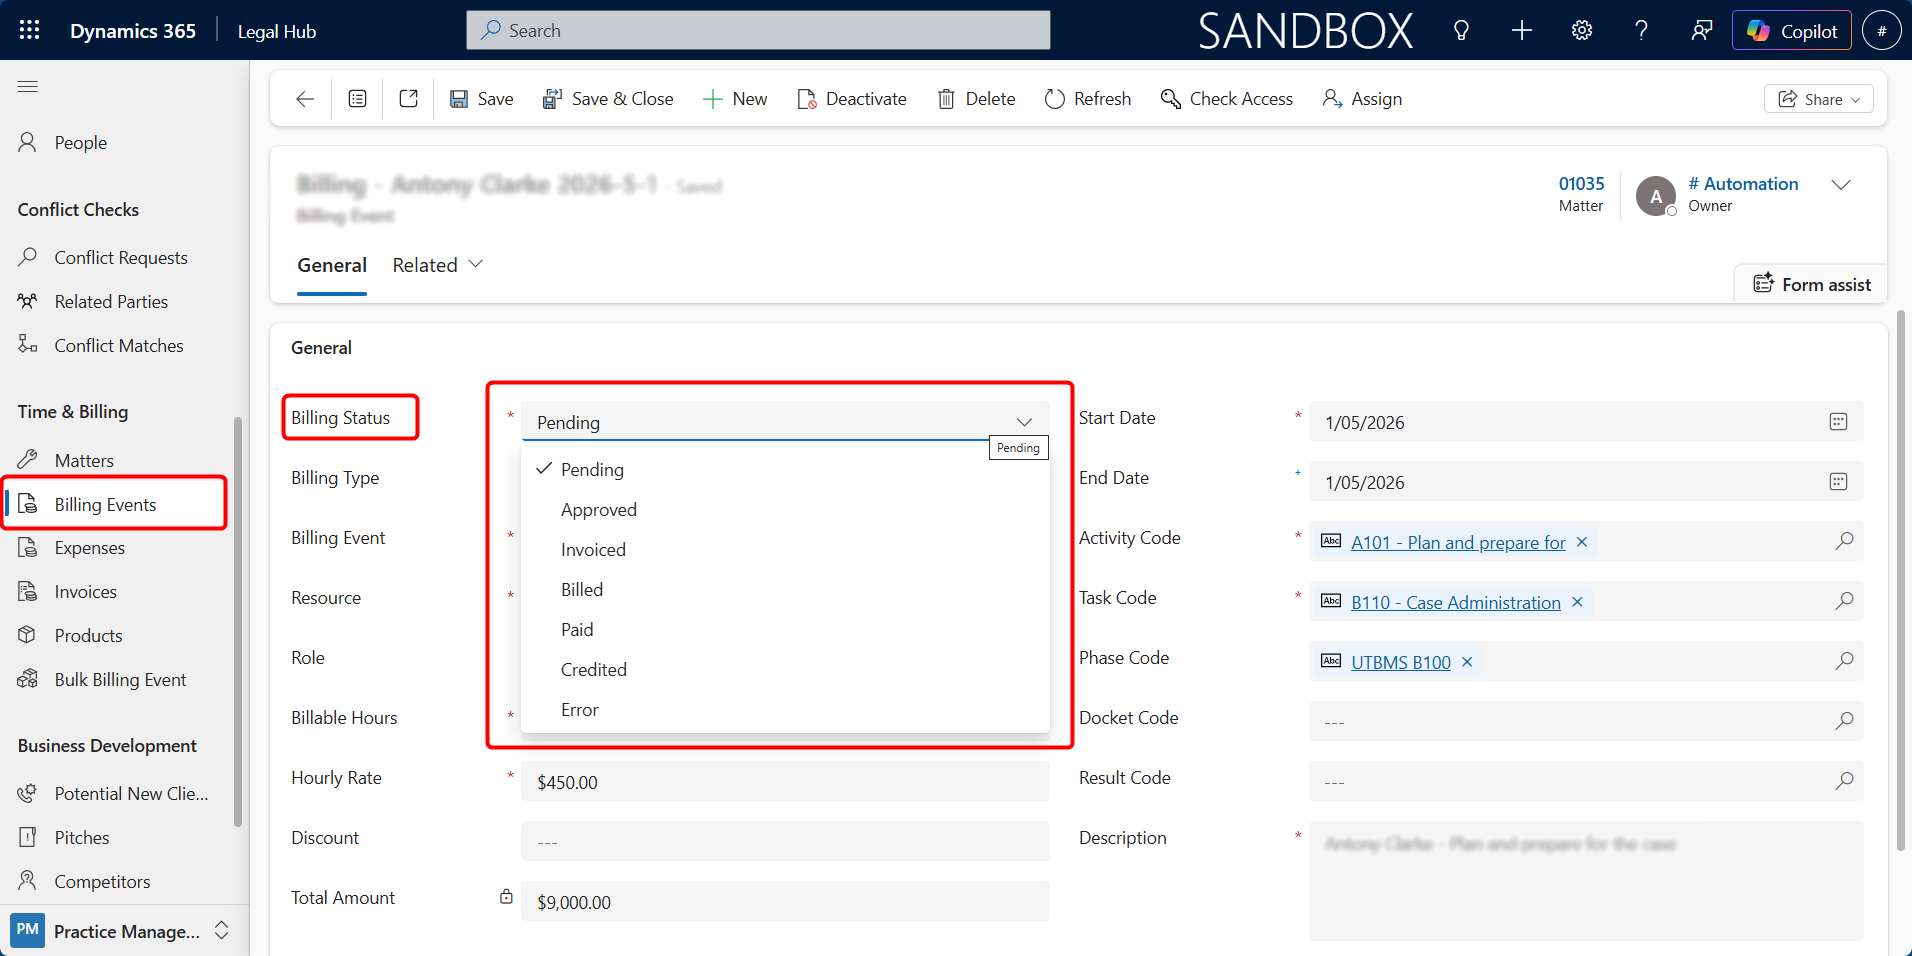
Billing Status & Workflow
Each billing entry moves through a simple lifecycle:
-
Time is logged (Status: Pending)
-
Reviewed / approved
-
Included in invoice generation
-
Status updates to Invoiced
This ensures structured revenue tracking and proper financial control.