Legal User Guide for Microsoft Dynamics 365
Legal Case Management Section
Documents
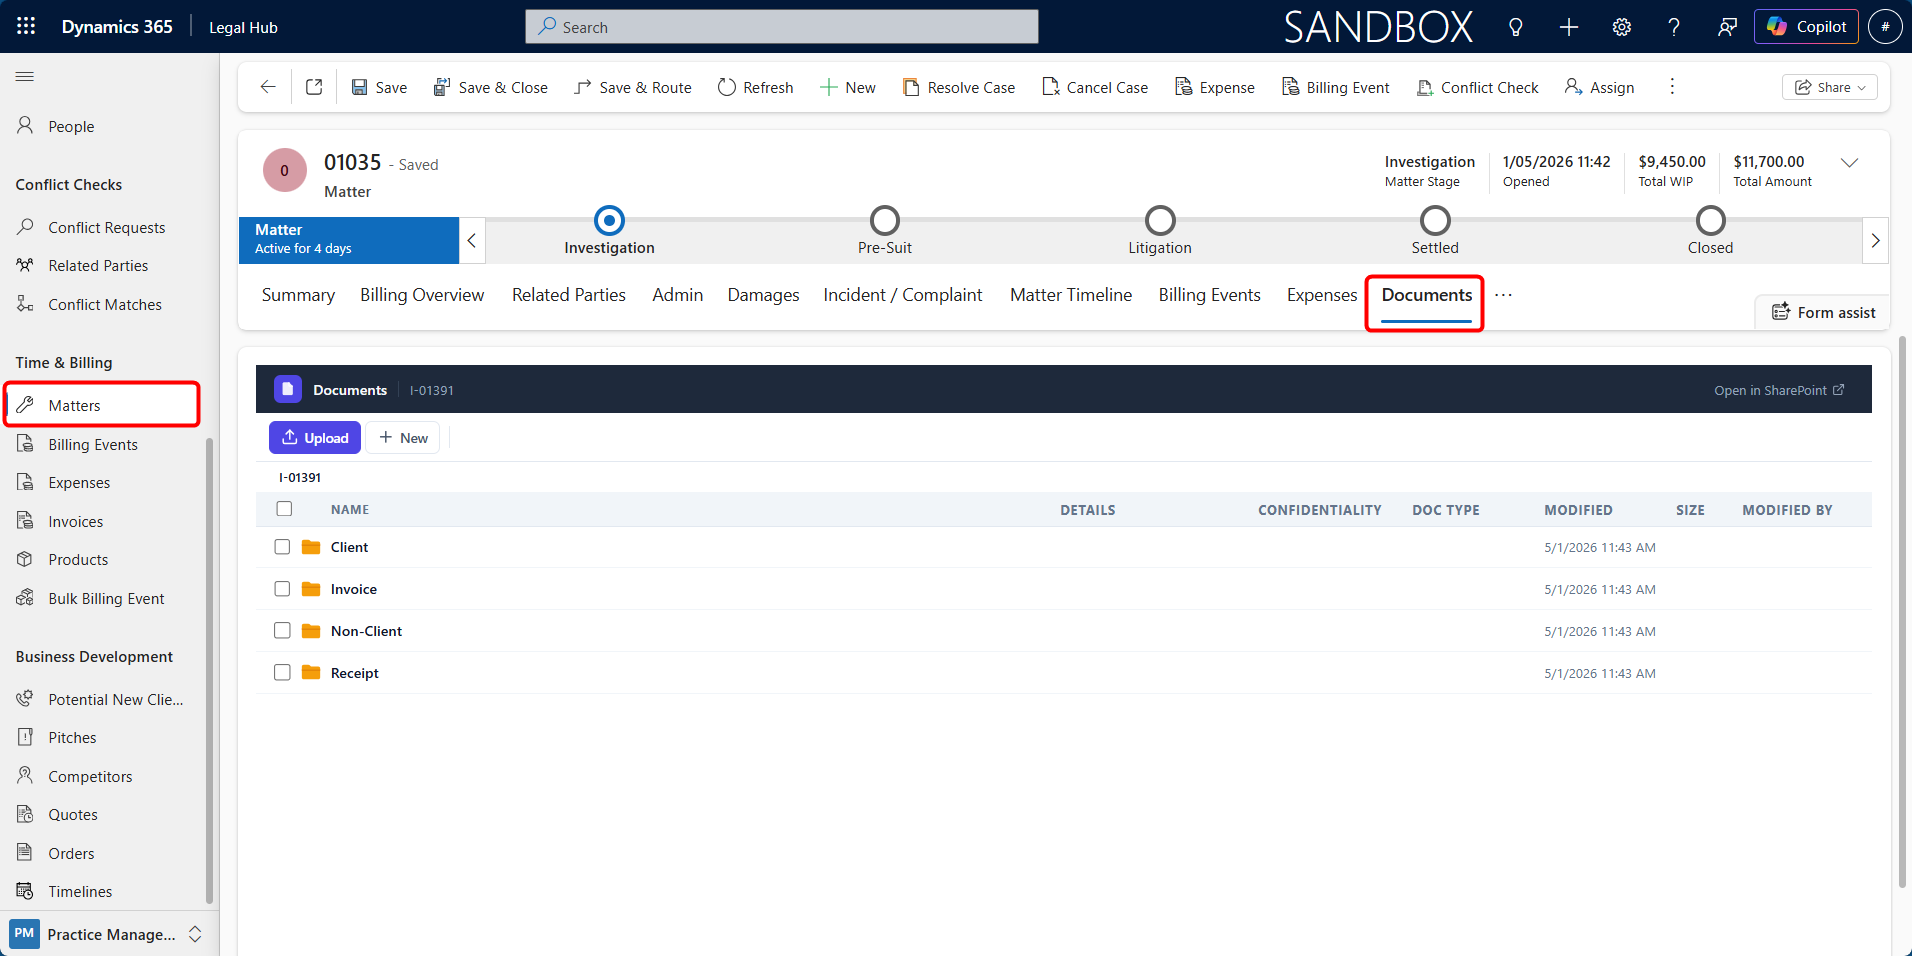
The Documents tab is the central document management area for a Matter. It allows users to upload, view, manage, and tag documents directly from the Matter record.
Documents uploaded through this tab are stored in the connected SharePoint document location for the Matter. This ensures secure storage, version control, and structured document organisation while allowing users to manage files from within Dynamics 365.
The Documents tab works similarly to the standard Dynamics 365 Files tab, with additional document management features such as metadata tagging.
What You See in the Documents Tab
Under the Documents tab, users can:
-
View uploaded documents and folders for the Matter.
-
Upload files directly.
-
Drag and drop files into the document area.
-
Open the Matter document location in SharePoint.
-
Check documents out and check them back in.
-
Delete documents, if permitted.
-
Add and view metadata such as Document Type, Confidentiality Level, Counterparty, and Notes.
Each Matter is linked to its own SharePoint document location, where uploaded files are stored.
Accessing the Documents Tab
To access Matter documents:
-
Navigate to Time & Billing > Matters.
-
Open the required Matter.
-
Select the Documents tab.
The Documents area will open and display the files and folders linked to the Matter.
Uploading Documents
Users with permission can upload files directly from the Documents tab.
Follow these steps to upload a document:
-
Open the required Matter.
-
Go to the Documents tab.
-
Upload the document using one of the available options:
a. Drag and drop the file into the document area, or
b. Use the upload option to select a file from your computer
-
Wait for the file to upload
Once uploaded, the document will appear in the Documents list and will be stored in the Matter’s connected SharePoint document location.
Viewing and Managing Documents
From the Documents tab, users can manage uploaded documents without leaving the Matter record.
Users can:
-
Select a document from the list.
-
Open documents in SharePoint or Office.
-
Check documents out before editing.
-
Check documents back in after changes.
-
Delete documents, if required and permitted.
-
Navigate between folders, such as invoice or receipt folders where available.
The Open in SharePoint option can be used when users need to access the full SharePoint document library.
Adding Document Metadata
The Documents tab allows users to add metadata to uploaded documents. Metadata helps classify files and makes it easier to identify the document purpose, confidentiality level, counterparty, and related notes.
Metadata can be added in two ways:
-
During document upload
-
After the document has already been uploaded
Method 1: Add Metadata During Upload
Users can add metadata while uploading a new document. The system can also analyse the document and suggest metadata automatically using AI.
Follow these steps to add metadata during upload:
-
Open the required Matter record.
-
Select the Documents tab.
-
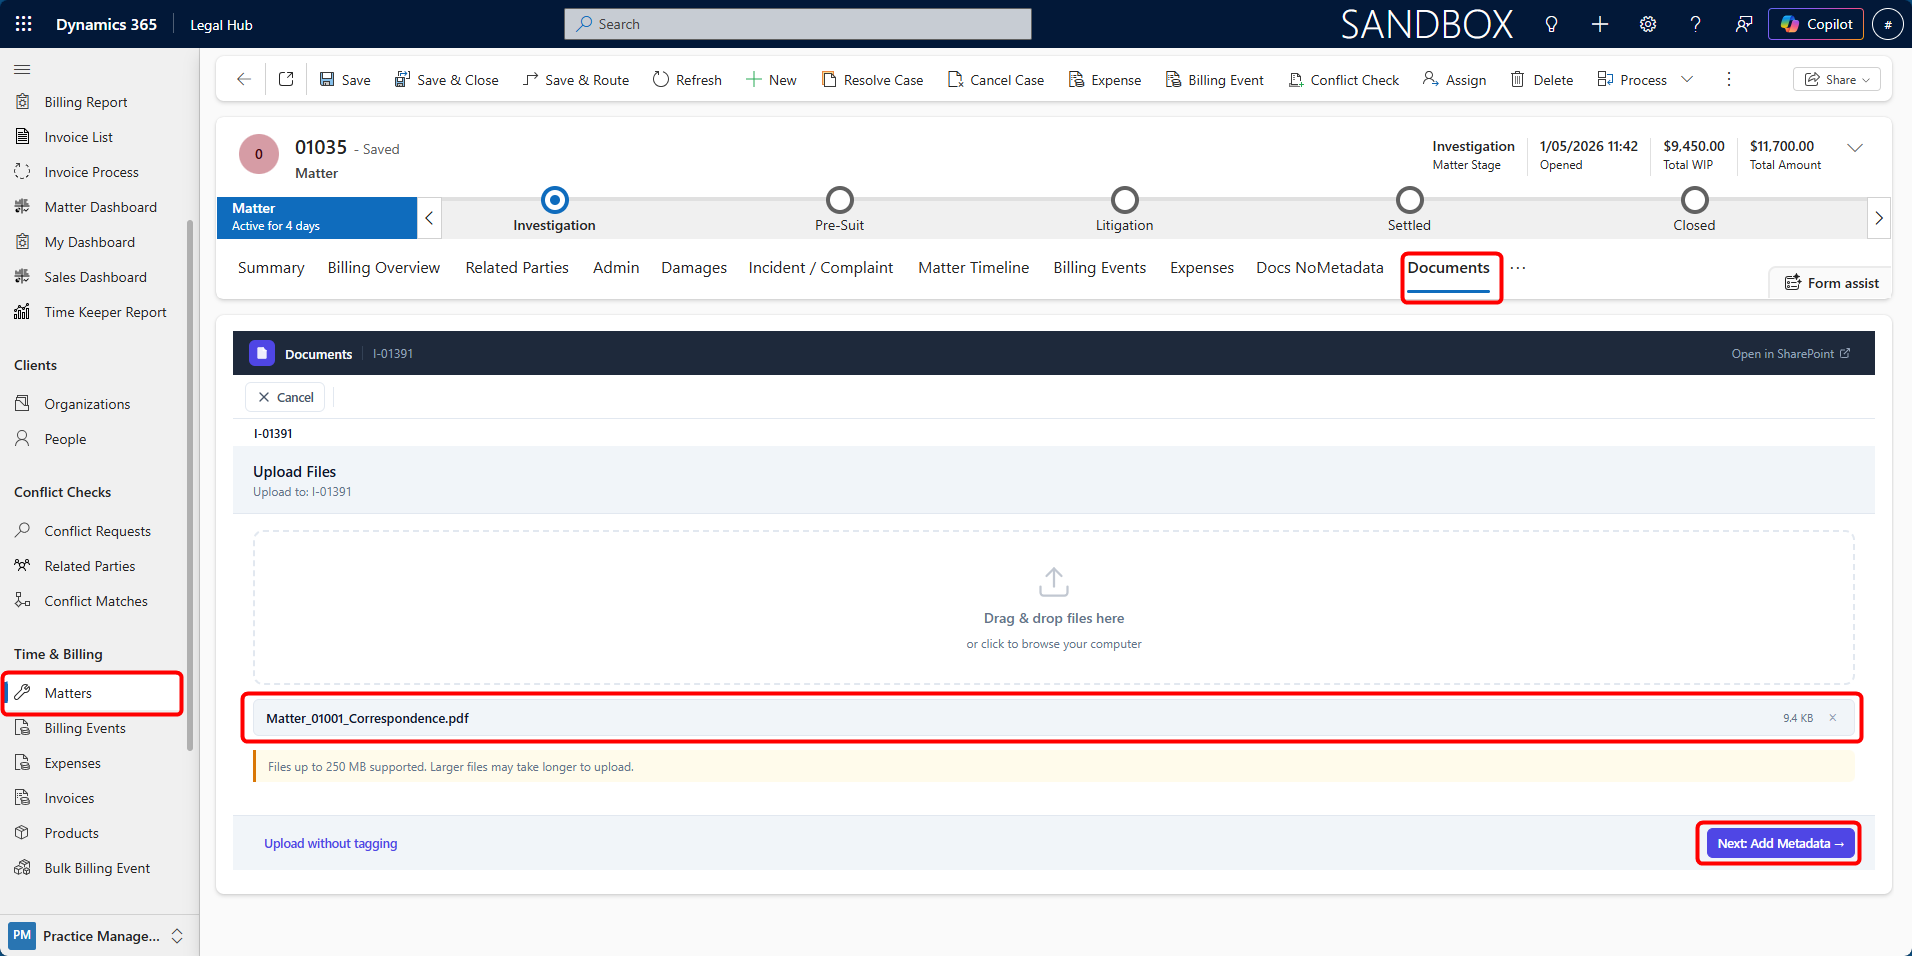
Click Upload, then either:
a. Select file(s) from your computer, or
b. Drag and drop file(s) into the upload area
-
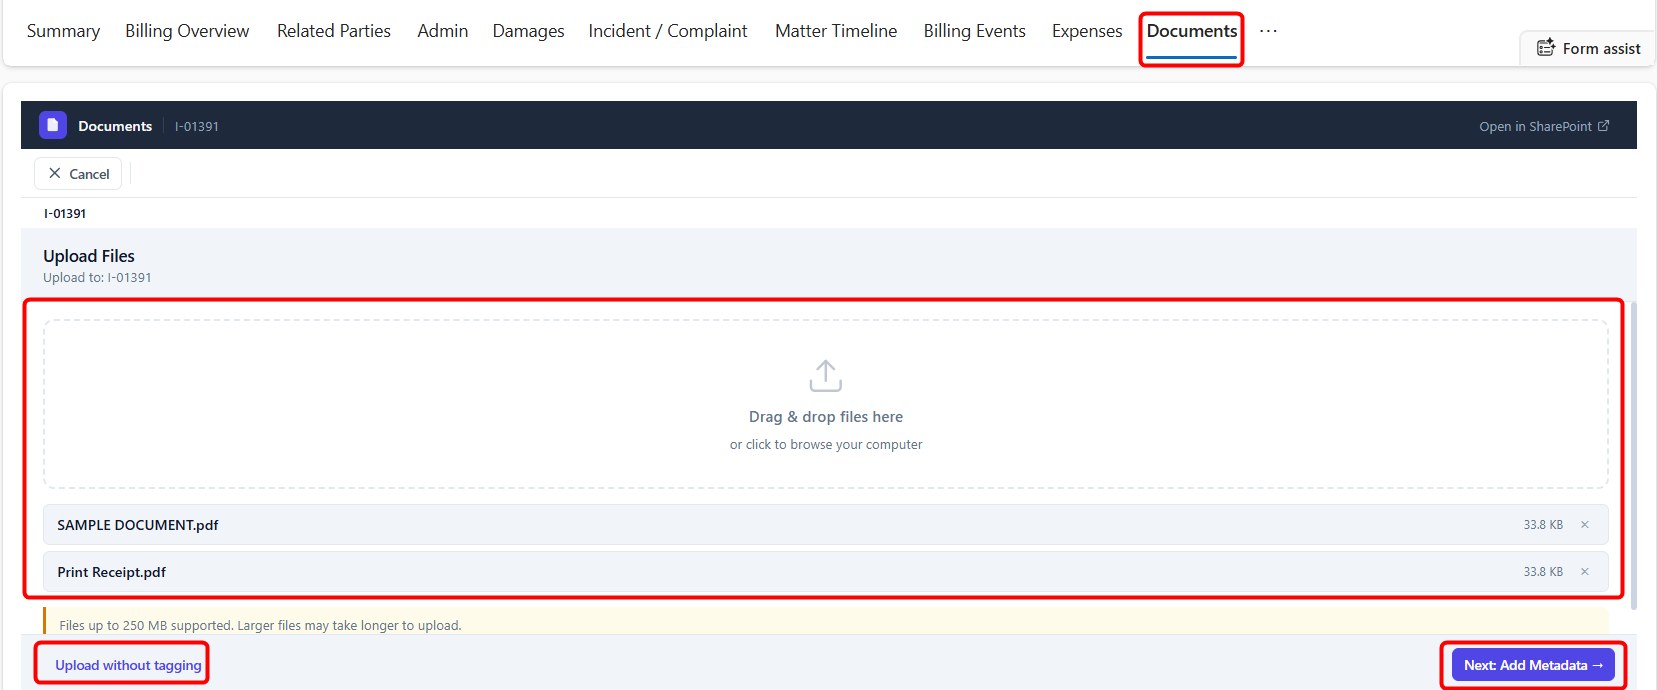
Once the file is selected, choose one of the following options:
a. Upload without tagging — Uploads the file directly without adding metadata.
b. Next: Add Metadata — Opens the metadata tagging panel before uploading.
-
Click Next: Add Metadata.
-
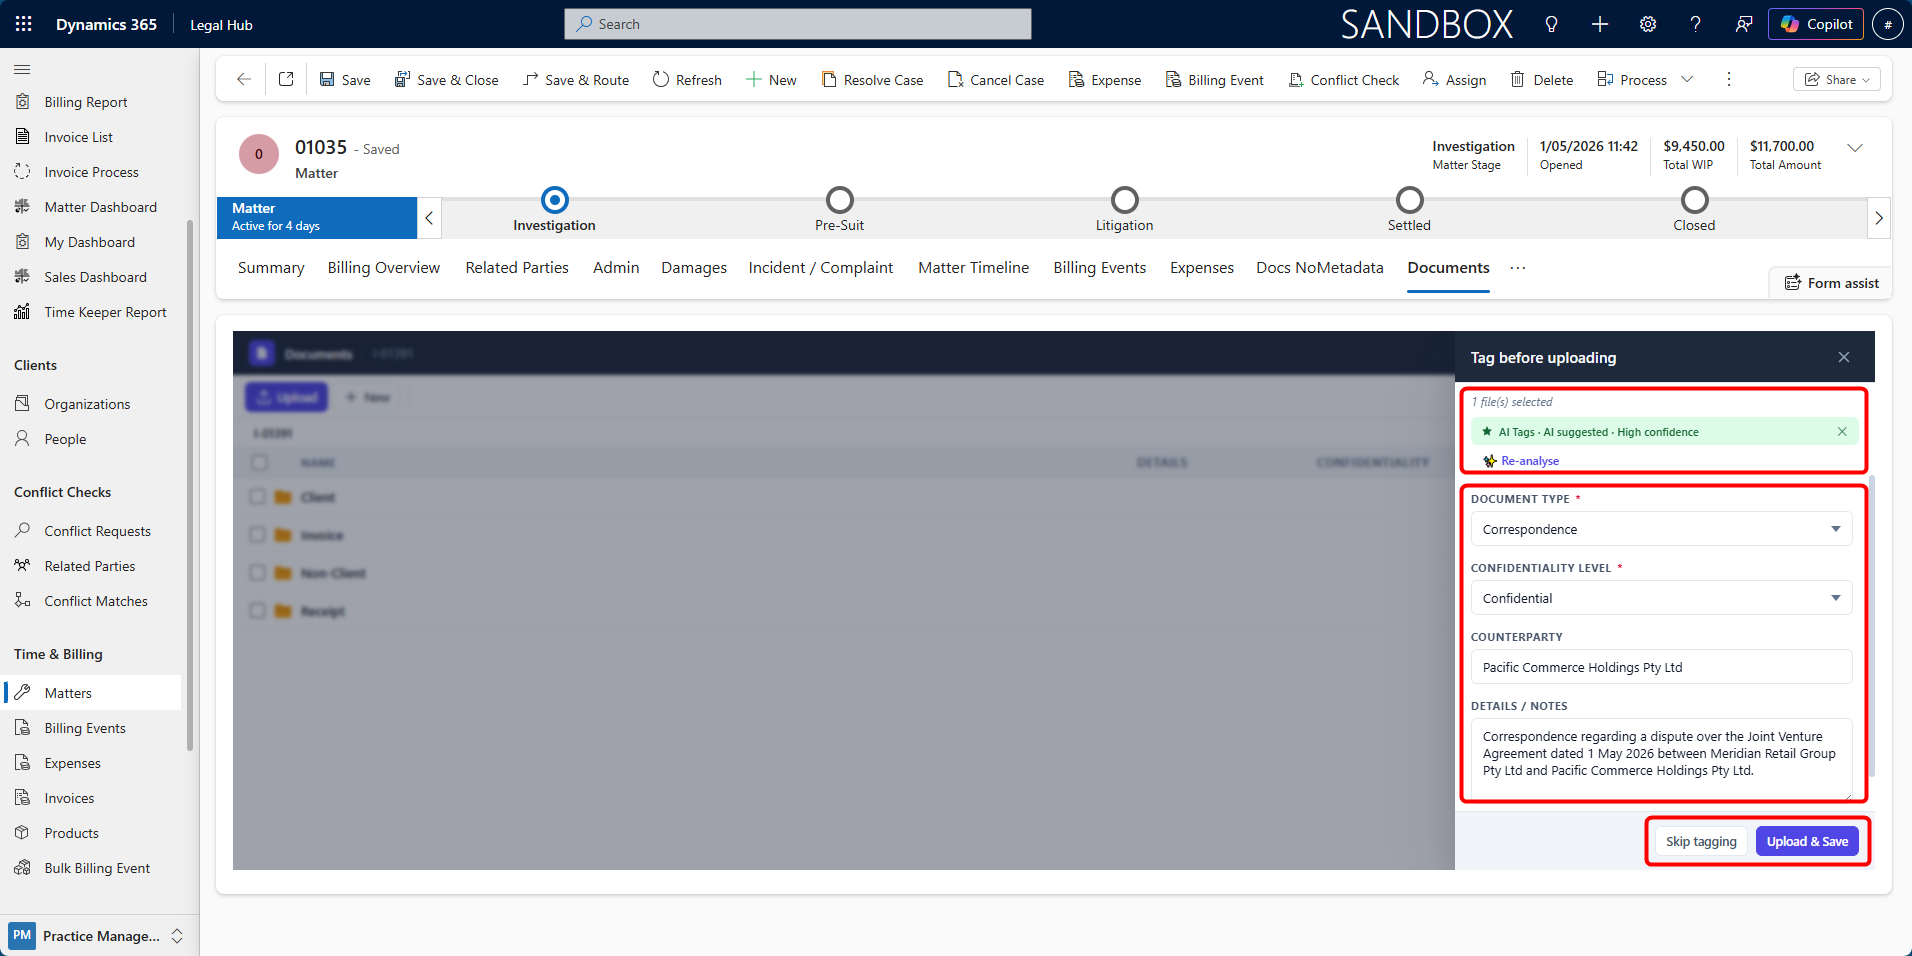
The AI-powered analyser will review the selected document and suggest metadata where possible.
-
Review the suggested metadata fields:
a. Document Type
b. Confidentiality Level
c. Counterparty
d. Details / Notes
-
If required, update the suggested values manually.
-
If the suggested metadata does not look correct, click Re-analyse.
-
Click Upload & Save to upload the document and save the metadata.
The document will be saved to the Matter’s SharePoint document location with the selected metadata applied.
Method 2: Add or Edit Metadata After Upload
Users can also add or update metadata after a document has already been uploaded.
Follow these steps to add or edit metadata after upload:
-
Open the Documents tab on the Matter.
-
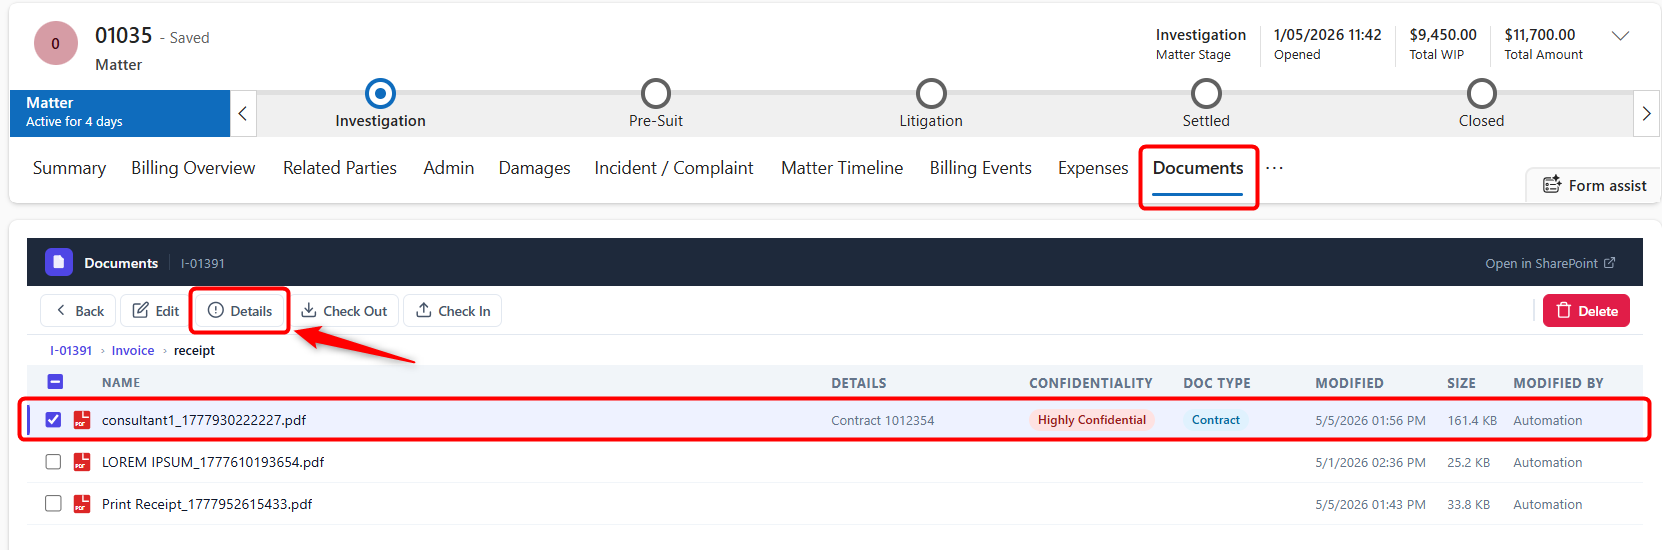
Select the document you want to update.
-
Click Details from the top bar.
-
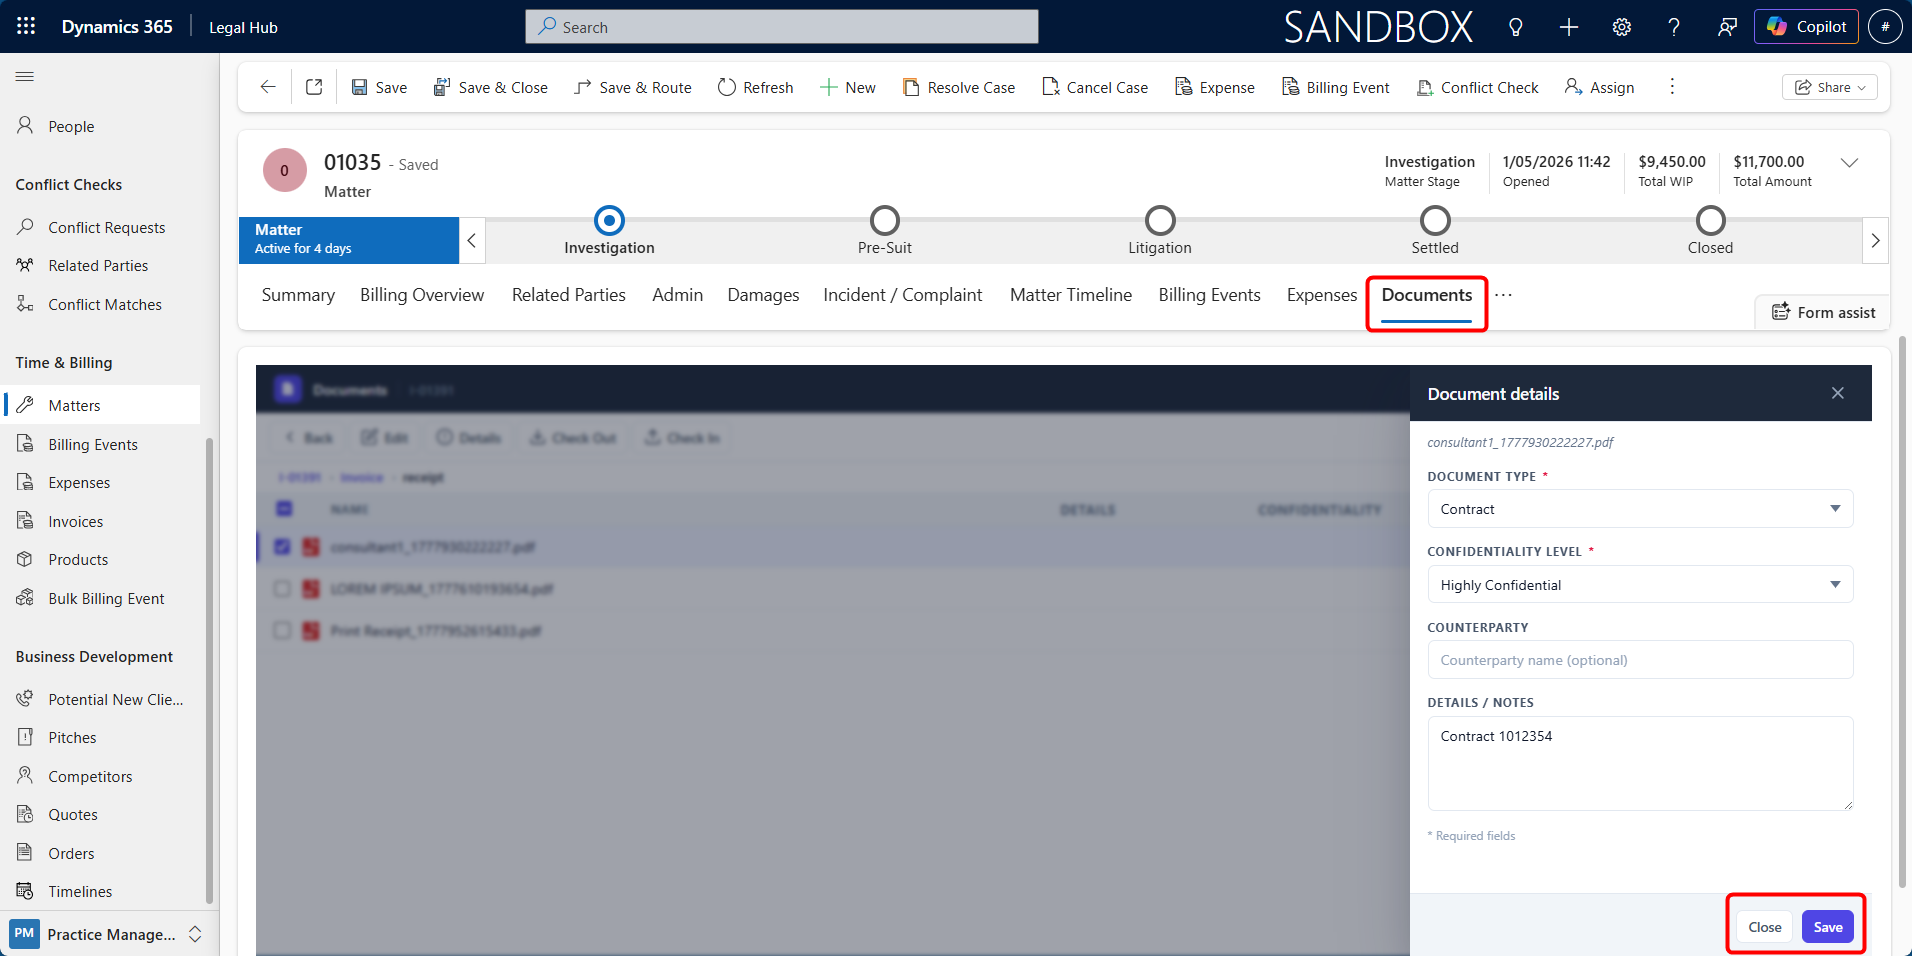
A details panel will appear on the right side of the screen.
-
Add or update the relevant metadata fields:
a. Document Type - Select the type of document, such as Contract, Receipt, Correspondence, or other available categories.
b. Confidentiality Level - Select the appropriate confidentiality level.
c. Counterparty - Enter the related counterparty name, if applicable.
d. Details / Notes - Add any useful notes or description.
-
Click Save.
The metadata will be saved against the selected document.
Viewing Existing Metadata
To view metadata later:
-
Select the document.
-
Click Details.
-
Review the saved metadata in the details panel.
Important Notes
-
Metadata can be added during upload or after upload.
-
AI-suggested metadata should be reviewed before saving.
-
Users can manually edit AI-suggested values before uploading.
-
The Details button appears after selecting a document.
-
Selecting Upload without tagging uploads the file without metadata.
-
Metadata helps improve document organisation, searching, and review.
First-Time Access/Troubleshooting
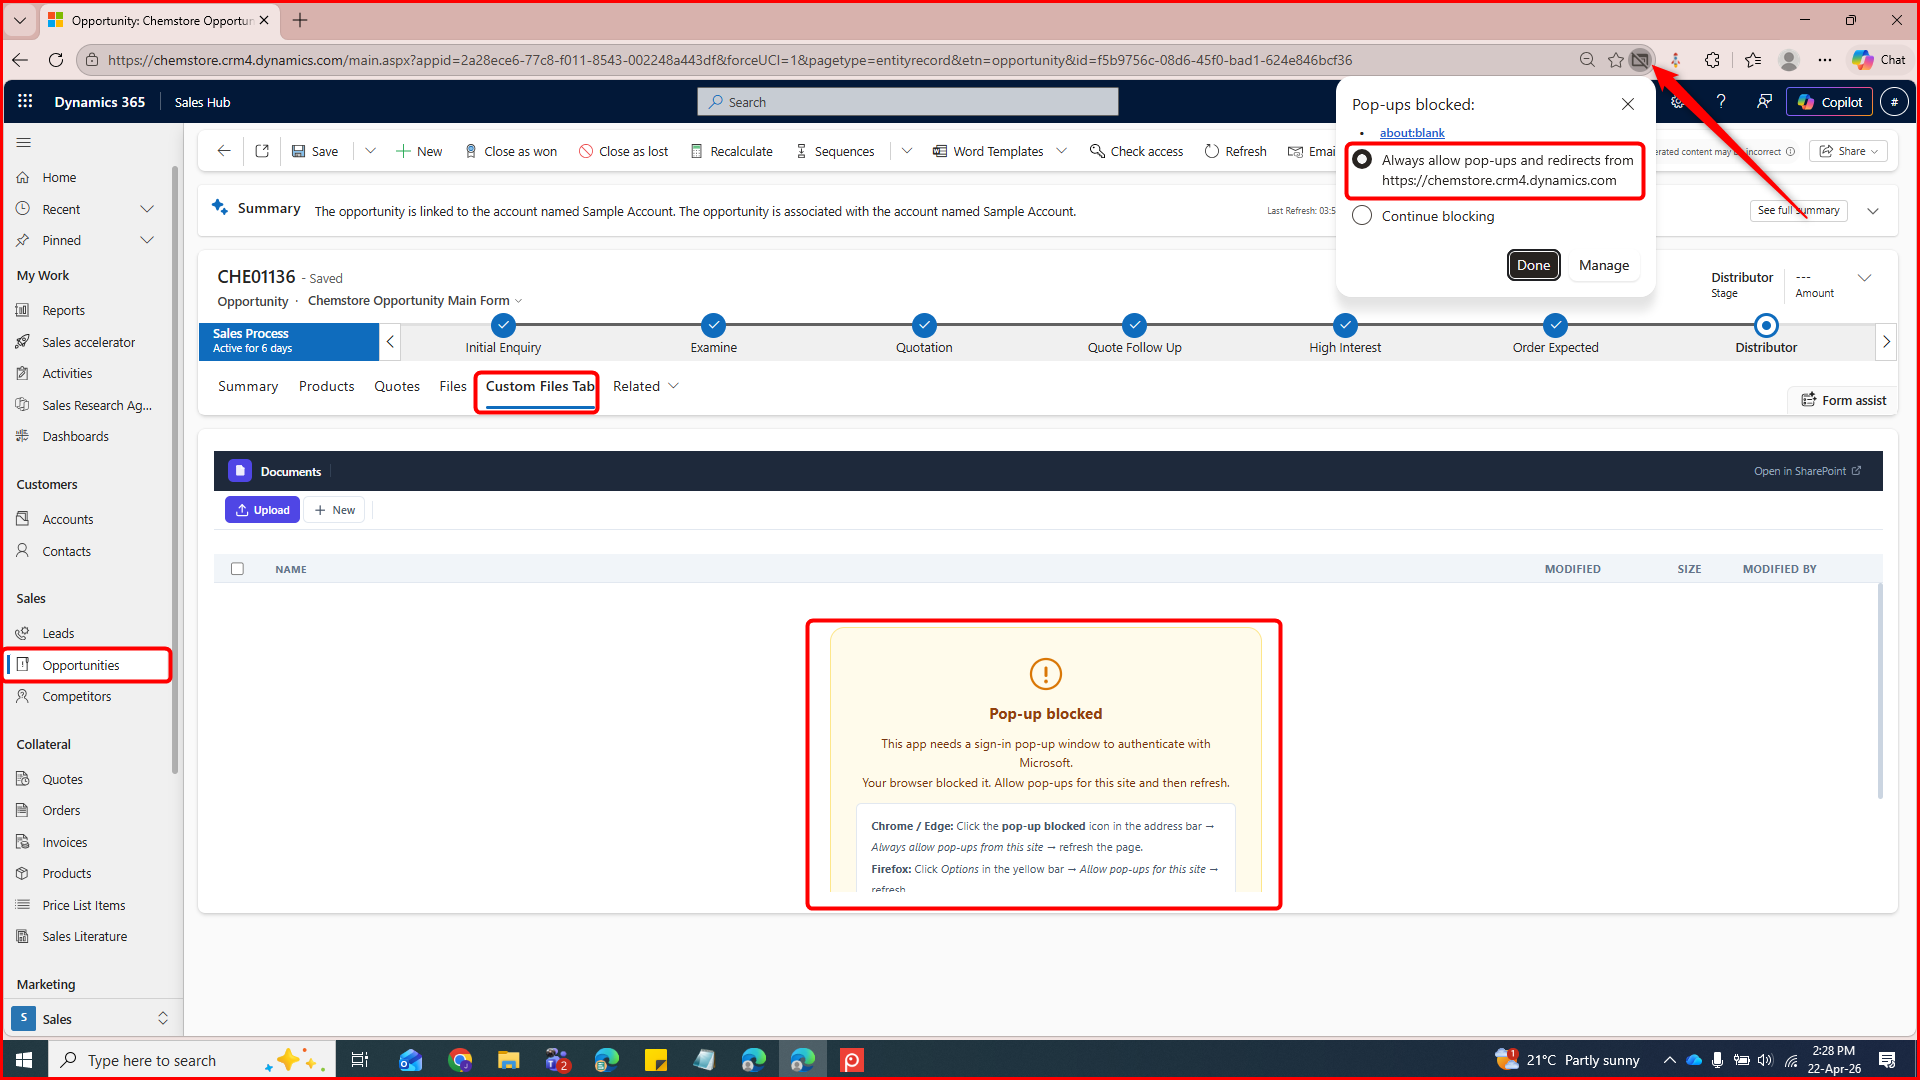
When using the Documents tab for the first time, users may need to allow browser pop-ups or complete Microsoft authentication.
If the Documents tab does not load correctly:
-
Check the browser address bar for a pop-up blocked message.
-
Allow pop-ups and redirects for the CRM site.
-
Refresh the page.
-
If required, perform a hard refresh using Ctrl + Shift + R.
-
Complete Microsoft sign-in if prompted.
Important Notes
-
Documents are stored in SharePoint and accessed through Dynamics 365.
-
Metadata is added after a document is uploaded.
-
The Details button appears after selecting a document.
-
Permissions may control who can upload, edit, delete, or update metadata.
-
If the Documents tab does not load, check pop-up settings and authentication.