Bank Integration for EFT Payments in Dynamics 365 Business Central
Introduction
Many banks provide Electronic Funds Transfer (EFT) as a payment method for businesses paying vendor invoices. The process involves a payment run, followed by extracting the payment file with vendor bank accounts, and then providing the file to the bank.
The method of providing the EFT file is through a secured encrypted Azure Storage to which the bank has access. The alternative is to upload the file to the bank’s online portal (if available).
After authorisation/authentication of the account, the bank will use the file to process payments to various vendors’ accounts and deduct the total paid amount from the business’ dedicated bank account.
The setup and process are similar in many banks although the file formats may differ. This user guide documents the steps to set up and to process the EFT payment run. Microsoft Marketplace has d365 Global’s separate solutions with file formats suited to Citibank and JP Morgan Bank.
Visit our banking integration solution on Microsoft Marketplace:
Setup Requirements
Bank Account Setup
The Bank Account defined in Business Central will need to have specific data fields completed for the EFT payment from the selected bank account. If more than one account is used in the same bank, the details may be different and need to be entered in the respective bank account.
Example:
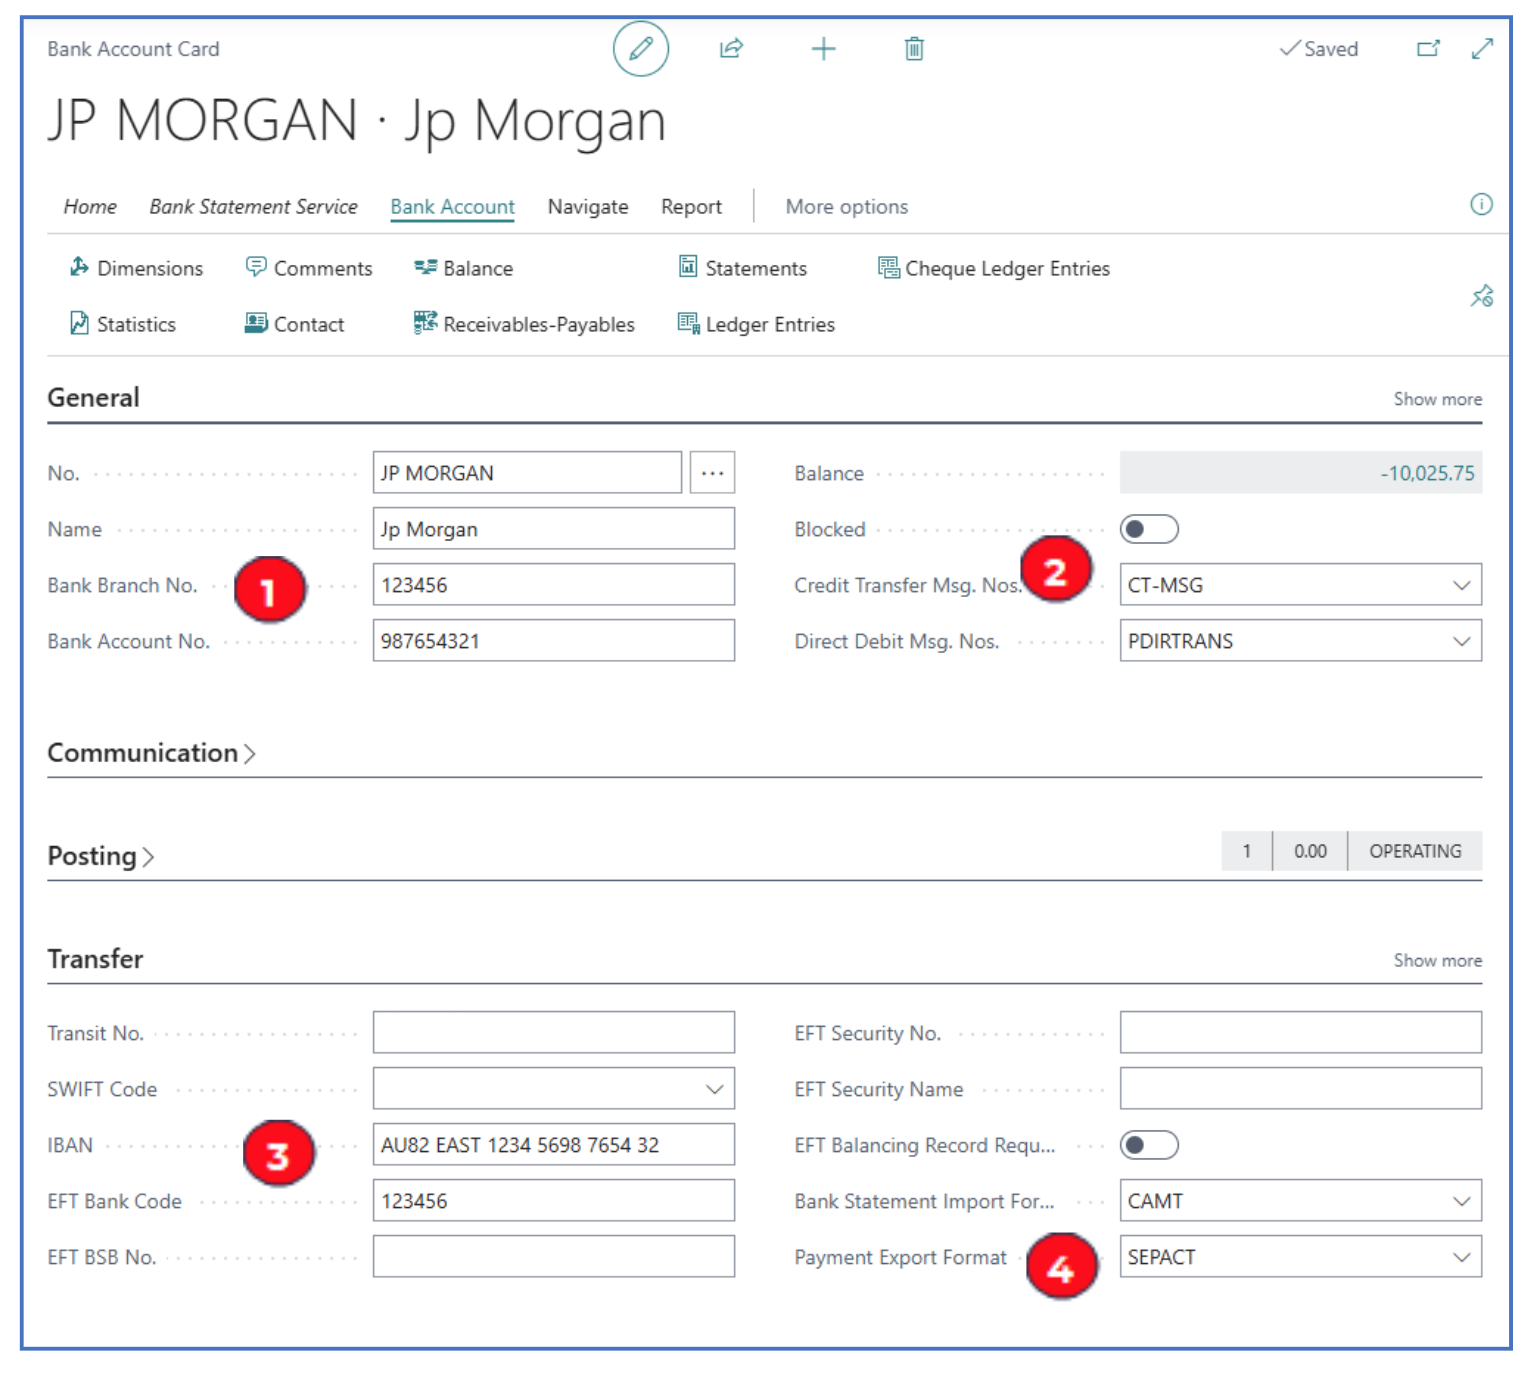
Key Fields Required
General
-
Bank Branch No. and Bank Account No. — Enter the bank branch and account numbers
-
Credit Transfer Msg No. — Select the no. series for credit transfers
Transfer
-
IBAN and EFT Bank Code — Enter the bank IBAN (International Bank Account Number) number, and EFT Bank Code.
-
Payment Export Format — This is the configured format for the bank.
Vendor Bank Account Setup
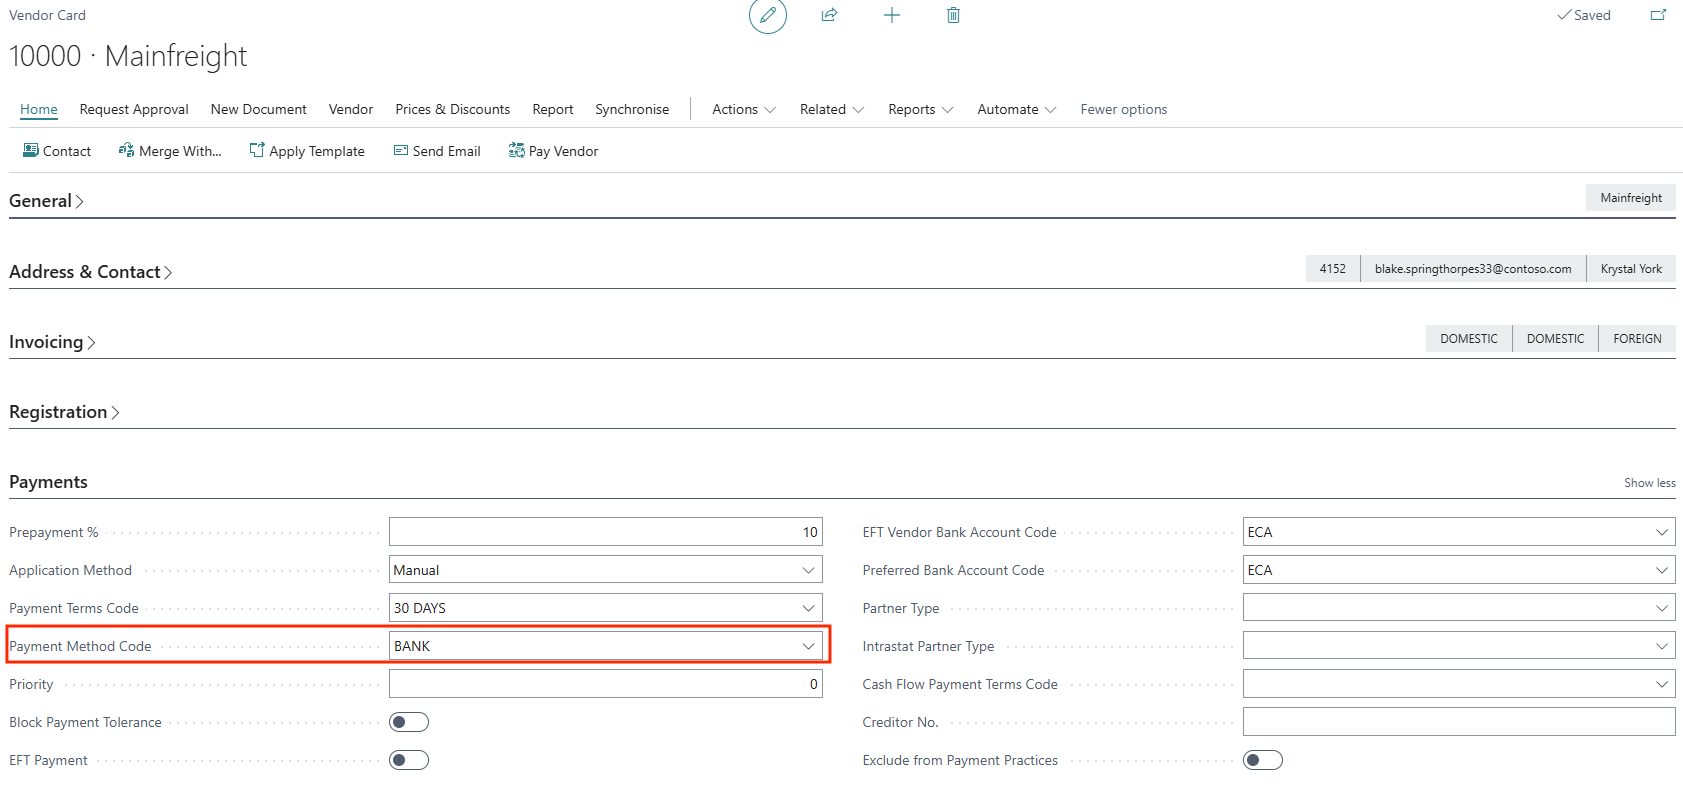
To pay vendors directly through EFT, the vendors’ bank accounts must be defined in the vendor card. The vendor’s Payment Method should also be configured as EFT so that the payment run can filter on EFT payment method.
Navigate to the Vendor Card, and in the Payments Fasttab, select the Payment Method Code used to select vendors for EFT payments.
Then navigate to the vendor bank account card from within the Vendor card, Vendor > Bank Accounts, for example:

In the Bank Account card, complete these key fields:
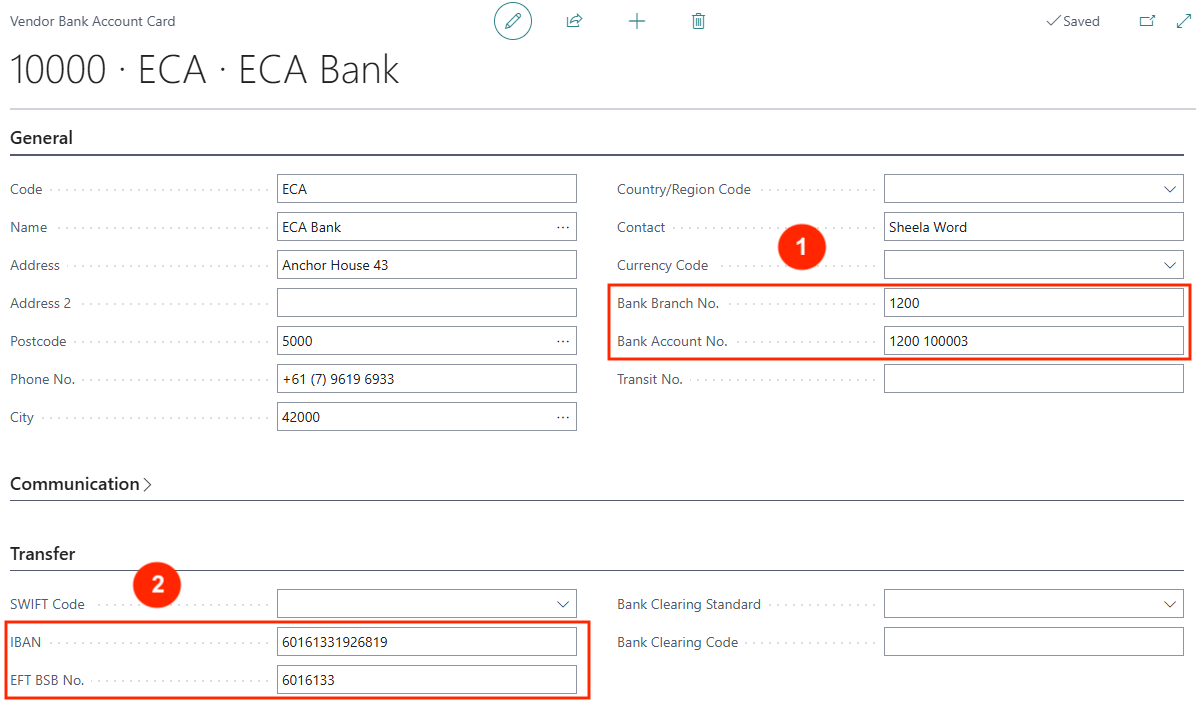
General
- Bank Branch No. and Bank Account No. — Enter the vendor’s bank details.
Transfer
- IBAN and EFT BSB No. — Enter the vendor’s bank IBAN and EFT BSB No..
Storage Account Setup
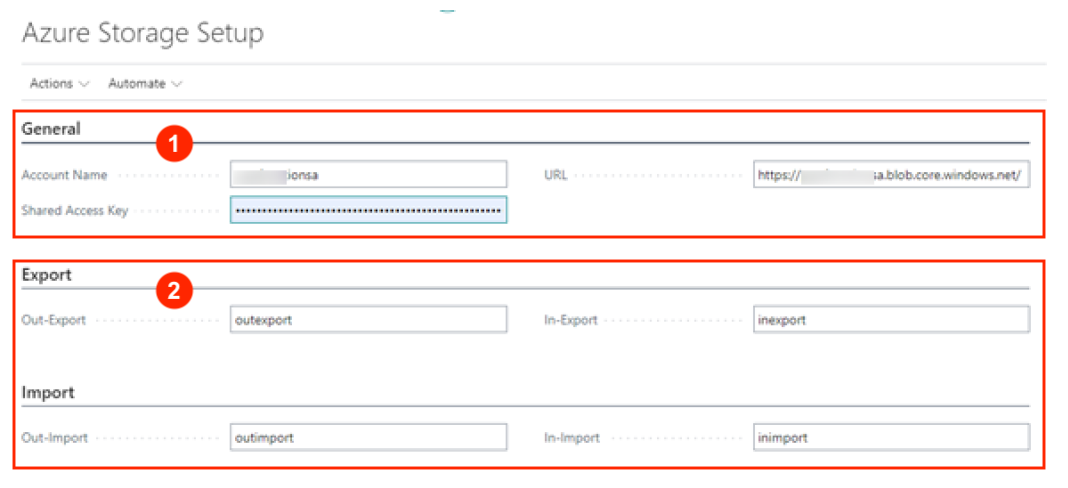
To provide data security for the EFT file, an Azure Storage account is needed to transmit the encrypted EFT file to the bank. When the EFT file is created from a Payment Journal, it will be loaded into Azure Storage to encrypt and forward to the bank.
Azure Storage Setup
-
Create an Azure Storage account (with secure credentials) — This account will be used for encrypting and exporting the EFT file to the SFTP folder for secure import by the bank.
-
Map the export & import Azure containers used to export the EFT file to the bank and import bank files.
The configuration of Azure Storage with Business Central Payment Journal is beyond this user guide and requires assistance from our team.
EFT Payment Run
Creating Payment Run
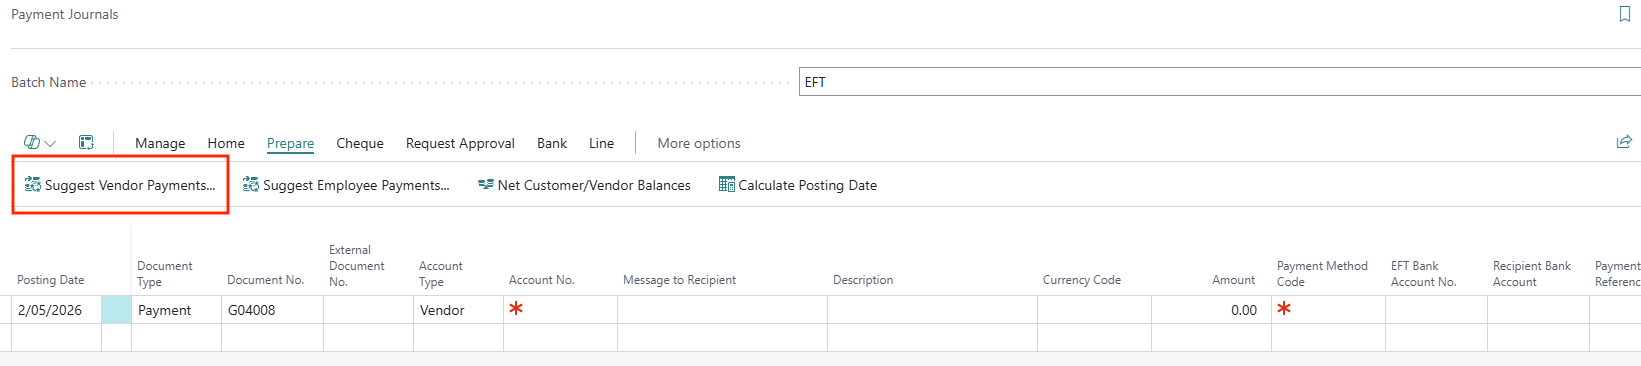
Navigate to the Payment Journal to generate a Payment Run -> Cash Management > Payment Journals.
- Create an EFT batch or select a batch:

- In the batch entry, select Prepare > Suggest Vendor Payments.
-
On the payment prompt, complete the key fields:
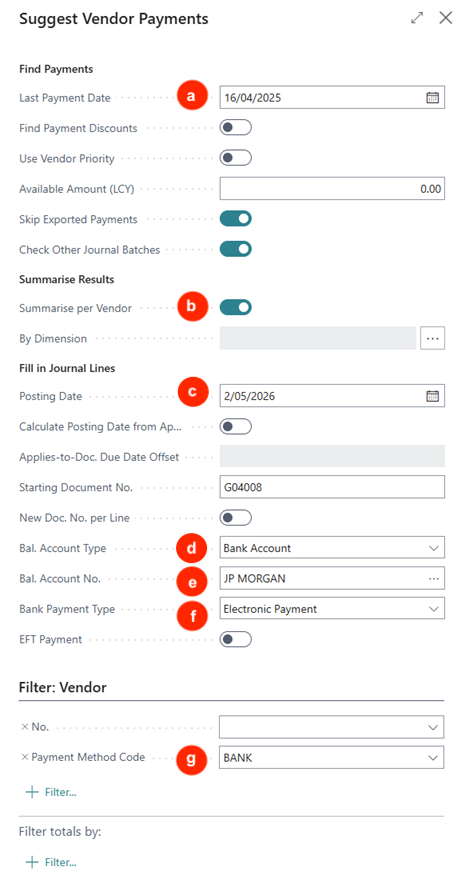
a) Last Payment Date — This is the payment date selects all unpaid invoices with due dates before this Last Payment Date.
b) Summarise per Vendor — This sums all invoices into a payment per vendor.
c) Posting Date — Select the date to post the payment batch.
d) Bal. Account Type — Select Bank Account.
e) Bal. Account No. — Select the bank account number for the payment.
f) Bank Payment Type — Select Electronic Payment to default this to the journal lines.
g) Payment Method Code — Use this method to select vendors for EFT payments.
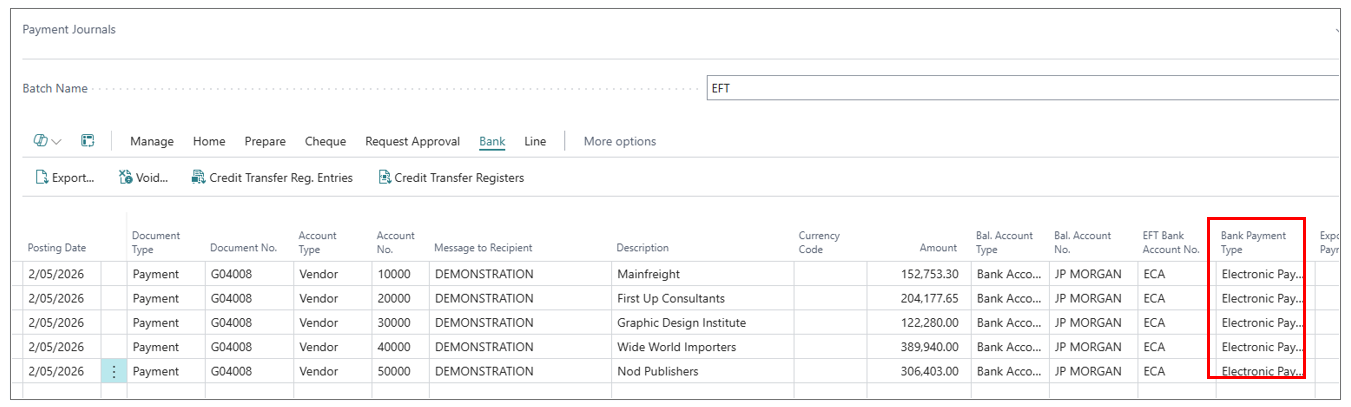
-
Payment lines will be generated, and the Bank Payment Type will default as Electronic Payment.
Exporting Bank Payment File
After the payment journal lines are created, navigate to Bank > Export to export the payment .xml file. The file name will be sequenced as defined in the Bank Account Credit Transfer Msg. No. code.
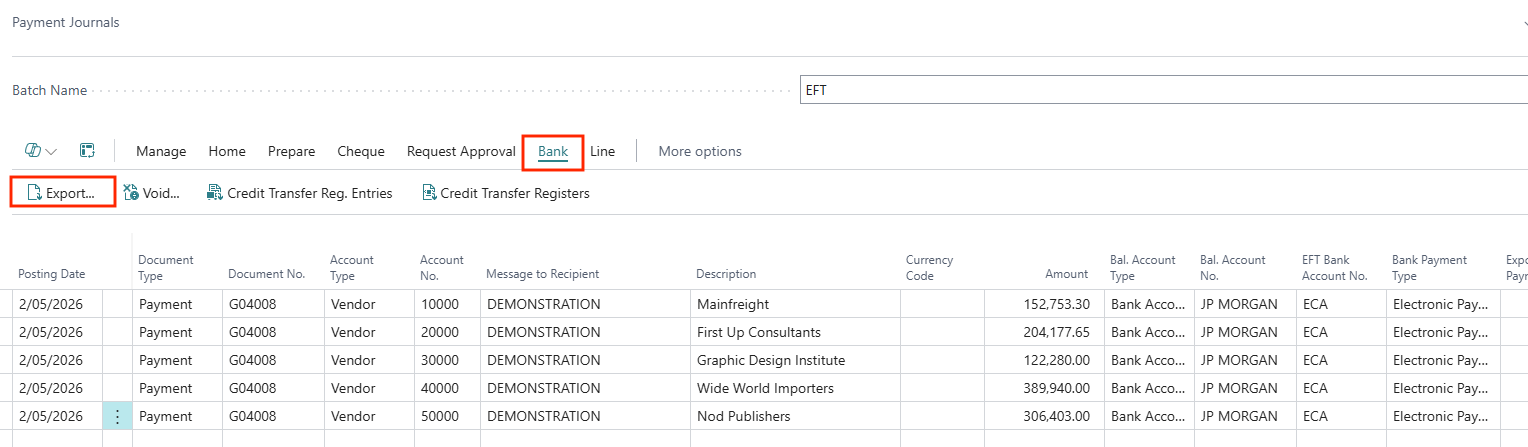
The export will result in the .xml file being exported to the Azure Storage, and a copy downloaded as a local file for reference or checking.
Bank Integration
The exported .xml payment fil would be encrypted in Azure Storage and sent to the bank for processing.
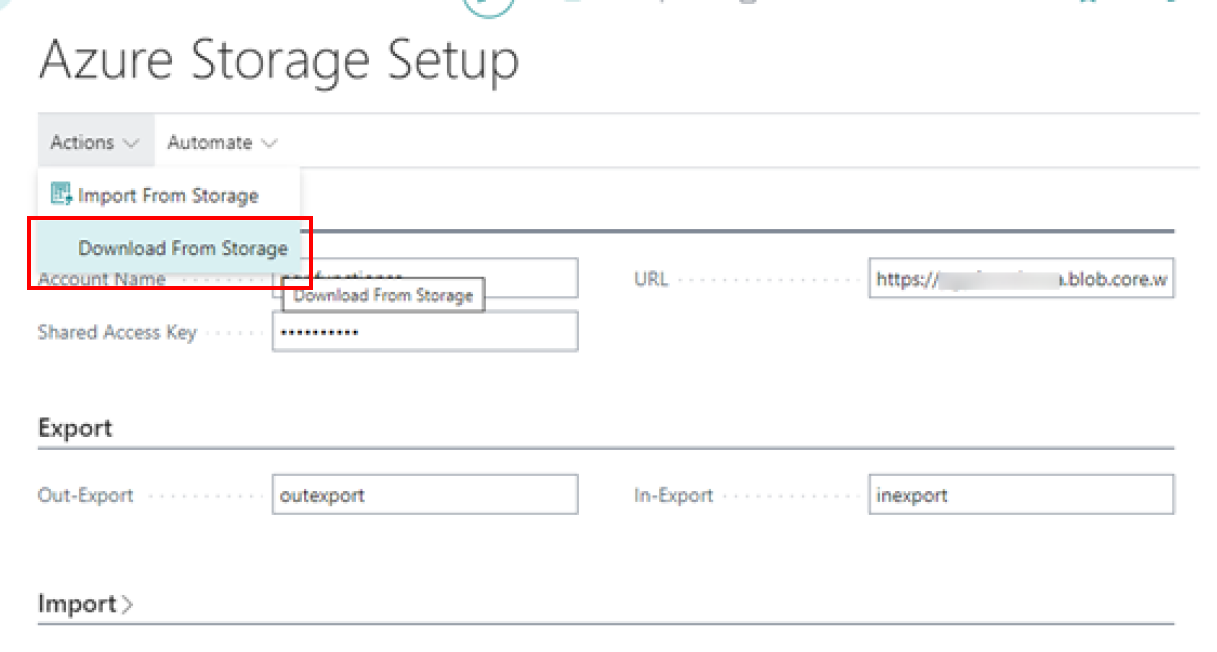
If you need to check the file, it can also be downloaded from Azure Storage.
Login to Azure Storage and select Download from Storage:
Written By:
Peter Loo
Team Leader, Business Central
Connect on LinkedIn