Legal User Guide for Microsoft Dynamics 365
Legal Case Management Section
Expenses
The Expenses tab is used to record and manage disbursements or costs incurred while working on a Matter. Expenses may include filing fees, travel costs, third-party services, court fees, courier costs, or other recoverable amounts.
Expenses are recorded separately from Billing Events. Billing Events usually represent fees or billable work, while Expenses represent costs or disbursements that may also be charged to the client.
Expenses contribute to the Matter’s financial position and may appear in:
-
Billing Overview
-
Work-in-progress / WIP
-
Invoice processing
-
Matter financial reporting
-
Matter closure checks
Before generating an invoice or closing a Matter, users should review the Expenses tab to confirm that all required expenses have been entered, reviewed, and approved where required.
Expenses can be added in two ways:
-
Using the Expense button from the top command bar of the Matter form (quick entry).
-
Clicking + New Expense within the Expenses tab.
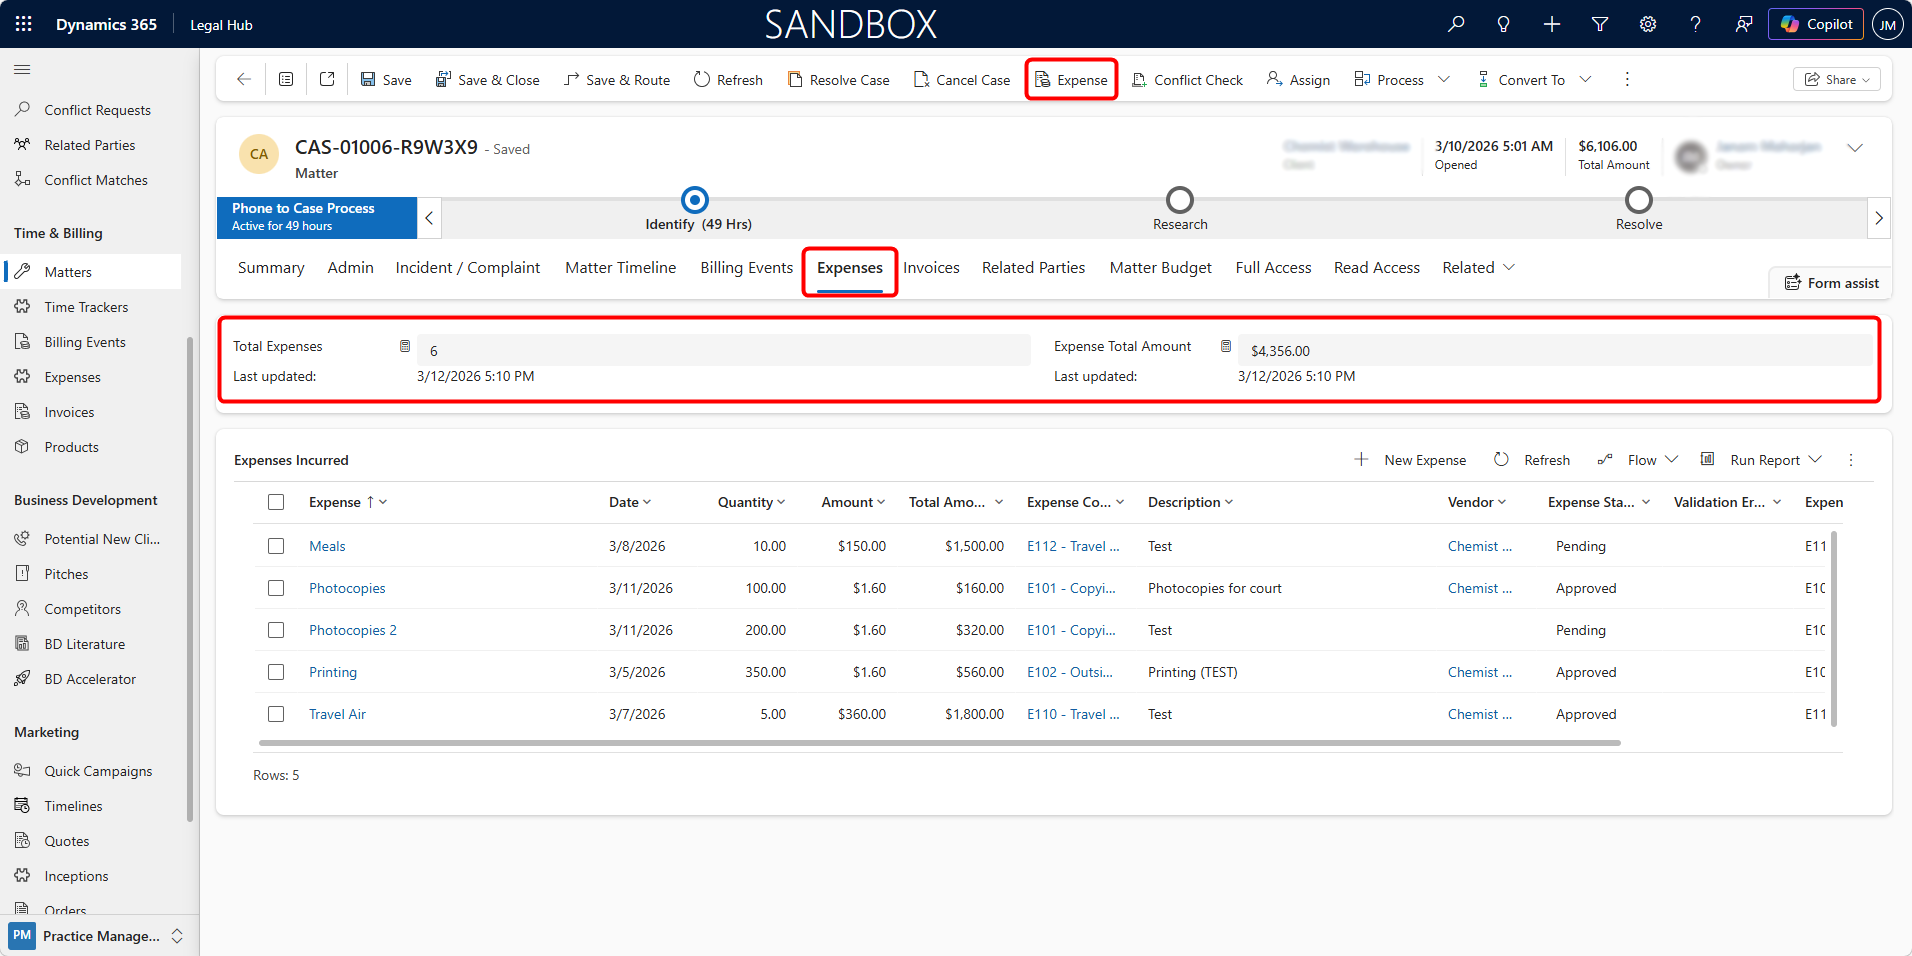
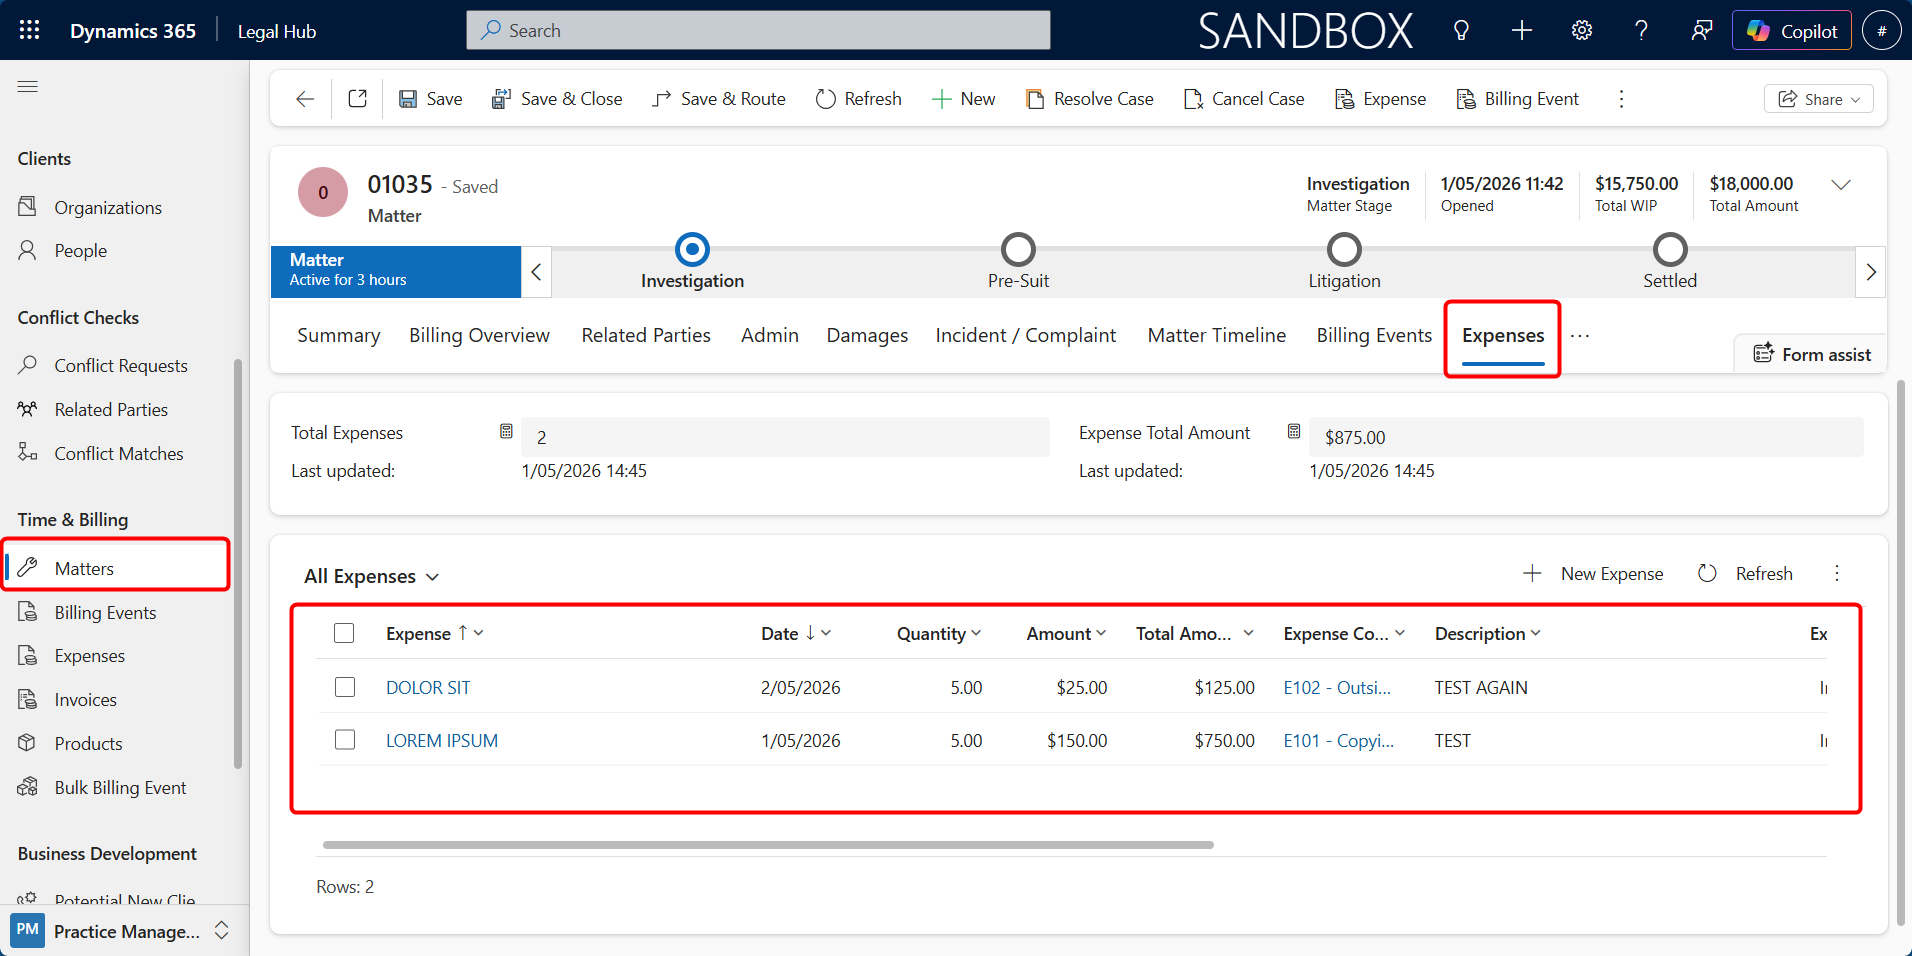
What You See in the Expenses Tab:
At the top of the tab, the system provides a summary of expenses recorded against the Matter:
-
Total Expenses — Displays the total number of expense records logged for the Matter.
-
Expense Total Amount — Shows the total value of all expenses combined.
-
Last Updated — Displays the date and time when the expense totals were last calculated.
Below the summary section, a grid lists all individual expense records, including details such as Expense Name, Date, Quantity, Amount, Total Amount, Expense Code, and others.
This provides a clear overview of all expenses incurred during the Matter, allowing legal teams to track and manage expenses before they are approved or invoiced.
Adding a New Expense
Expenses can be created using the Expense Entry screen, which allows users to add multiple expenses efficiently and attach receipts in a single workflow.
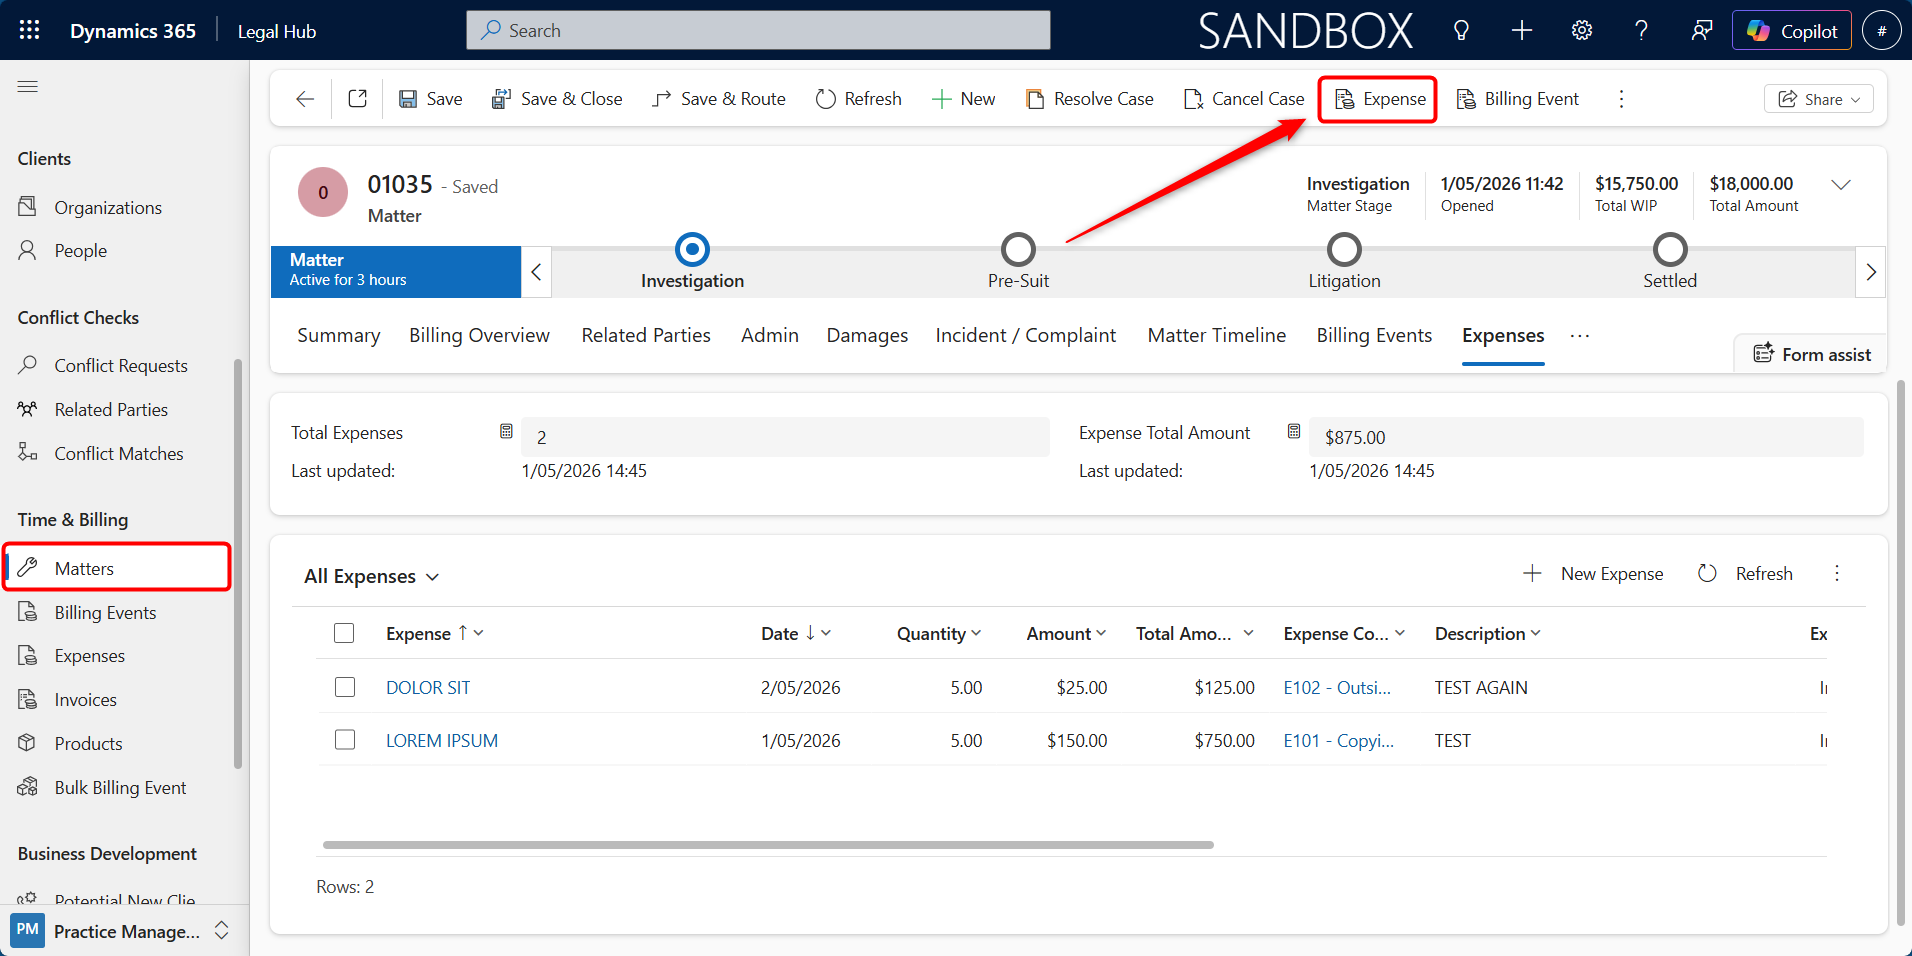
Method 1: Expense Entry (Recommended)
This is the preferred method for creating expenses, as it supports bulk entry, attachments, and review before submission.
Steps
-
Open the required Matter
-
From the top command bar, click Expense
-
The Expense Entry window will open.
-
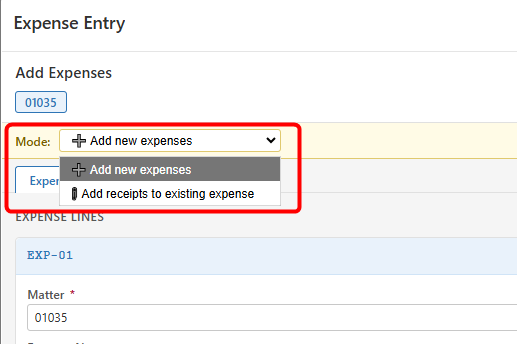
Ensure the correct Mode is selected:
a. Add new expenses
-
Enter the required details:
a. Expense Name
b. Expense Code
c. Date
d. Quantity
e. Amount (Unit Cost)
f. Description
g. Vendor (Lookup or Write-in)
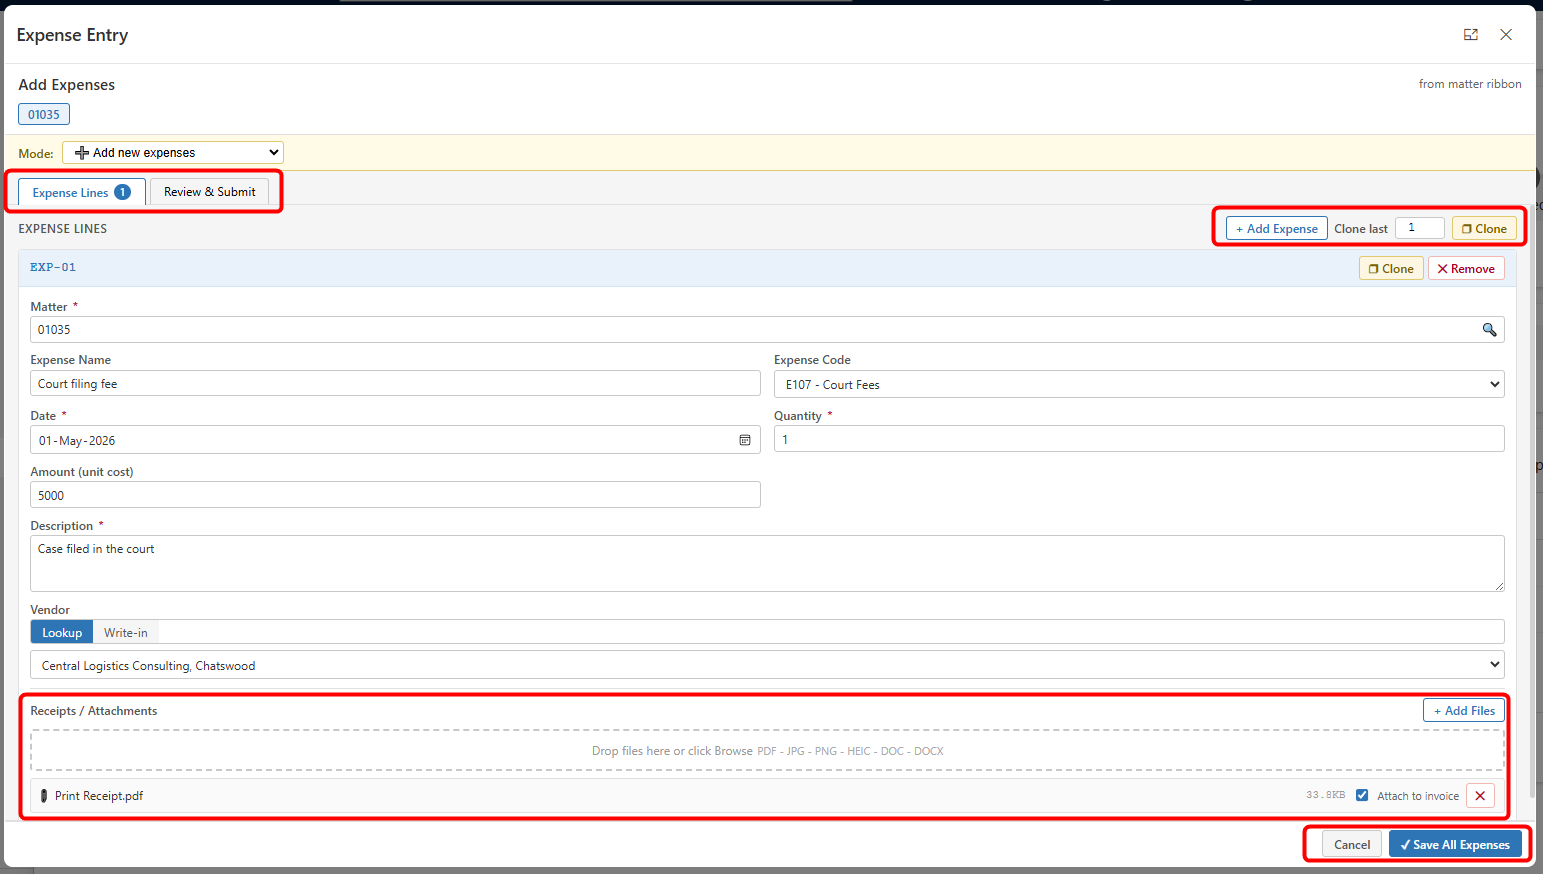
Working with Expense Lines
The Expense Entry screen allows you to manage multiple expense entries efficiently.
Add Expense
-
Click + Add Expense to create additional expense entries.
-
Useful for recording multiple expenses in one session.
Clone
-
Use Clone to duplicate an existing expense line.
-
Option to clone multiple times.
-
Ideal for similar expenses with minor changes.
Remove
-
Click Remove to delete a draft expense line.
-
This only removes the draft (not yet saved records).
Adding Receipts / Attachments
Expenses can include supporting documents such as receipts.
-
Use the Attachments section to:
-
Drag and drop files, or
-
Click + Add Files to upload
-
-
Multiple files can be uploaded at once.
-
Uploaded receipts will be:
-
Linked to the expense
-
Included when generating invoice documents
-
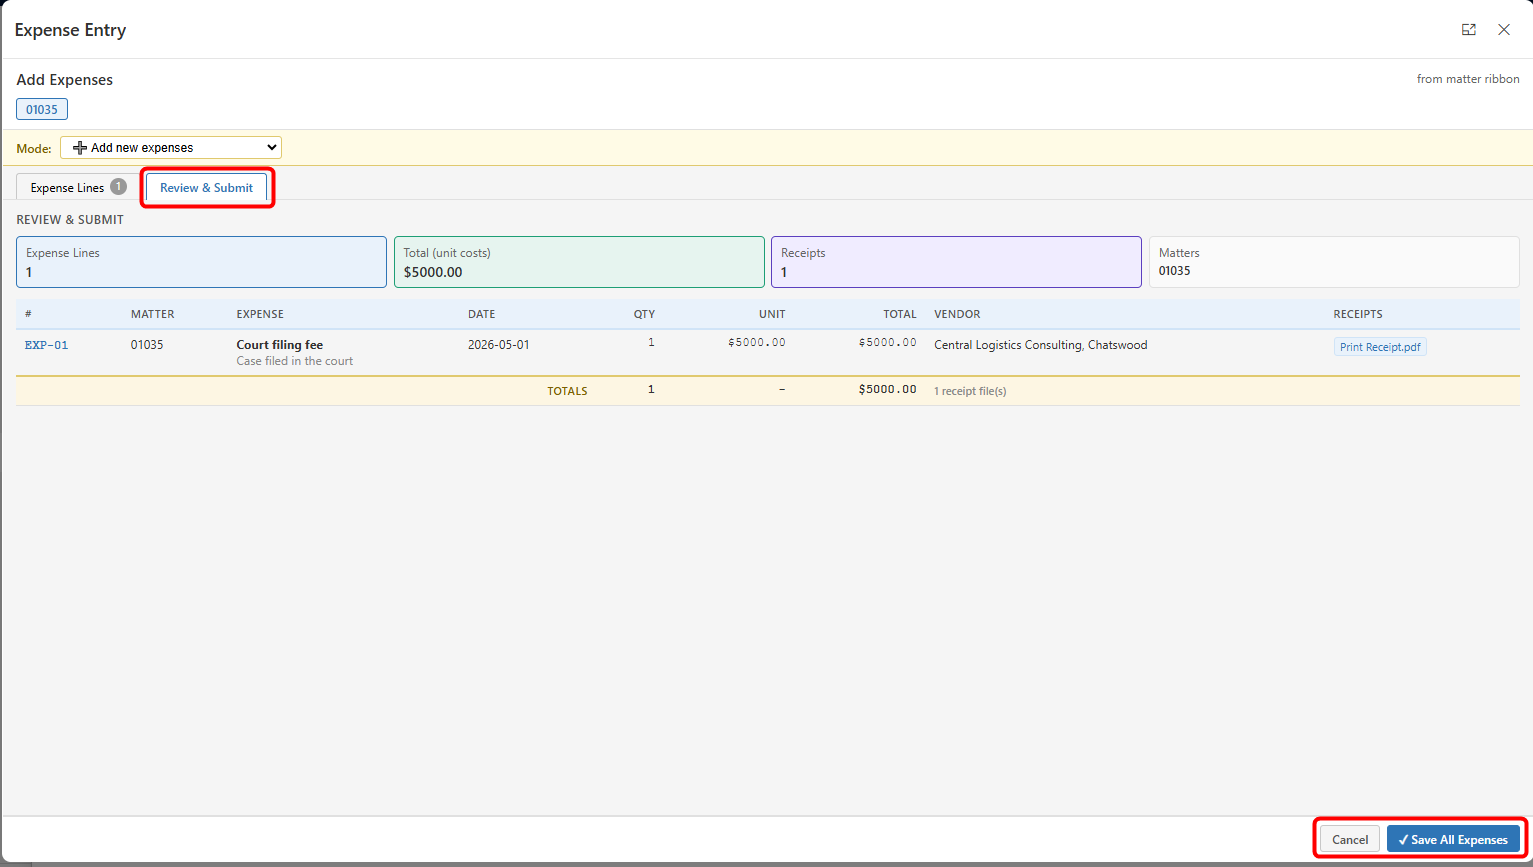
Review & Submit
Once all expense lines are added:
-
Click Review & Submit
-
Review:
a. Total number of expenses
b. Total amount
c. Receipt count
-
Click Save All Expenses
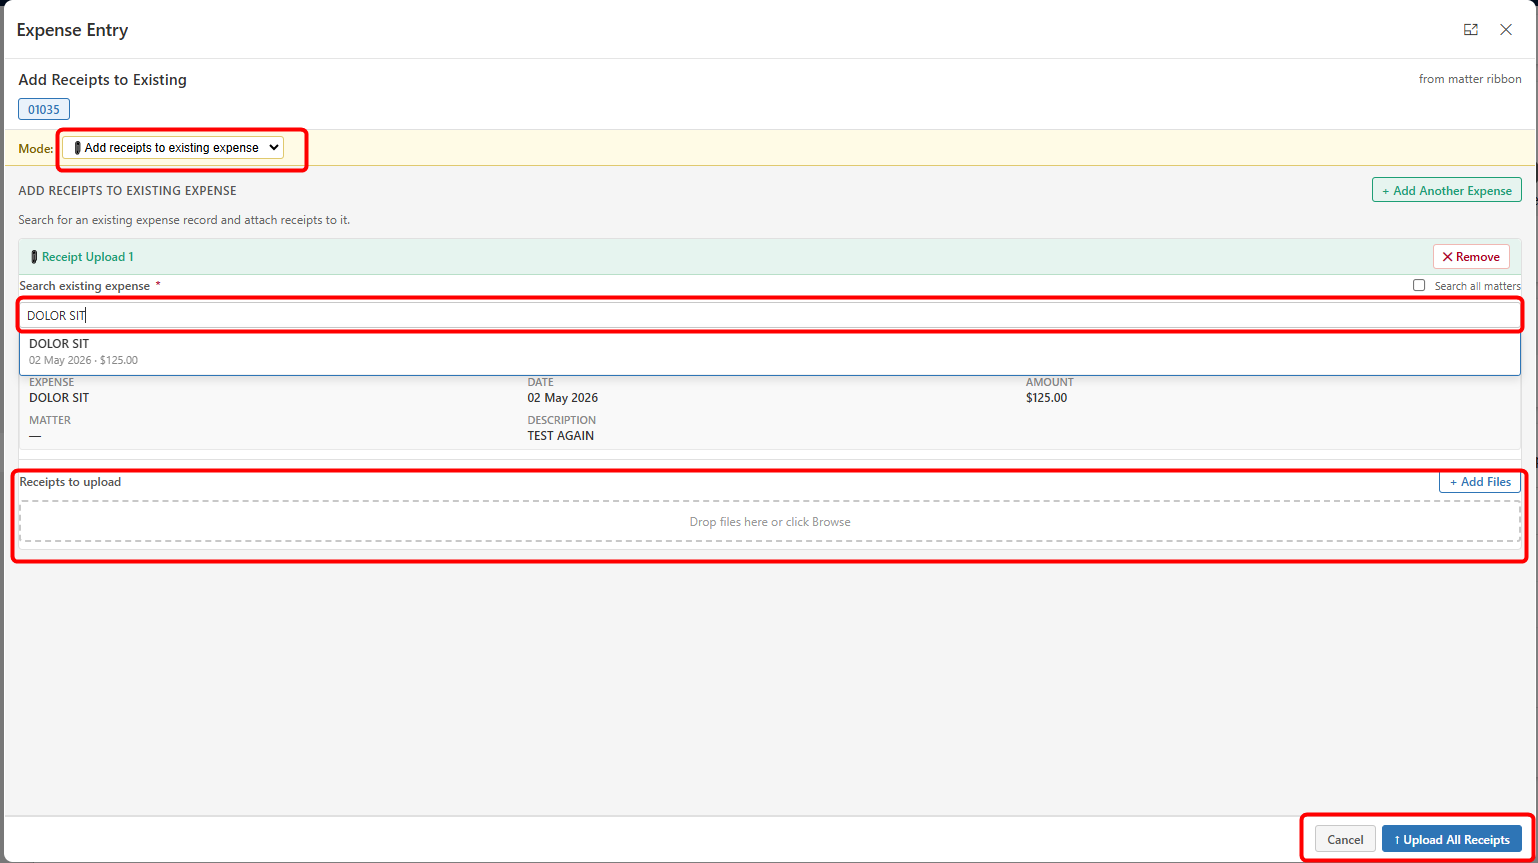
Adding Receipts to Existing Expenses
The Expense Entry screen also allows receipts to be added to previously created expense records.
Steps
-
Open the Expense Entry window from the Matter.
-
Change Mode to:
a. Add receipts to existing expense
-
Search and select the required expense record.
-
Upload receipts using the Attachments section.
-
Click Upload All Receipts.
Method 2: Creating Expense from Expenses Tab
Expenses can also be created individually from the Expenses tab.
Here are the steps to follow:
-
Go to Matter → Expenses tab.
-
Click + New Expense.
-
Enter required details.
-
Save the record.
Viewing & Managing Expenses
Once expenses are created, they can be viewed, updated, or removed as required before being invoiced.
Viewing Expenses
Expenses can be accessed from:
-
Matter → Expenses tab, or
-
Time & Billing → Expenses
The Expenses grid displays key details such as:
-
Expense Name
-
Date
-
Quantity
-
Amount
-
Total Amount
-
Expense Code
-
Vendor
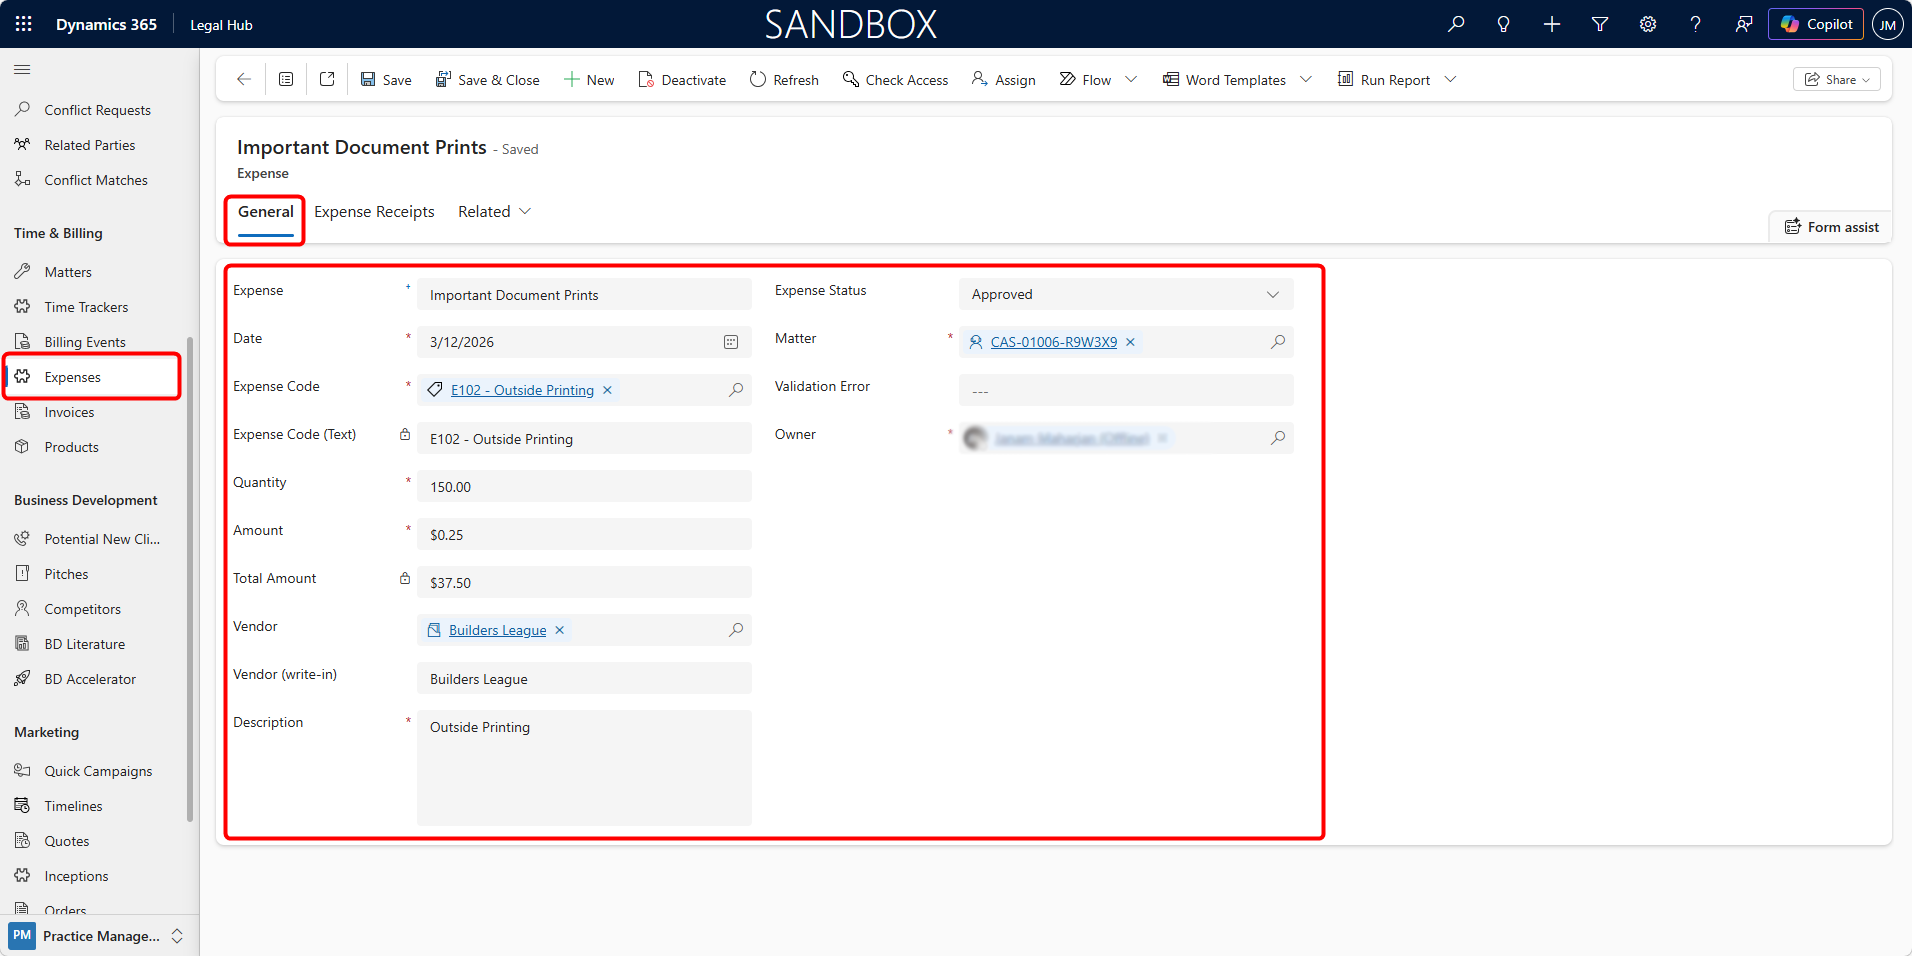
Editing Expenses
Expenses can be updated (i.e. edited) after creation.
Follow these steps:
-
Open the required Expense record.
-
Update fields as needed, such as:
a. Expense Name
b. Expense Code
c. Quantity / Amount
d. Description
e. Vendor
-
Click Save or Save & Close
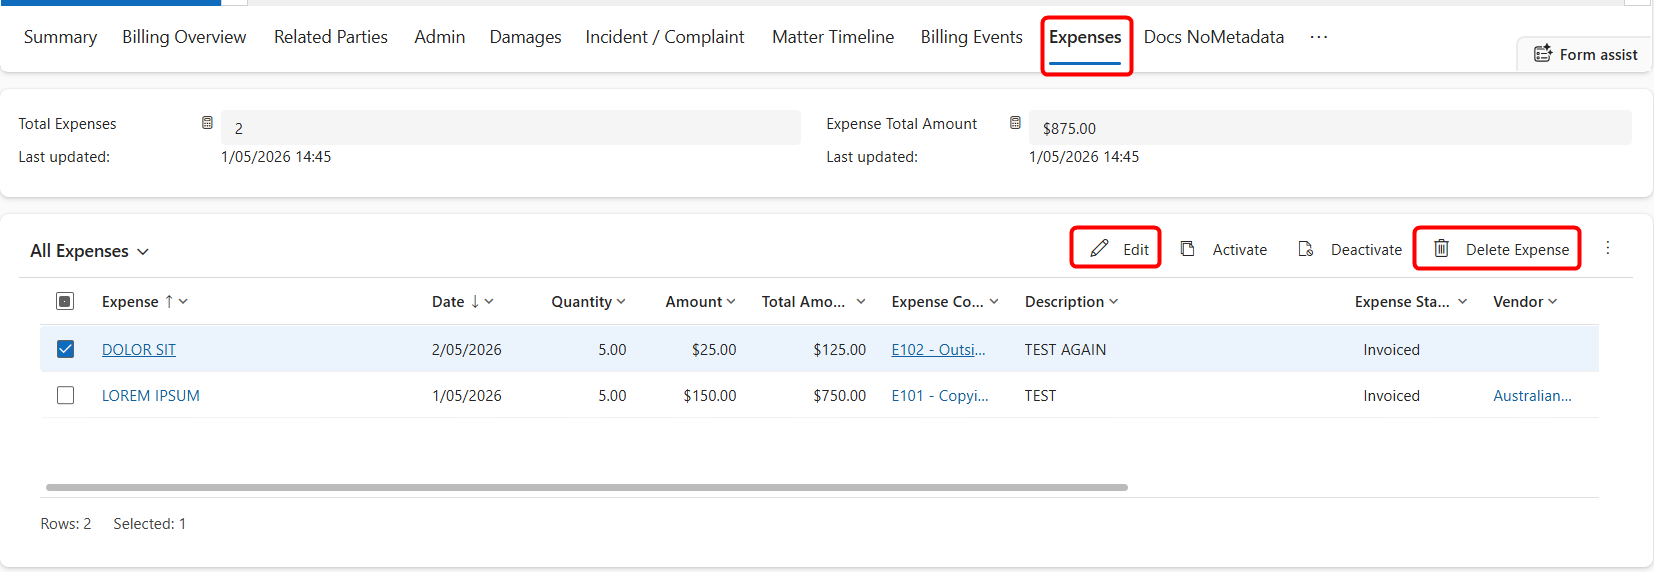
Deleting Expenses
Expenses can be removed if they were created incorrectly.
Follow these steps:
-
Select the Expense record.
-
Click Delete from the command bar.
-
Confirm deletion.
Viewing Uploaded Receipts
-
Open Matter > Expenses tab > Expense record.
-
Navigate to the Expense Receipts tab.
-
Clicking the File URL opens the document in SharePoint.

Users should check whether expenses are still pending, approved, or invoiced before running invoices or closing the Matter.
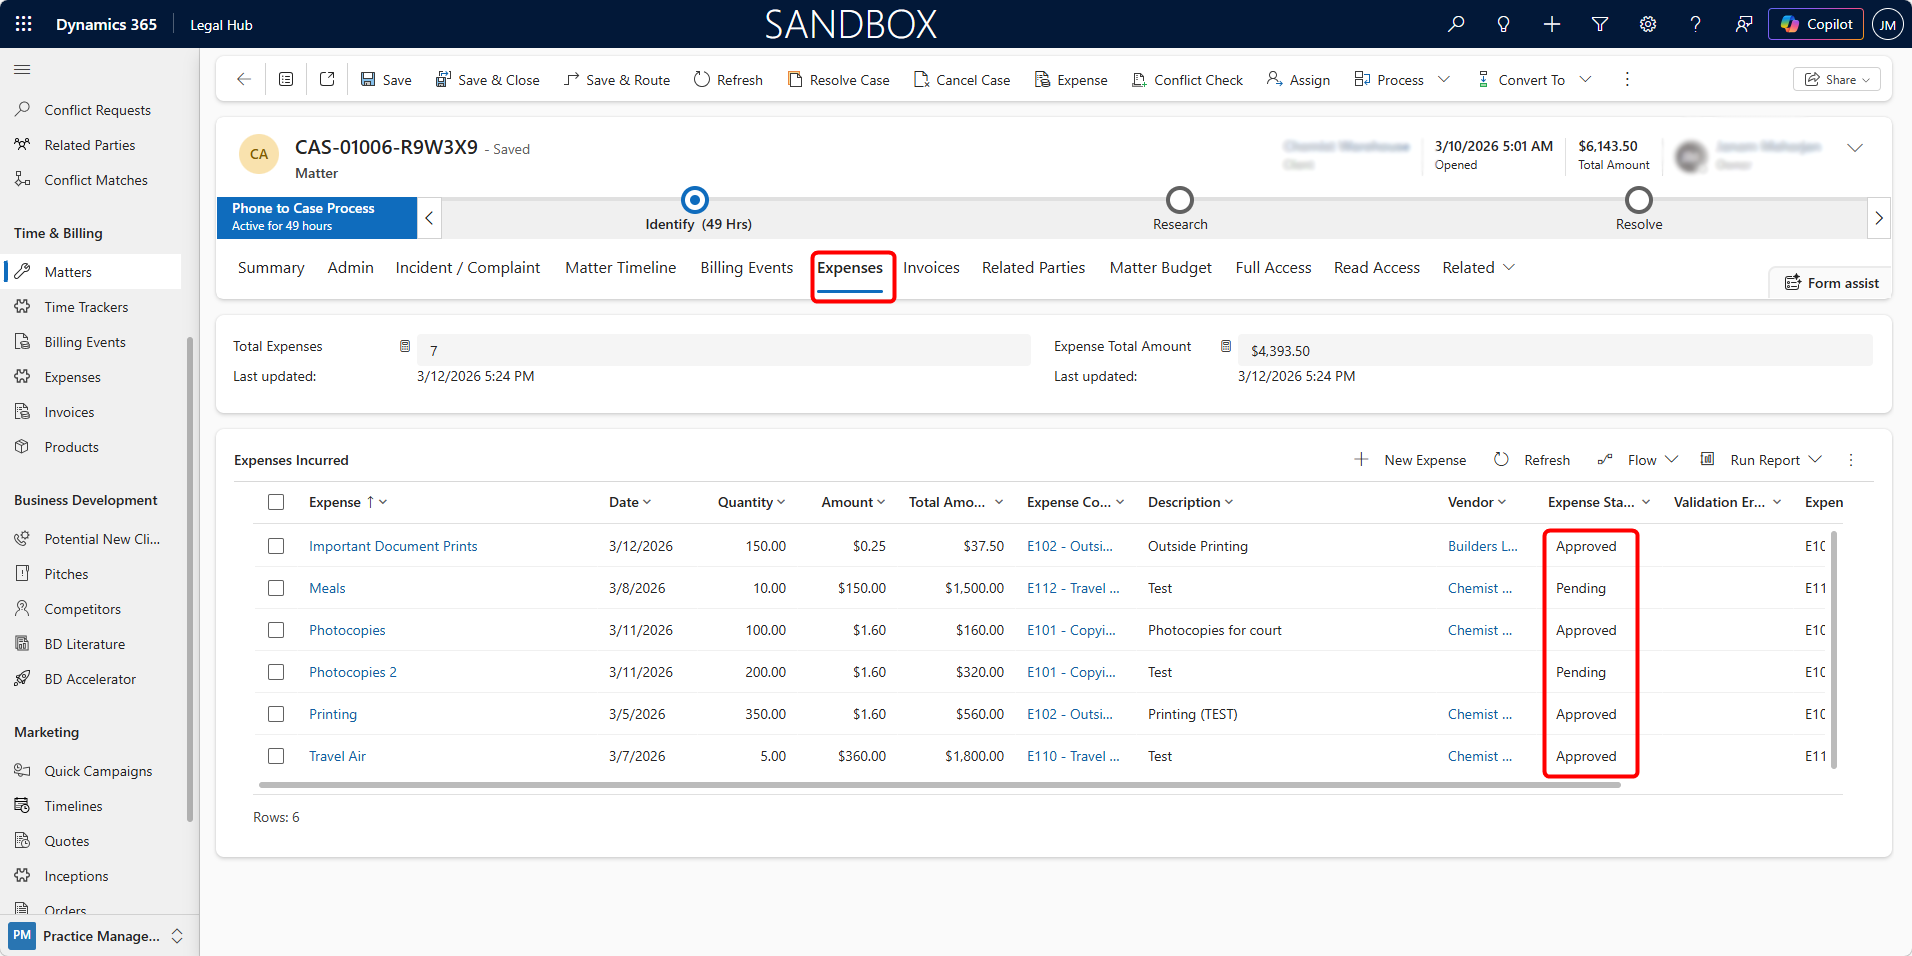
Approving Expenses
Like Billing Events, Expenses must also be approved before invoicing.
To approve Expenses:
-
Go to the Expenses tab on the Matter.
-
Select the relevant Expense records.
-
Update the Expense Status to Approved.
Only approved Billing Events and approved Expenses will be included in the invoice.