Legal User Guide for Microsoft Dynamics 365
Legal CRM Section
This section covers the Legal CRM (Customer Relationship Management) aspect of the user guide. This covers:
- Potential New Client
- Pitch
Potential New Client
A Potential New Client record is the starting point for all new legal work. This record captures initial enquiry details before progressing to a Pitch.
Creating a Potential New Client
A Potential New Client record can be created in two ways:
Method 1 - Manual Creation
-
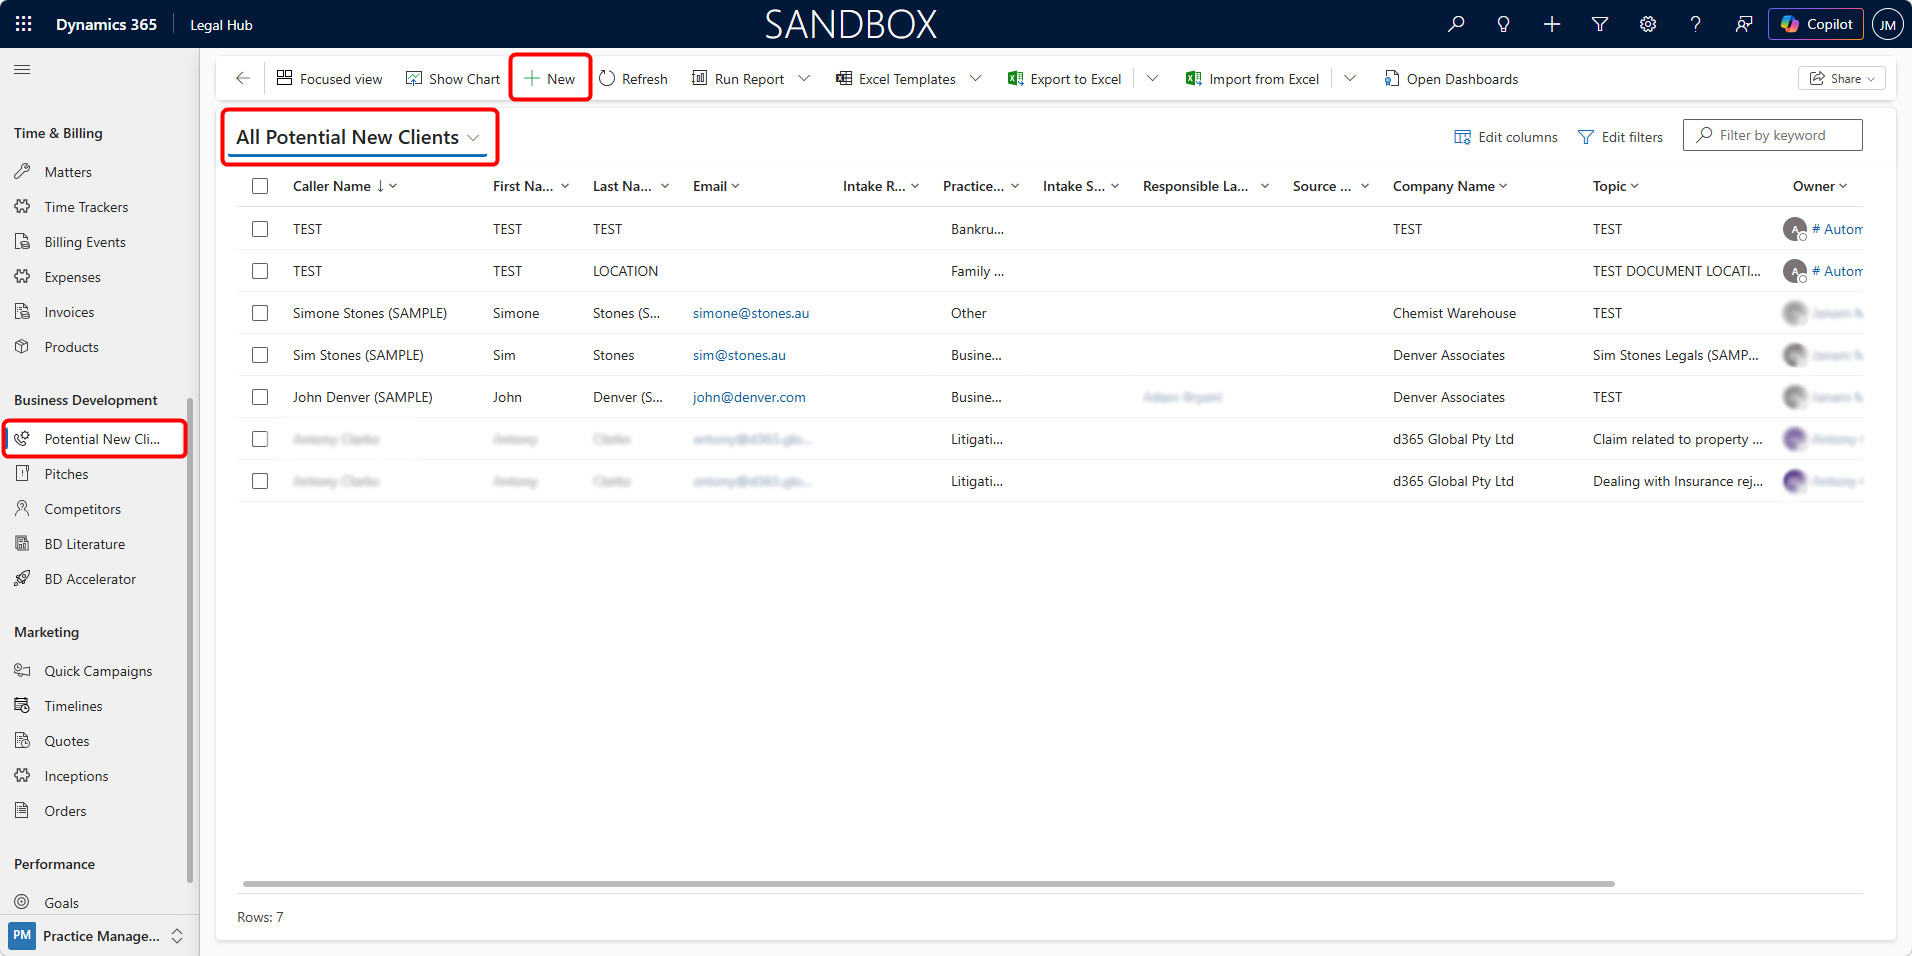
Navigate to Business Development in the left navigation pane → Select Potential New Client.
-
Click + New.
-
Enter the required information on the form.
-
Click Save.
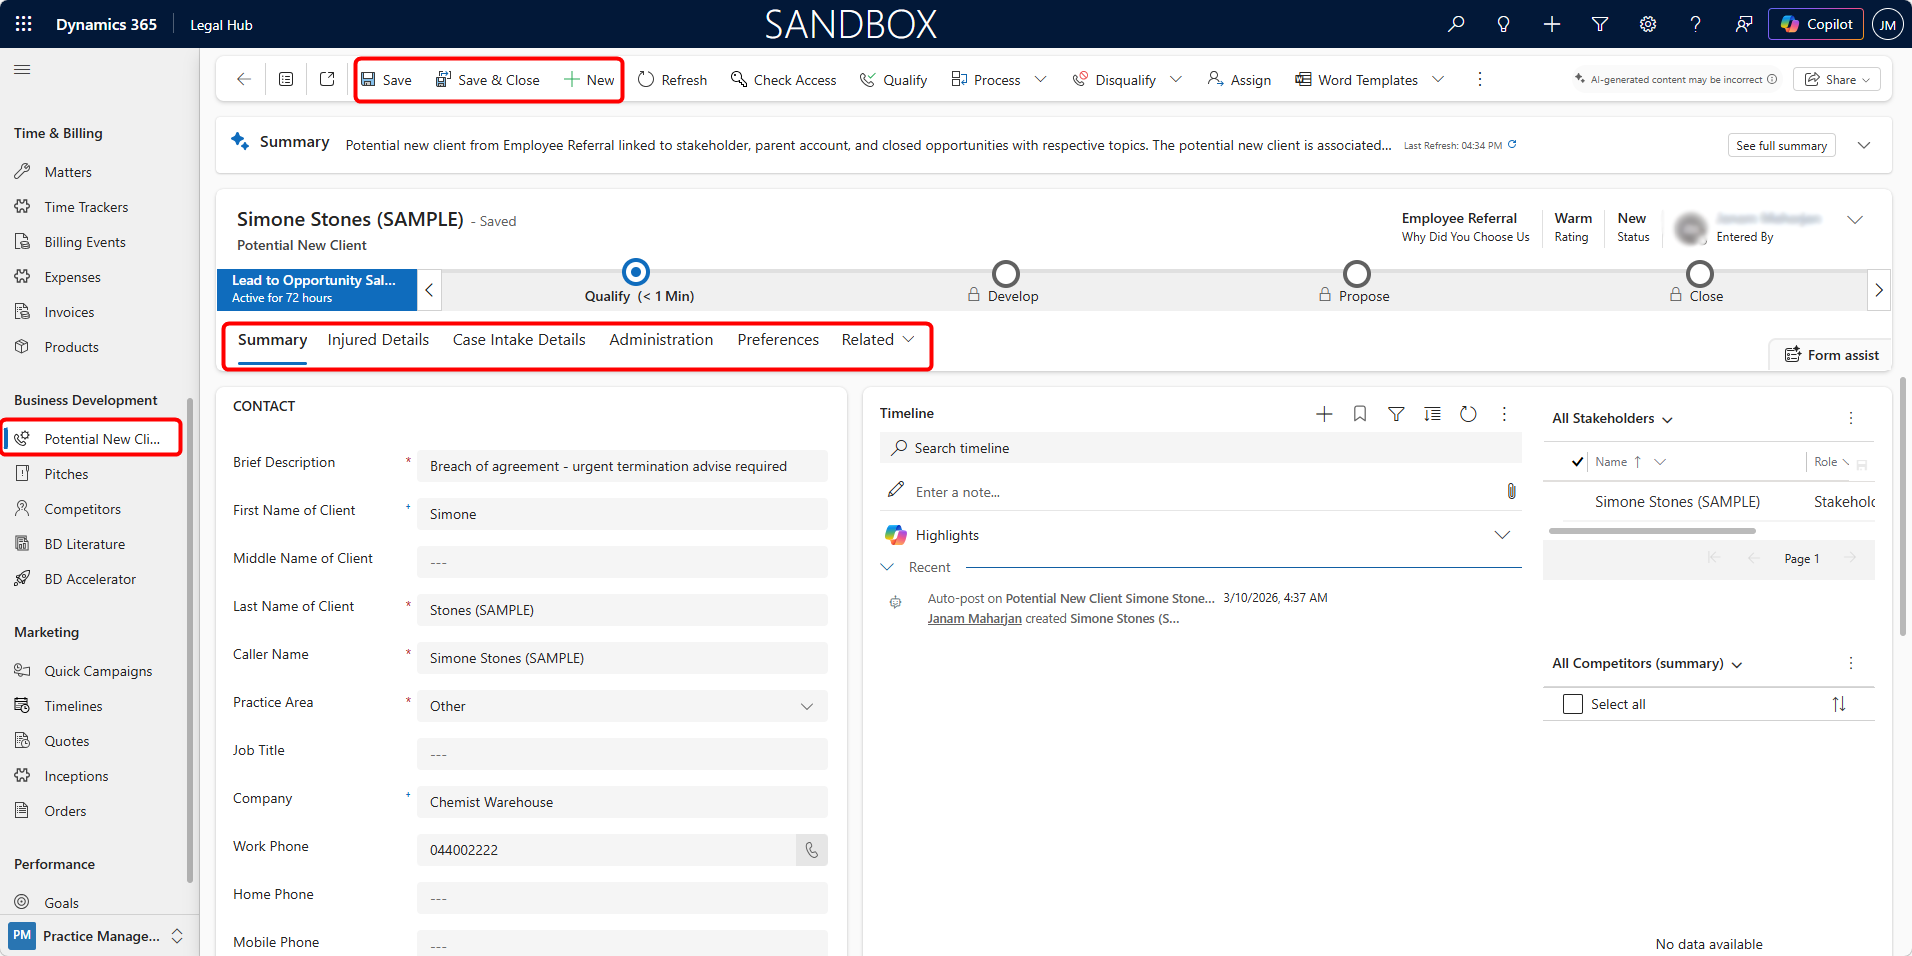
Once saved, the full form becomes active, including:
-
Business Process Flow (top bar)
-
Multiple form tabs
-
Timeline
-
Ribbon actions (Qualify, Disqualify, Assign, etc.)
You can add the individuals and organizations involved under All Stakeholders, and competitors under All Competitors on the right-hand side of the Summary form.
To do that:
-
Open the record.
-
Locate All Stakeholders or All Competitors on the right-hand panel.
-
Click + Add by clicking the three dots on the top of the grid.
-
Select an existing contact or create a new one.
-
Click Save.
Stakeholders and/or competitors representing other relevant parties connected to the enquiry will be added.
Method 2 - Automatic Creation
This is via External Webforms or Portals
Potential New Client records can also be created automatically from external sources such as:
-
Website enquiry forms
-
Client intake portals
-
Online consultation request forms
-
Campaign landing pages
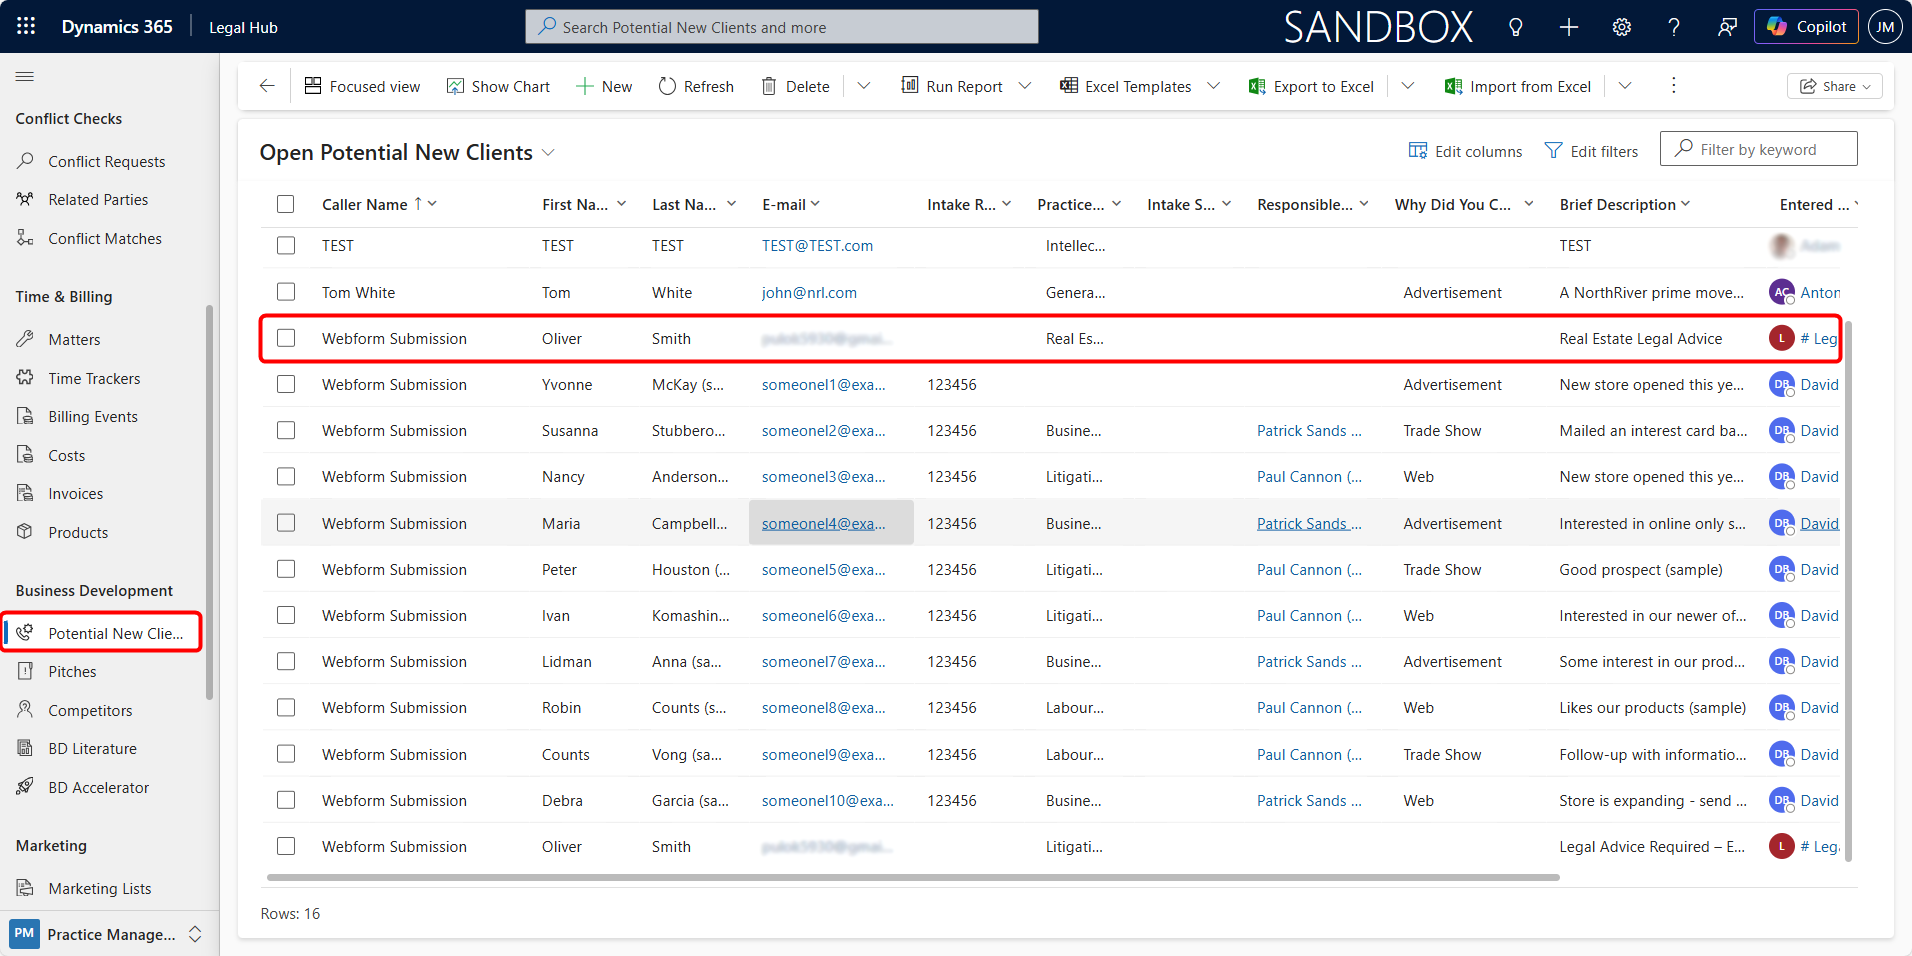
If the firm’s website or portal is integrated with Microsoft Dynamics 365, any submitted enquiry form can automatically create a Potential New Client record and capture submitted contact details.
This ensures:
-
No manual re-entry of data
-
Faster intake processing
-
Immediate visibility for intake staff
-
Improved client response times
Once created (manually or automatically), the record follows the same qualification and review process within the Legal Hub.
Editing the Record
-
Open the Potential New Client record.
-
Update fields as required.
-
Click Save.
All changes are recorded in the Timeline.
Qualifying the Record
Once intake is complete and the firm decides to proceed:
-
Click Qualify from the top ribbon.
-
Confirm the action.
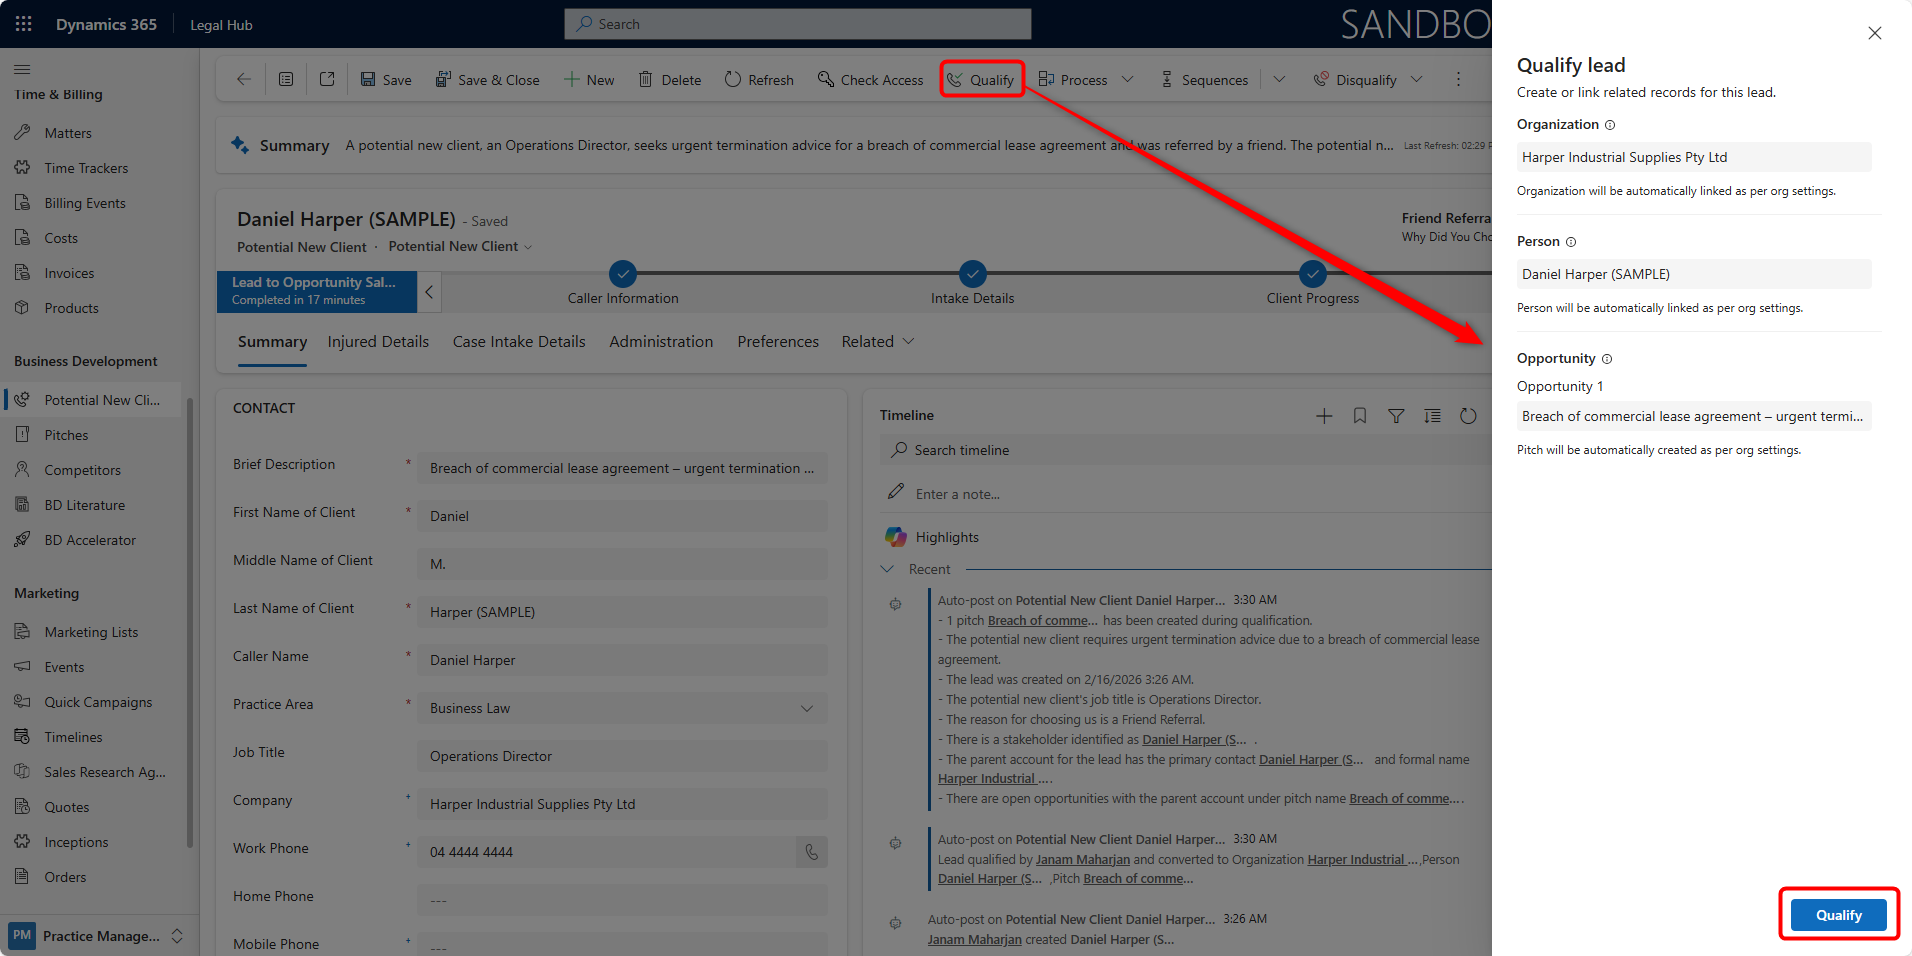
Qualifying the record achieves the following:
-
Creates a Pitch.
-
Links the client.
-
Advances the lifecycle to the next stage.
Duplicate Detection
Microsoft Dynamics 365 includes a Duplicate Detection feature that helps prevent the creation of duplicate Accounts and Contacts in the system.
When a user attempts to qualify Potential New Client to Pitch, Dynamics automatically checks whether a client (contact or account) with similar information already exists in the system before creating their record.
If a possible duplicate is detected, the following dialog box will appear:
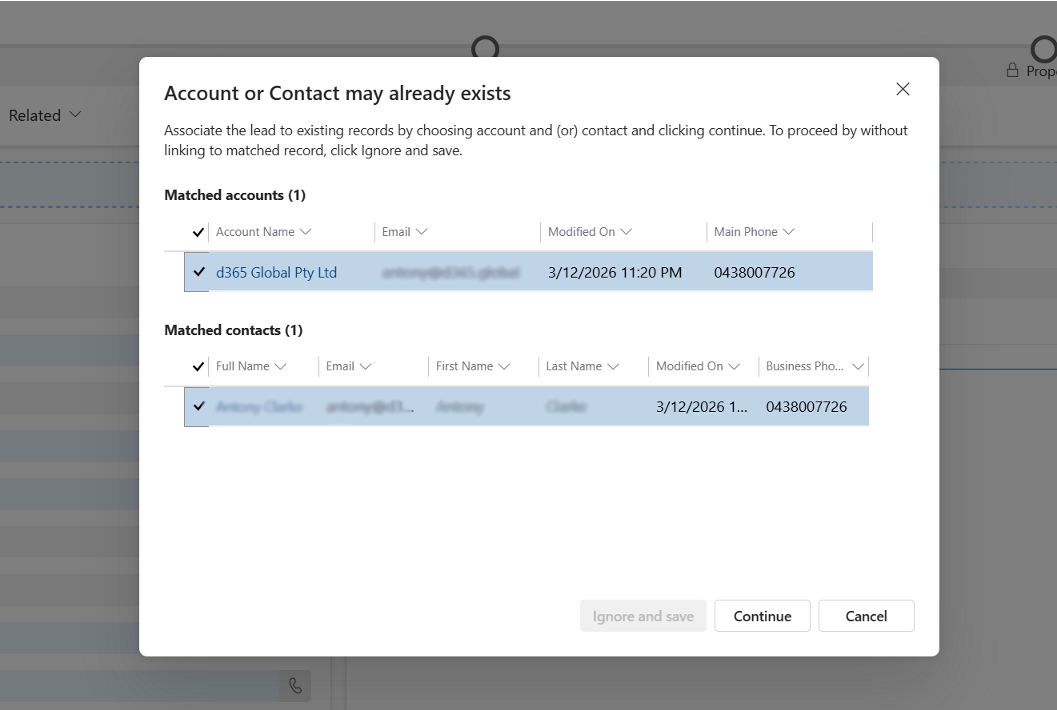
Possible Actions
When this message appears, the user has two options:
-
Associate with Existing Record (Recommended)
a. Select the existing Account and/or Contact from the matched records list.
b. Click Continue.
In this case, Dynamics will link the new record (such as a Pitch or Matter) to the existing Client (Account or Contact), avoiding the creation of duplicate records in the system.
-
Ignore and Create Duplicate Record
a. Click Ignore and Save.
b. This will create a new Account or Contact record, even though a similar record already exists.
This option should only be used when the user is certain that the record represents a different entity.
When Duplicate Detection May Appear
The duplicate detection dialog may appear in the following scenarios:
-
Creating a Client (Account or Contact) record from Potential New Client (Lead)
-
Adding a new Related Party in Pitches or Matters
-
Creating new People contacts or Organization accounts
Pitch
A Pitch is created when a Potential New Client is qualified.
It represents a proposed legal engagement, defined scope of work, commercial structure, and risk assessment.
The Pitch follows a structured Sales Process BPF.
Creating a New Pitch
A Pitch can be created in two ways:
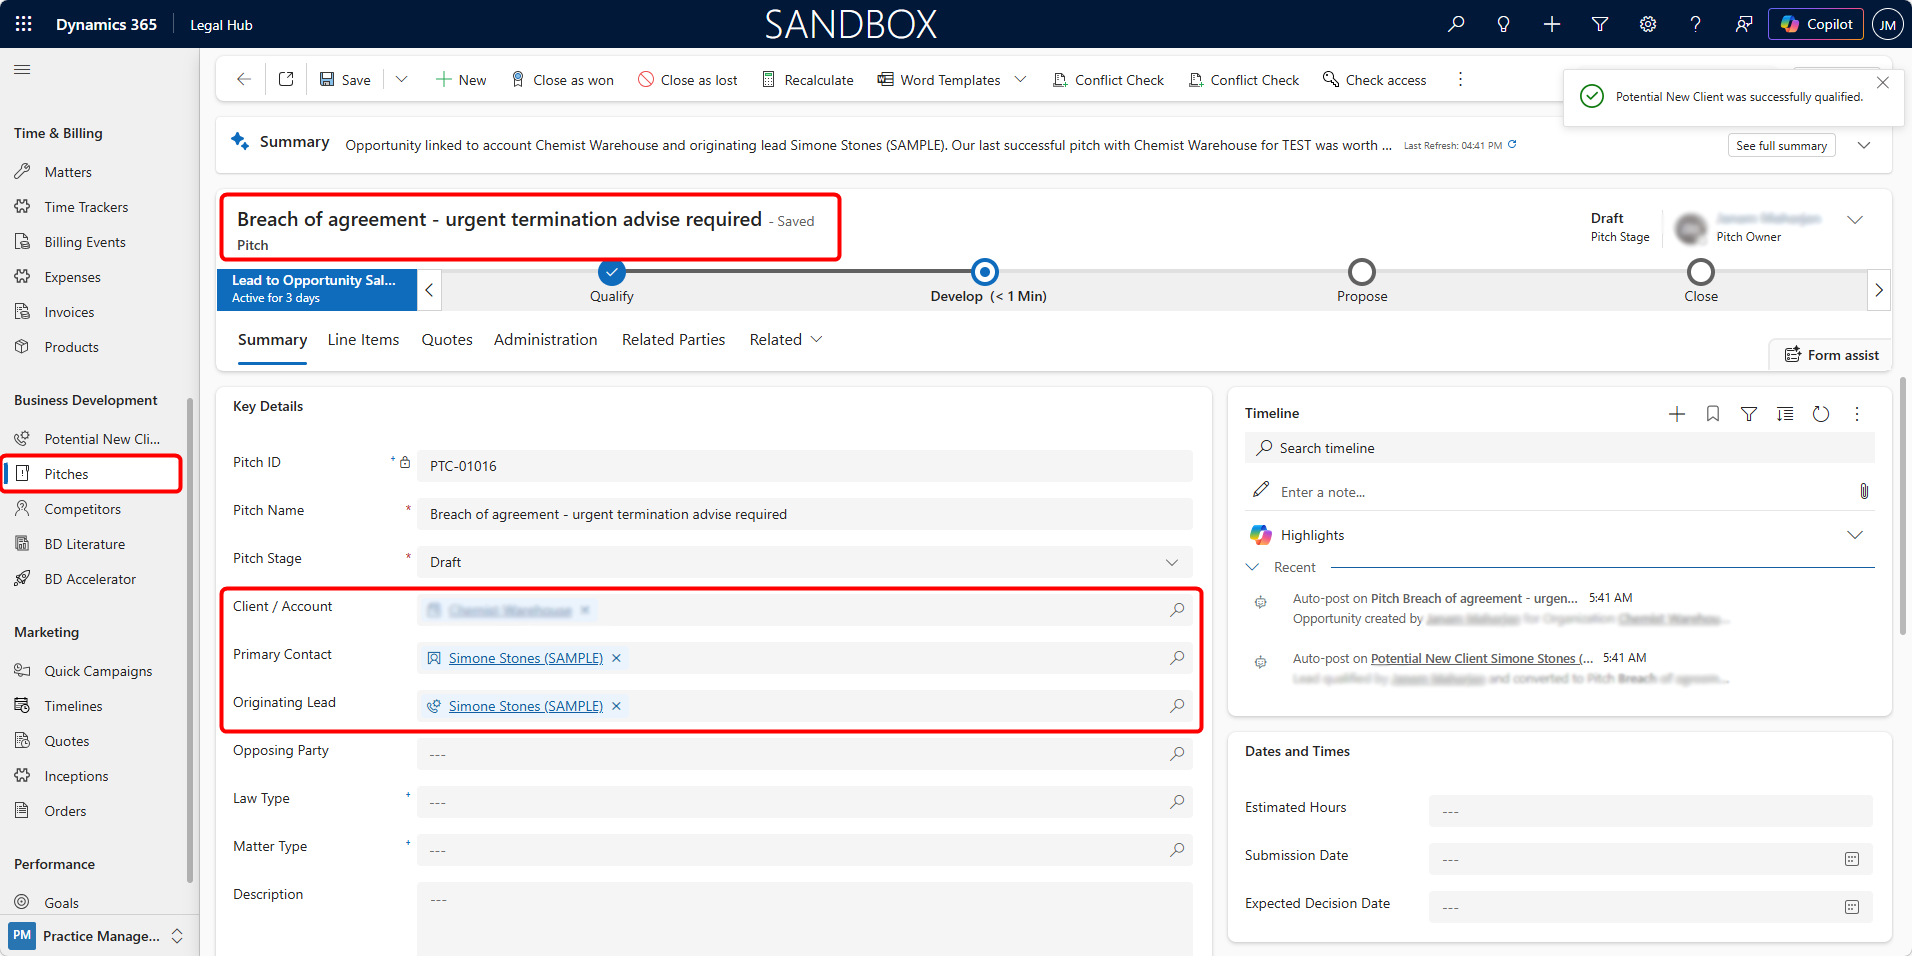
Method 1 - Automatic Creation
This is from a Potential New Client.
A Pitch is automatically created when:
-
Open the Potential New Client.
-
Click Qualify.
-
Confirm the action.
The system creates a Pitch record, links Client / Contact and sets Pitch Stage to Draft.
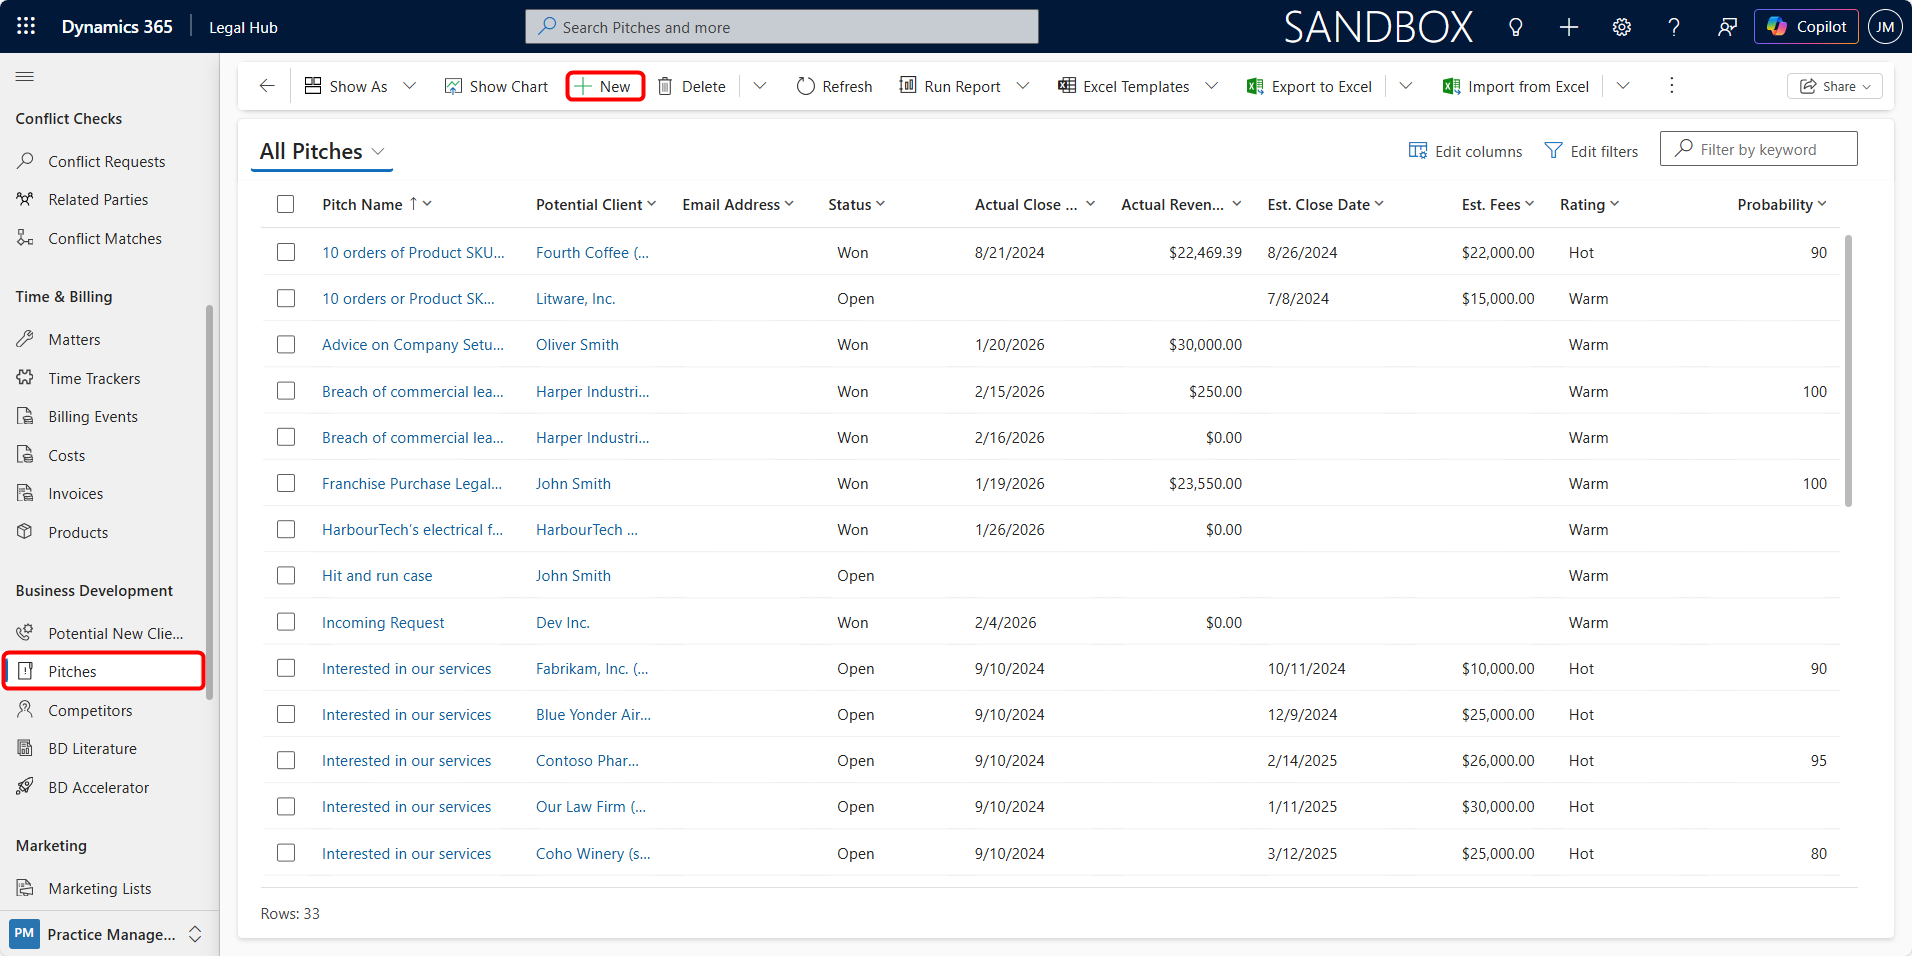
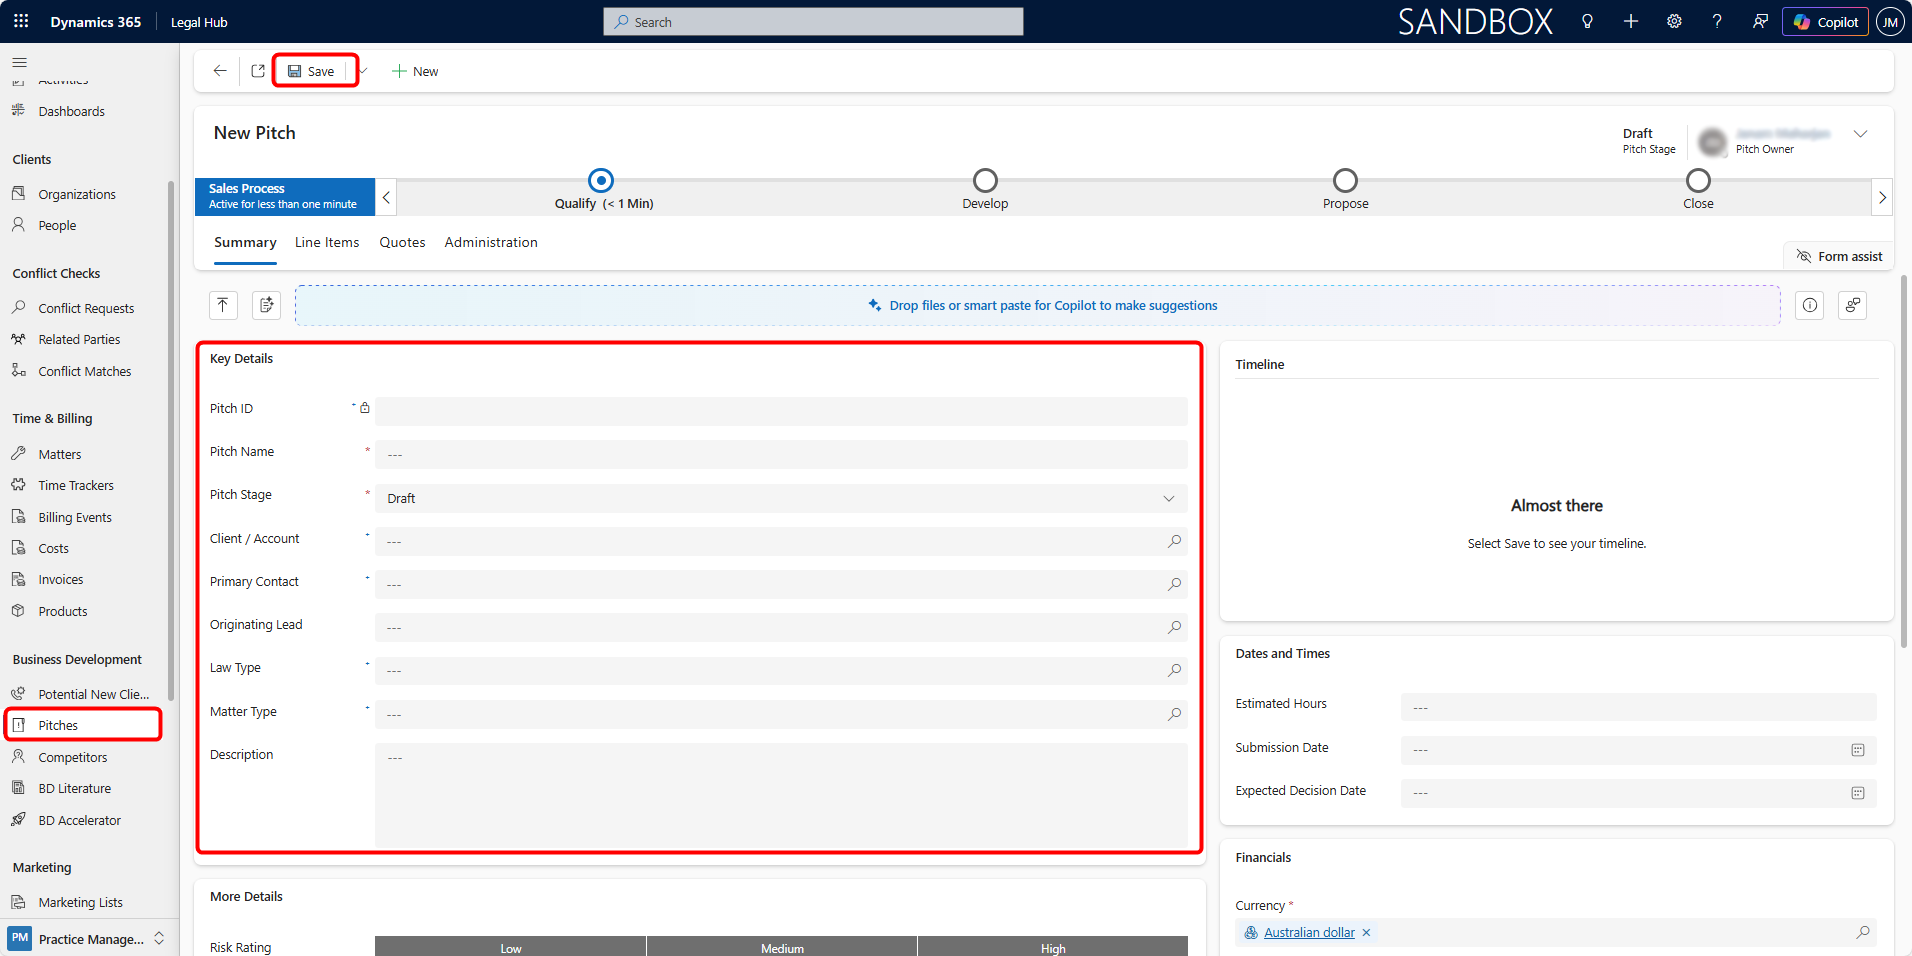
Method 2 - Manual Creation
This creates a direct Pitch entry.
A Pitch can also be created directly without originating from a Potential New Client. To create a Pitch manually:
-
Navigate to Business Development → Pitches
-
Click + New from the command bar
-
Complete the required fields like Pitch Name, Client / Account, Primary Contact, Law Type, Matter Type, Description, and others.
-
Click Save.
-
After saving the Business Process Flow becomes active.
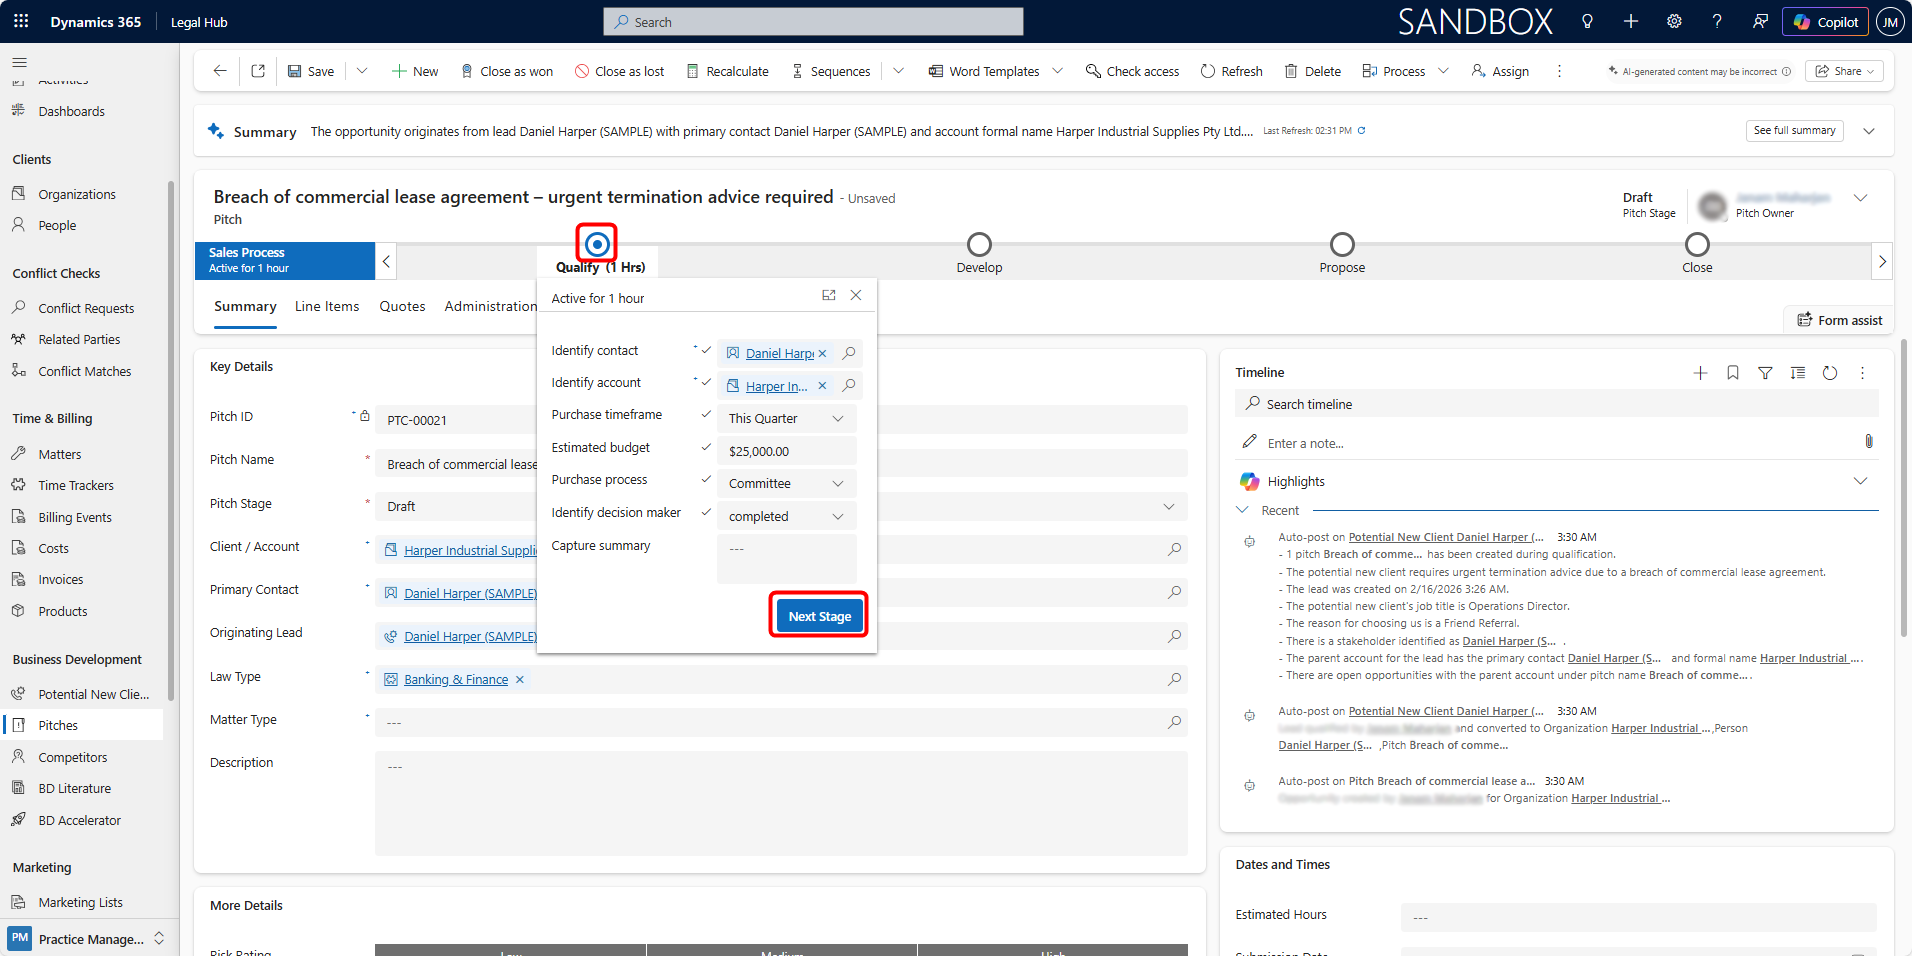
Understanding the Pitch Business Process Flow
At the top of the Pitch form, you will see a business process flow with following stages:
-
Qualify
-
Develop
-
Propose
-
Close
Each stage represents the progress of the opportunity.
Moving Between Stages
-
Complete required fields.
-
Click Next Stage.
-
Continue progressing as discussions advance.
Adding Line Items
Line items represent the services, fees, or expenses that are being proposed for the Pitch. Before adding line items, a Price List must be selected so that the system can retrieve the correct product pricing.
To add a line item:
-
Go to the Line Items tab within the Pitch.
-
Select the Price List from the Price list field (e.g., Default Price List).
This ensures that the available products and their pricing are loaded correctly.
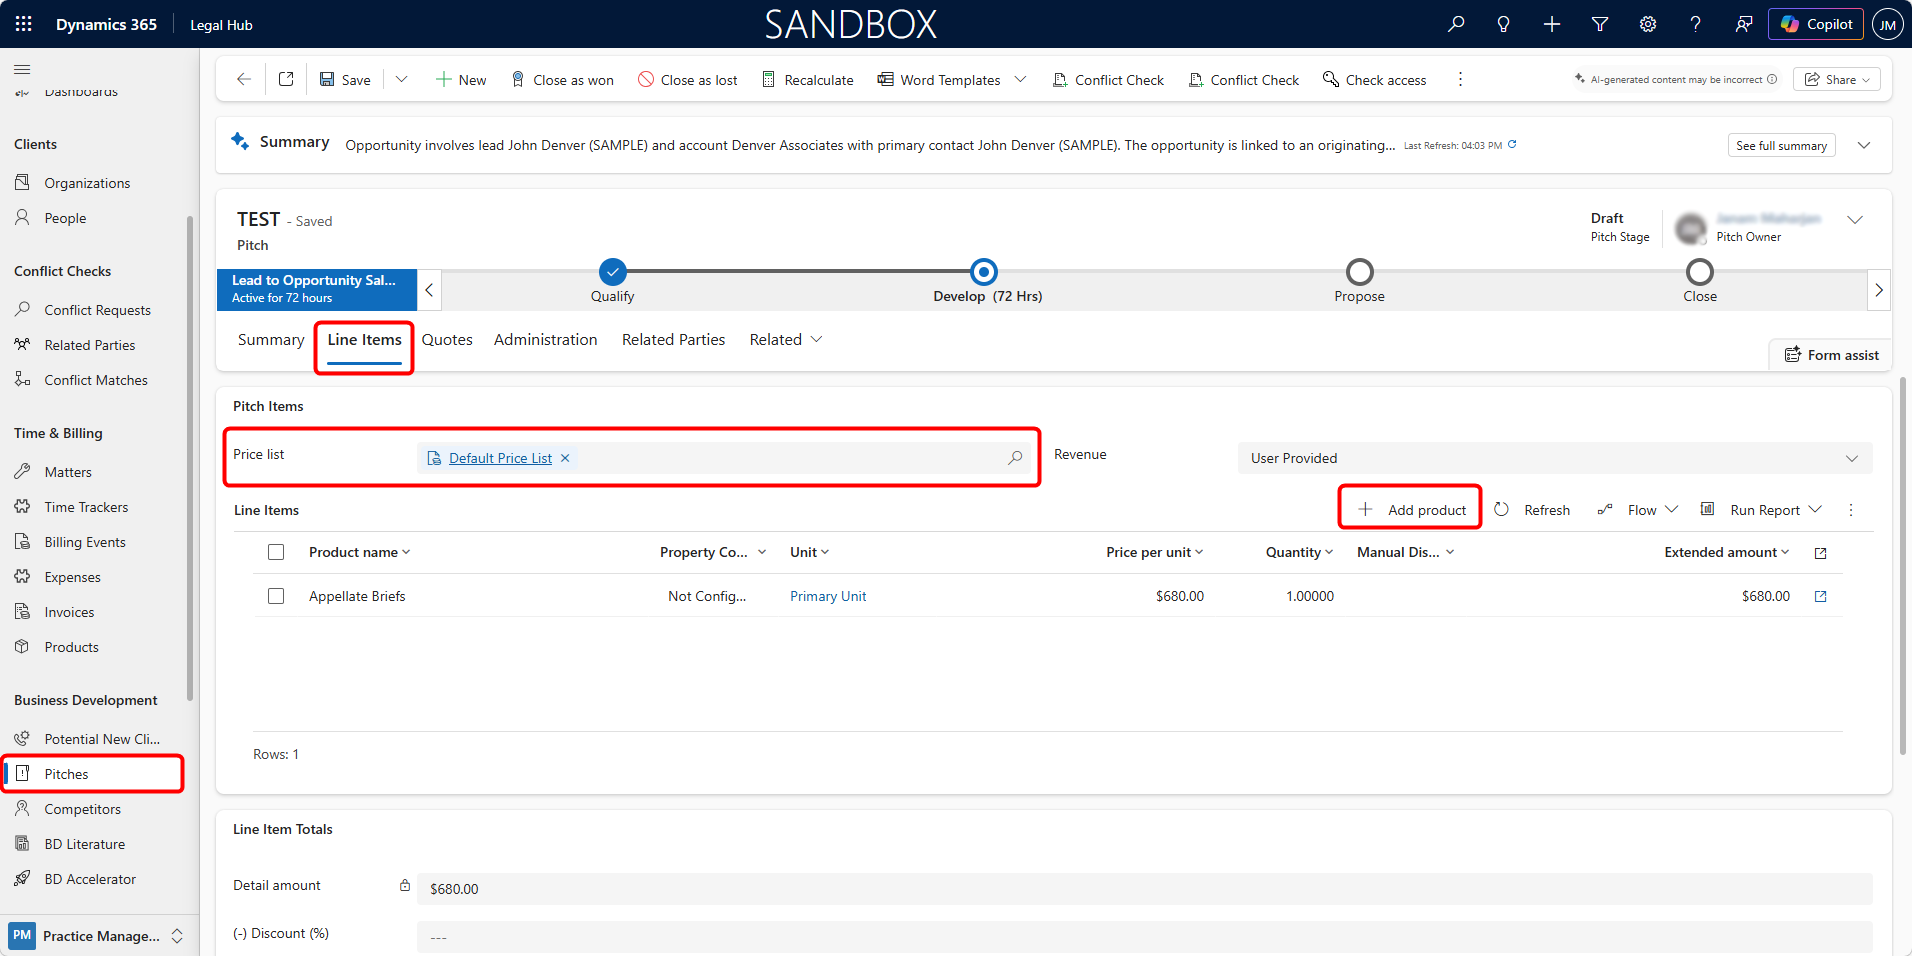
-
Click + Add product.
-
In the Quick Create: Opportunity Product window:
a. Select the required Existing Product.
b. Confirm the Unit and Price Per Unit.
c. Enter the Quantity.
-
Click Save and Close.
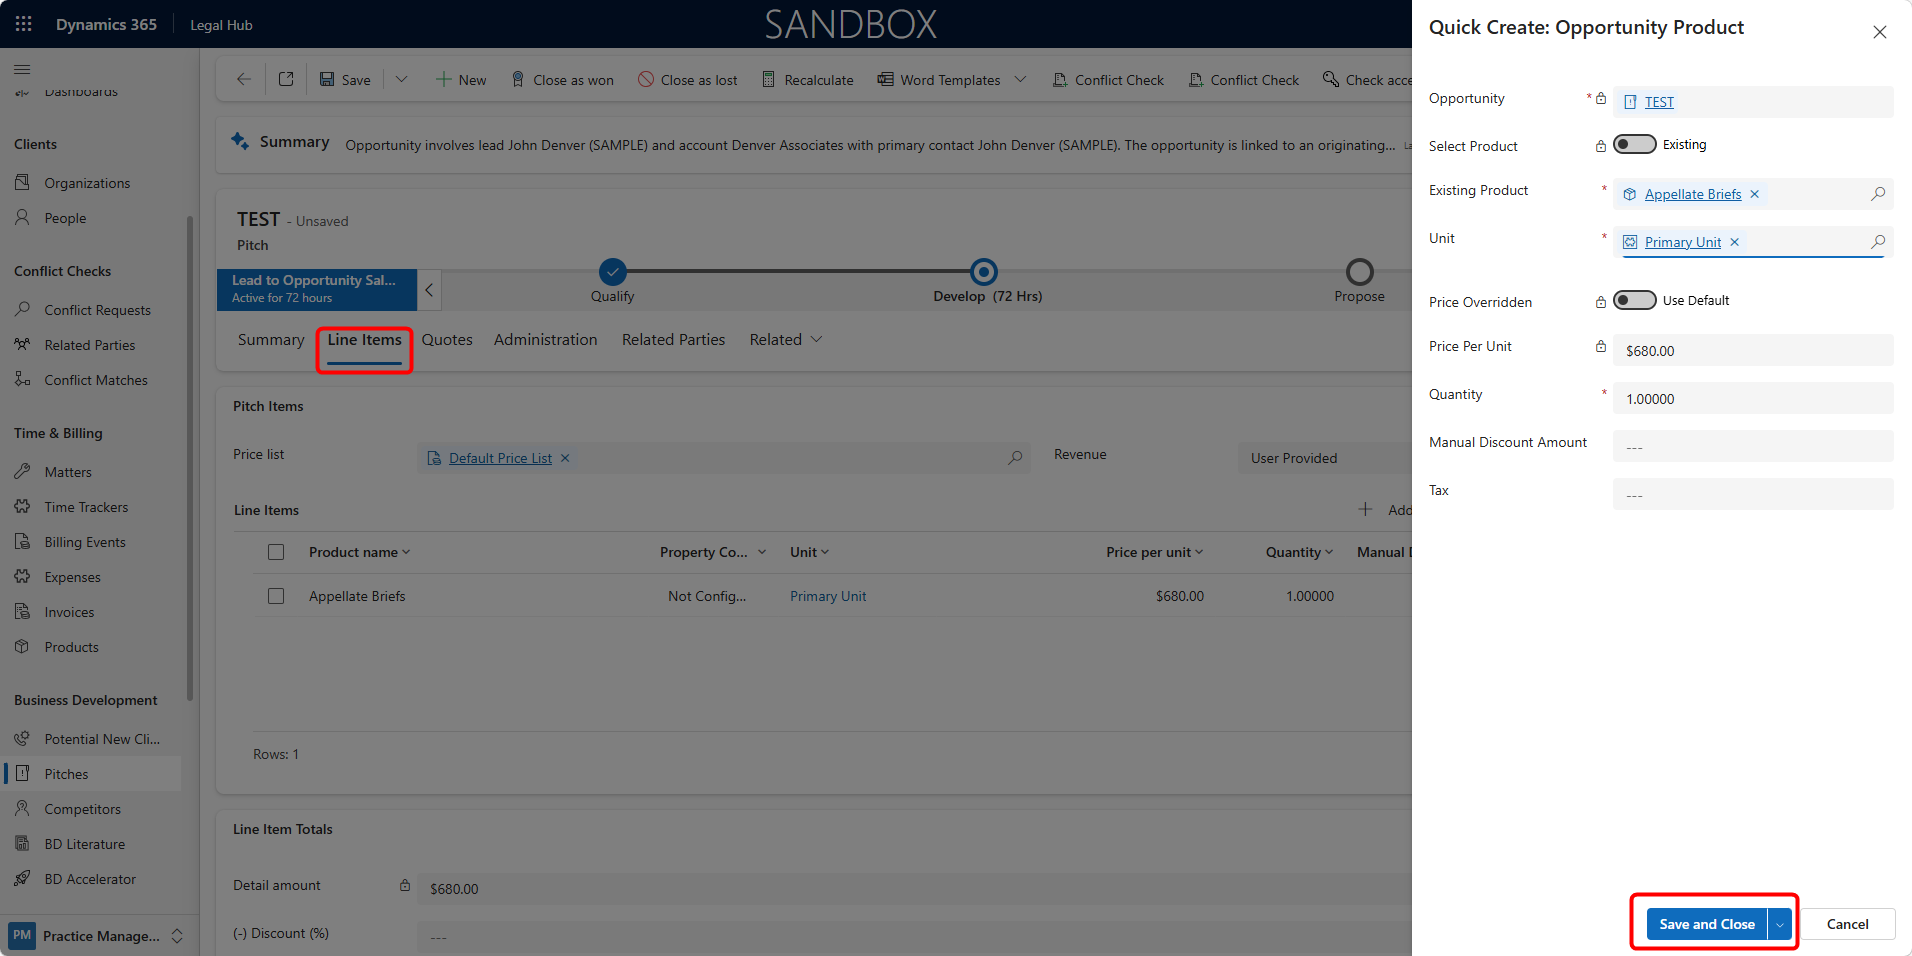
The selected items will then appear in the Line Items grid, where quantities, pricing, and discounts (if permitted) can be adjusted.
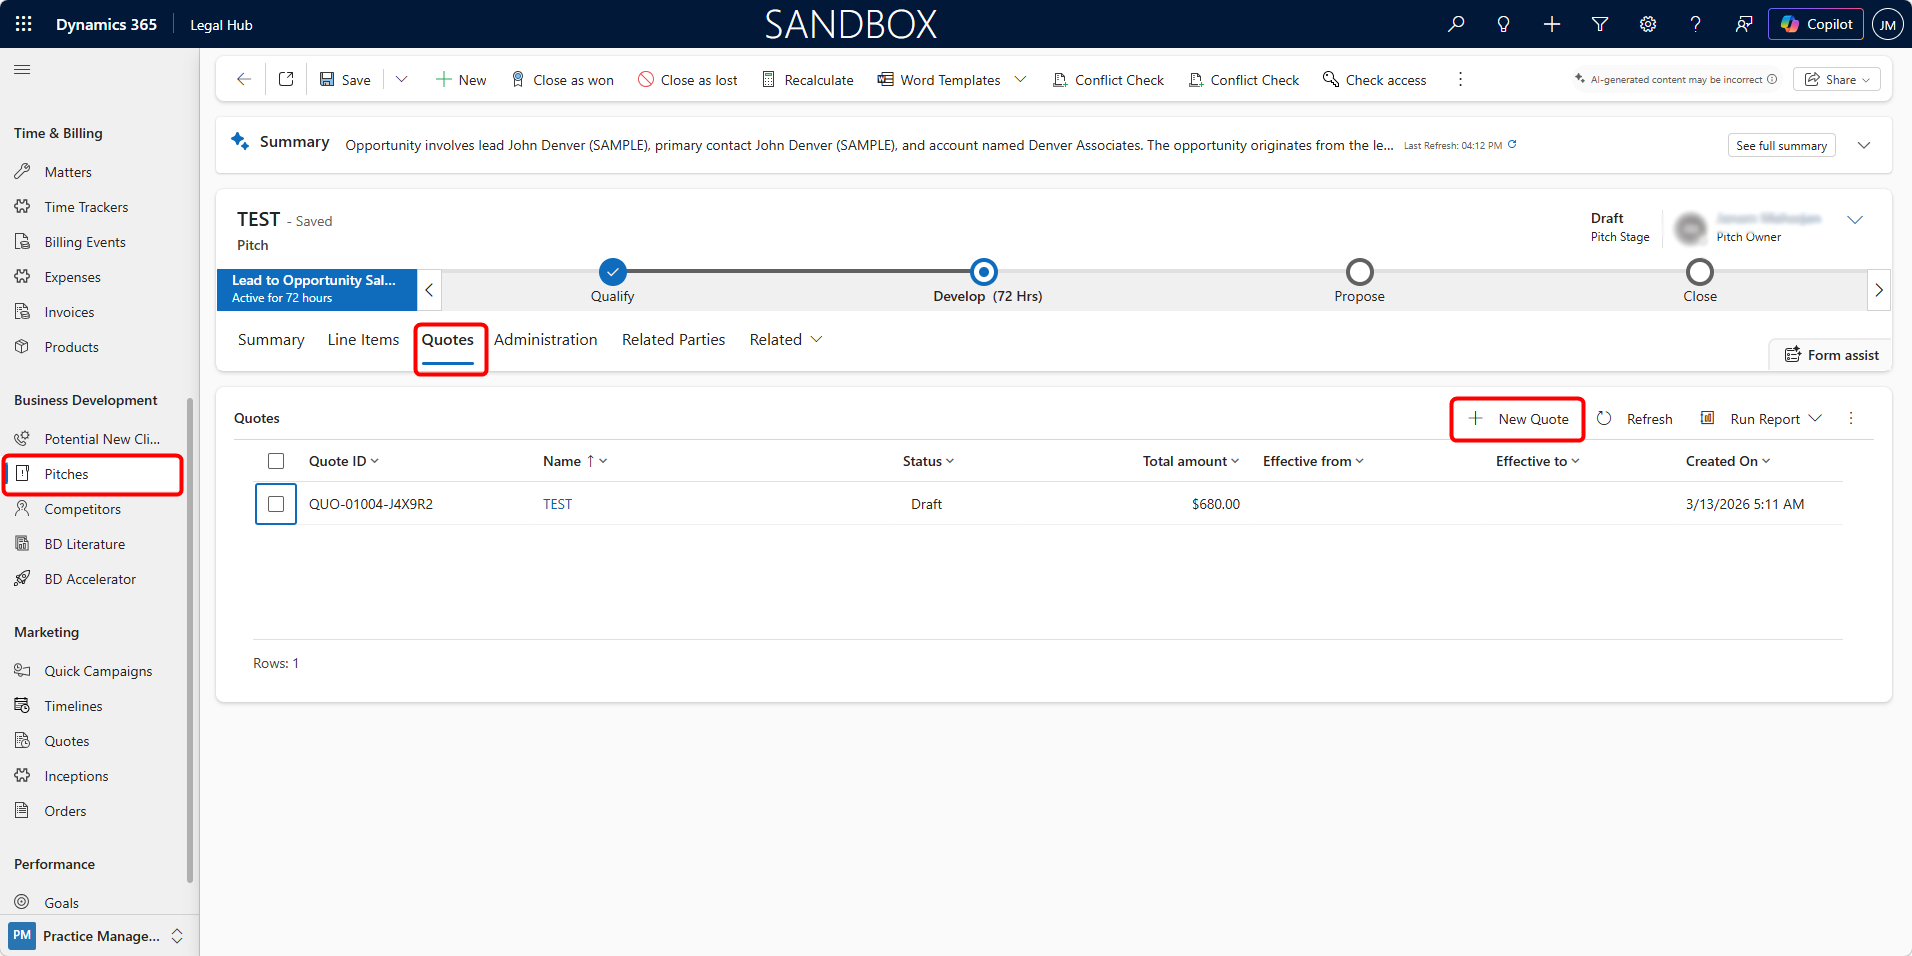
Creating a Quote
-
Navigate to the Quotes tab within the Pitch.
-
Click + New Quote.
-
A Draft Quote is automatically generated based on the products added in the Pitch Line Items.
-
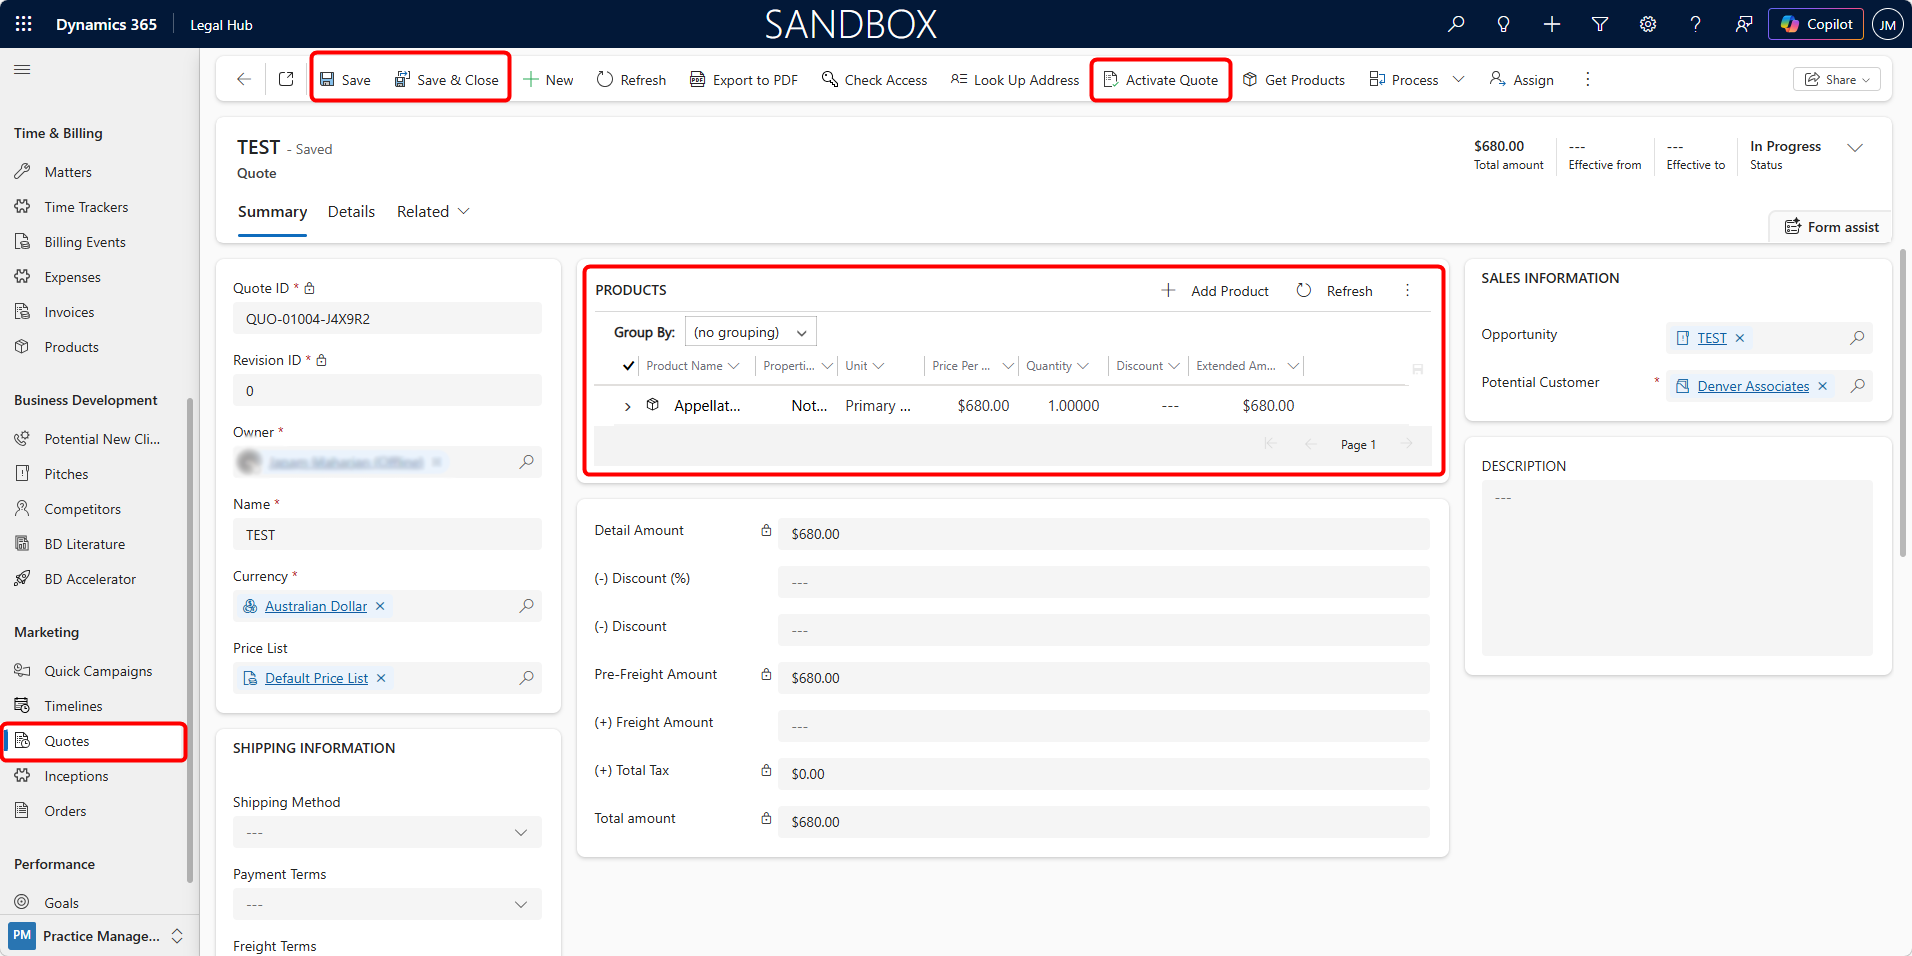
Review the pricing and make any required adjustments (products can still be added or removed at this stage).
-
Click Save, then Activate Quote once finalised.
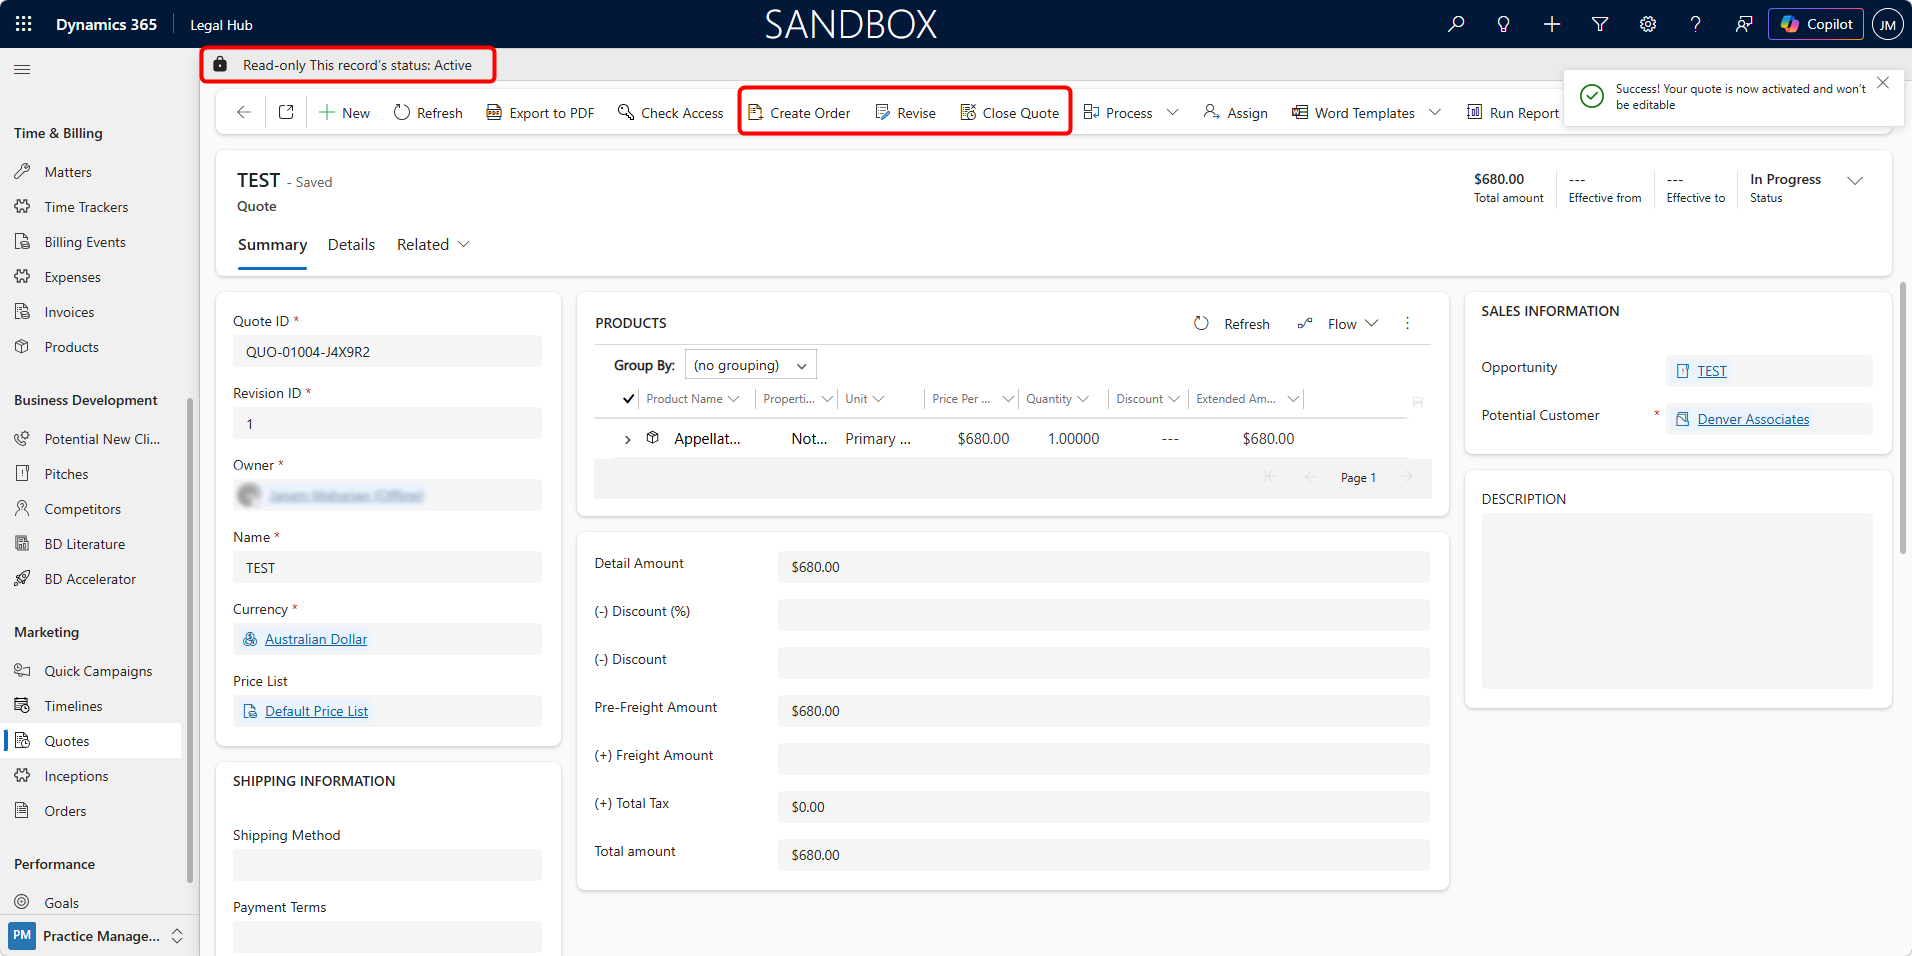
From this point, users may perform the following actions:
-
Create an Order - Convert the accepted Quote into an Order to proceed with service delivery or engagement execution.
-
Revise the Quote - If changes are required, the user can revise the Quote. When a Quote is revised, the system creates a new editable version of the Quote, and the status returns to Draft. The user can then make the necessary changes to line items, pricing, or other details. Once the updates are completed, the revised Quote must be activated again before it can be sent or used for further processing.
-
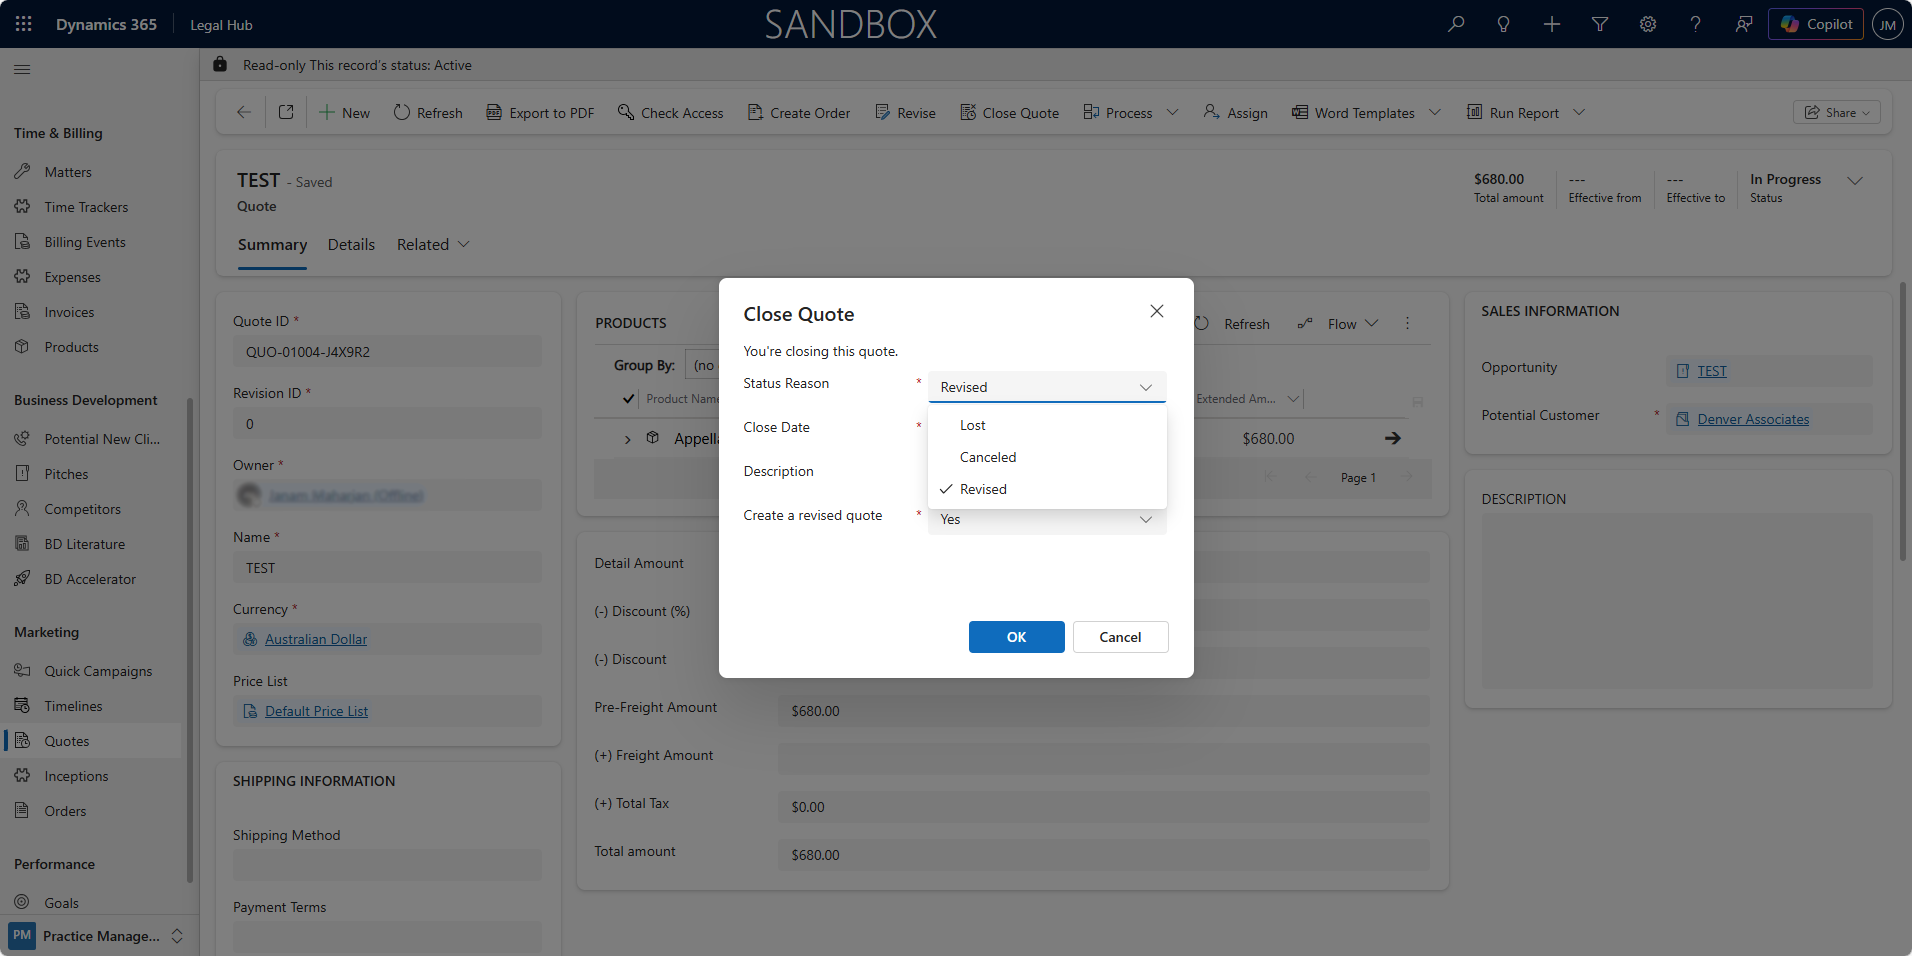
Close the Quote - If the Quote is not proceeding, it can be closed with one of the following statuses:
-
Lost — The client chose not to proceed with the proposal.
-
Cancelled — The Quote is no longer required or applicable.
-
Revised — The Quote has been replaced by a newer revision.
-
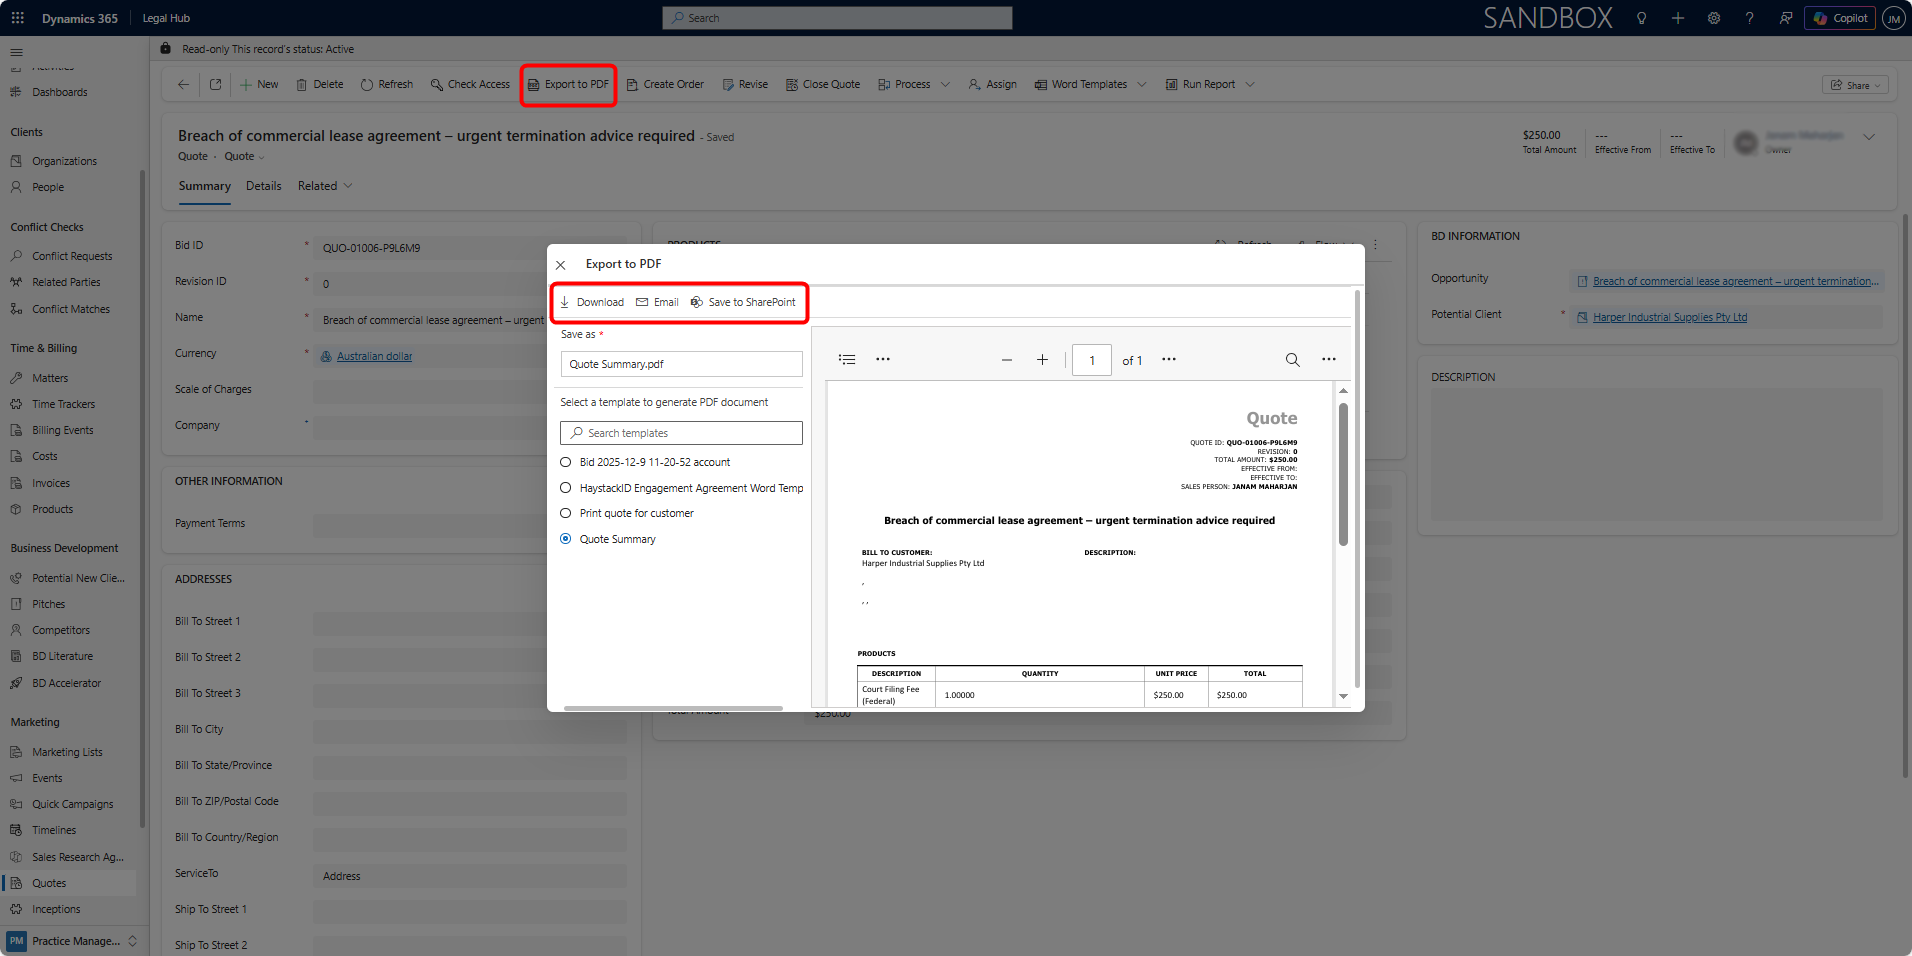
Additionally, the Quote can be issued to the client by selecting Export to PDF.
This opens the configured Quote template, which can be:
- Downloaded as a PDF and shared manually.
Or
- Emailed directly to the client as an attachment from the export window.
The Quote represents the formal commercial offer issued to the client prior to engagement confirmation.
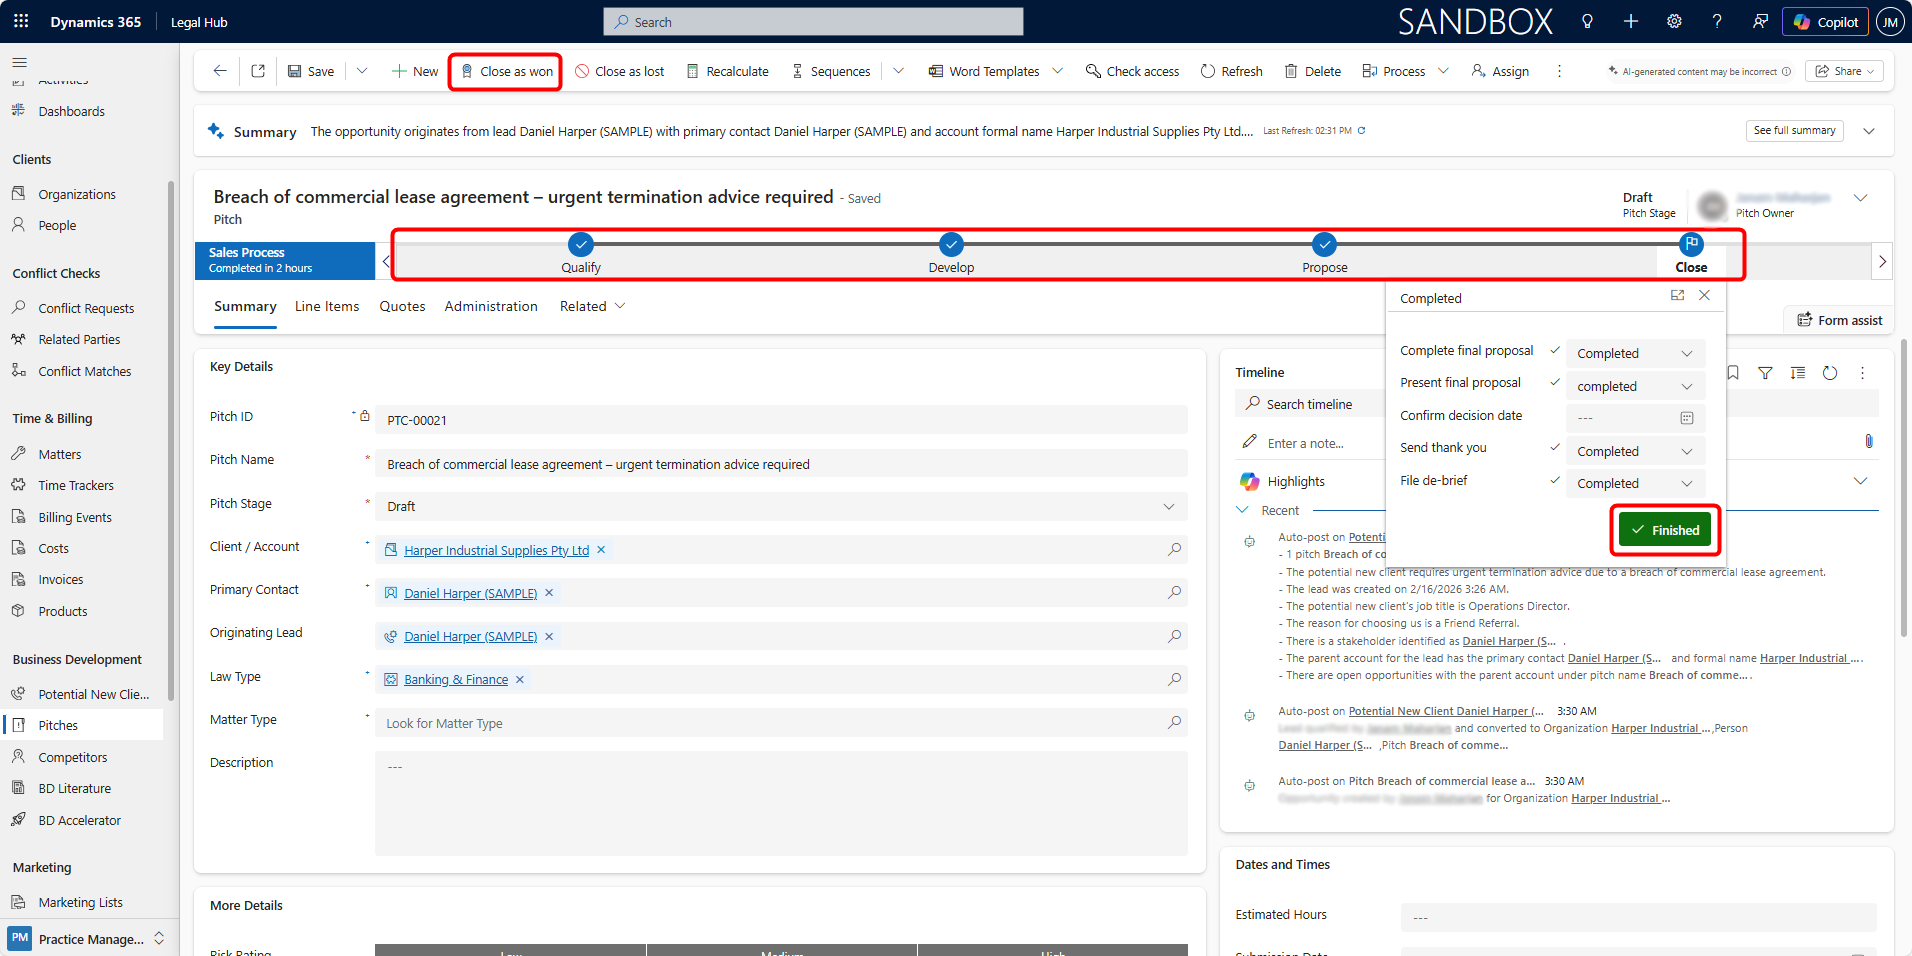
Closing the Pitch
When the client decides:
If Accepted:
-
Click Close as Won.
-
Confirm.
-
A Matter is created.
If Not Accepted:
-
Click Close as Lost.
-
Enter reason.
-
Save.
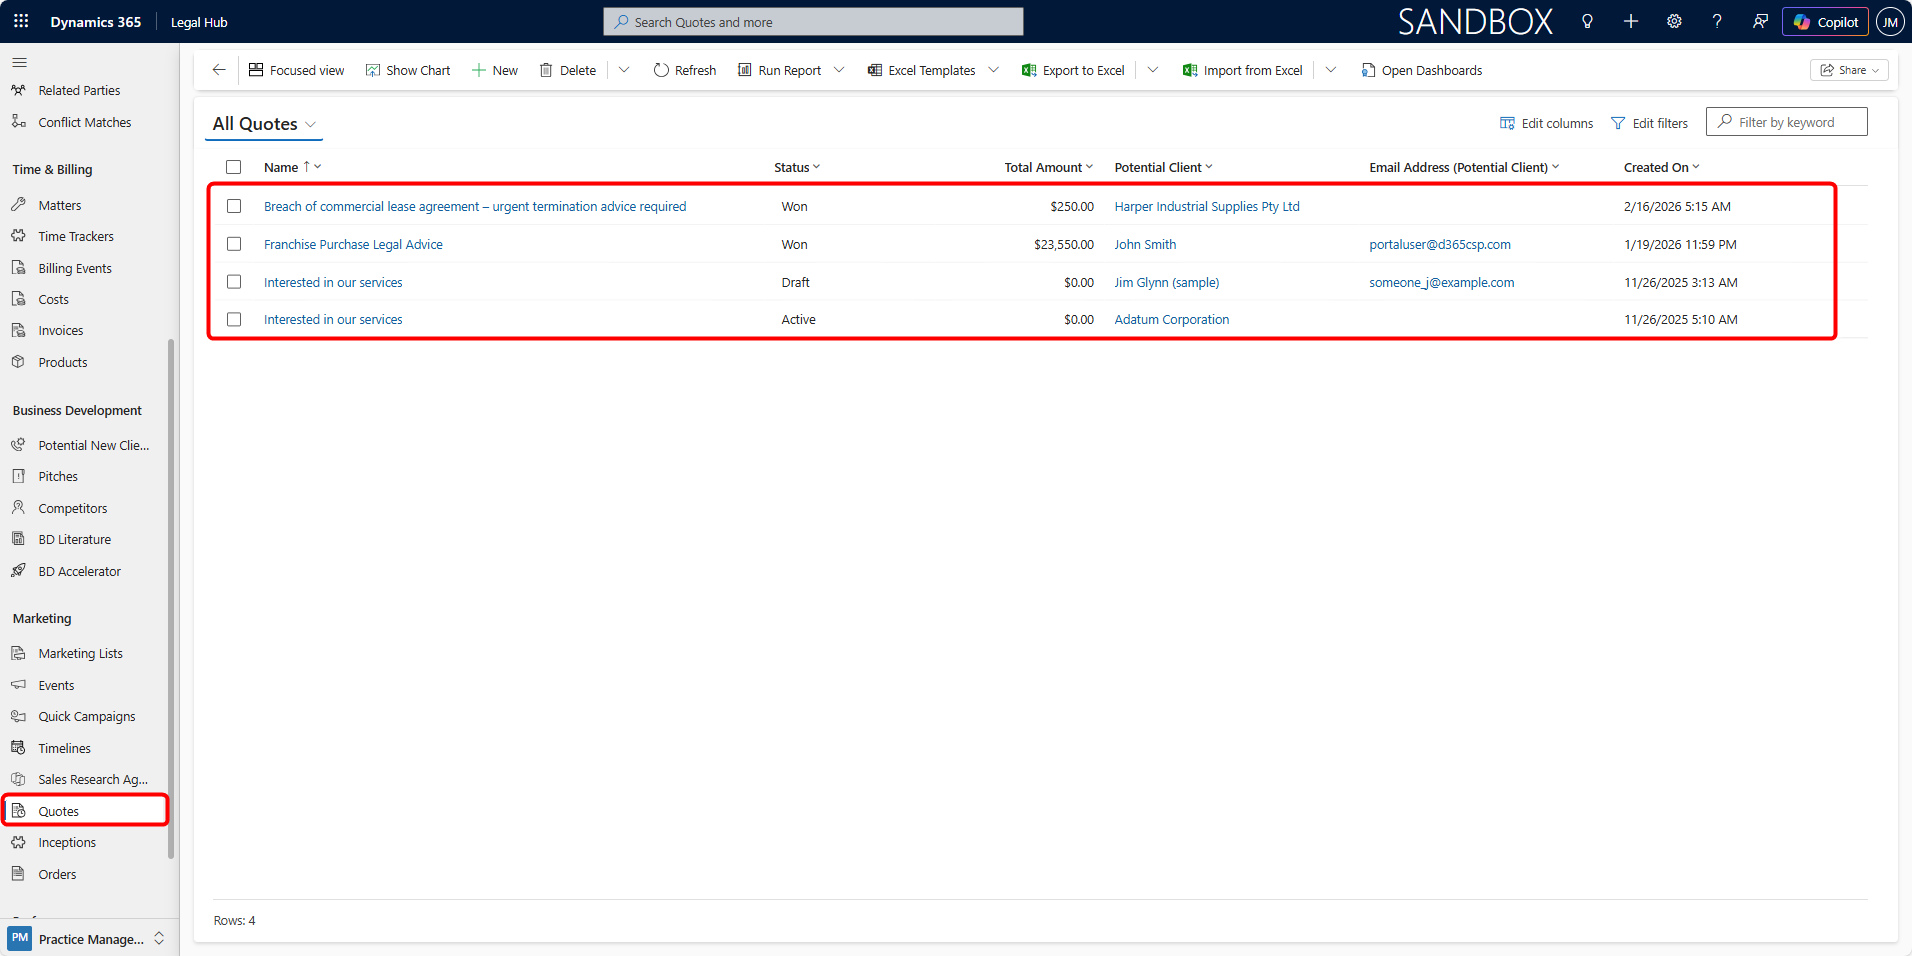
Once created, the Quote is also accessible from the main Quotes section under Marketing.